|
|
Abstract
Define the project and explain the prerequisites to undertaking it and
how to meet them, describe licensing considerations, and discuss
typographical conventions used in the document.
|
 Except where otherwise noted, content in this document
is licensed under the standard Creative Commons
Attribution–ShareAlike 4.0 International License.
Except where otherwise noted, content in this document
is licensed under the standard Creative Commons
Attribution–ShareAlike 4.0 International License.
Source code (scripts) are licensed under
GPLv2.
|
Virtual Plan 9 Cookbook
Section 1: Overview
Click on the lines following to jump down to their content:
Subsection 1-1: Introduction
Step 1-1-1: Welcome
Step 1-1-2: Abstract
Subsection 1-2: Prerequisites
Step 1-2-1: Fluency Reading Idiomatic American English
Step 1-2-2: Familiarity Using a Classical Personal Computer
Step 1-2-3: Exclusive Use of an Appropriate Computer
Step 1-2-4: Computer and Network Administration Skills
Step 1-2-5: Miscellaneous
Subsection 1-3: Intellectual Property Considerations
Step 1-3-1: This Cookbook
Step 1-3-2: Plan 9
Step 1-3-3: Debian
Subsection 1-4: Conventions
Subsection 1-1: Introduction
Step 1-1-1: Welcome
Welcome to the cookbook!
We (the Plan 9 community) are pleased you are considering getting some
hands-on experience with this operating system and hope this document
is convincing that you can do this, possibly in a just few hours
if you have solid prerequisite experience and top drawer Internet
bandwidth.
This document will not spend much effort attempting to persuade you to install
Plan 9 because there are so many different reasons for doing so and we don't
know what's important to you.
Instead we recommend you do some research if you are undecided, which should
certainly include the
Overview
and
What Do People Like About Plan 9
articles at the
Bell Labs' Plan 9 wiki
web site.
If you are still undecided after that, consider the case regarding other
flavors of Plan 9 (the
initial page of the FQA for 9front
in particular, which has links to the other flavors, too).
Step 1-1-2: Abstract
The
abstract
in the root file of this document, a précis of this
section of the document, is repeated here in larger font:
-
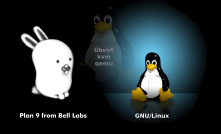
A cookbook to install a current
Bell Labs Plan 9
system into a
fully-virtualized
machine running in an
X86
GNU
/
Linux
environment, including cpu, auth, and fs services with real network
connectivity via a
virtual (bridged) Ethernet
interface.
Some experience with Linux system administration is expected,
as well as some exposure to the concepts of
virtualization,
but no familiarity with Plan 9 or virtual networking is necessary.
The goal is to quickly provide a full Plan 9 environment for someone to
explore to learn just what Plan 9 is.
If any of those highlighted terms make no sense to you, don't give up
just yet.
They are clickable links to explanations of the terms that may suffice
to educate you to the point of continuing this learning experience.
In most cases, simply grasping the main points of those articles is
sufficient for continuing.
If you're still struggling, read the next subsection for pointers to
other works that can enable you to get up to speed for this project.
Subsection 1-2: Prerequisites
If you can already use a personal computer or learn how to, you can
almost certainly learn to how to get to the objective of this cookbook.
So let's look at what you need and how to acquire it if necessary,
in rough order of most general to most specific.
Step 1-2-1: Fluency Reading Idiomatic American English
Idiomatic American English is the language of this document, and it is
expected you can read it fluently.
If not,
Google translate
may really be your friend (you're probably using it already just to
understand this sentence).
If any of the idioms are problematic, please let the maintainers know
so we can explain it to you and possibly rewrite the phrase for the
benefit of others.
Step 1-2-2: Familiarity Using a Classical Personal Computer
While experience using a smart phone may suffice, this is more about
having familiarity with concepts like using a mouse to control an
on-screen pointer, typing ASCII characters into a typewriter-style
keyboard with modifier keys such as Shift and Ctrl,
turning it on and off, rebooting when needed, and so much more.
The computer vendor's documentation is the best place to acquire this
knowledge but first keep reading so you procure an appropriate computer
for this project on which to learn this stuff.
Step 1-2-3: Exclusive Use of an Appropriate Computer
If what is said in this step causes your head to swim, you need to
accept you have a lot to learn and that will take a significant amount
of time and skullsweat.
If you are willing, then study rudimentary tutorials about Intel X86_64
Linux computers such as the
Computers For Beginners
Wikibook that is highly recommended by the good folks at
linux.com
who offer their own
Guides for New Users
web page.
You should also consider installing
Linux From Scratch
as a graduate course.
If this applies to you, do your best to get help identifying a good
computer for this project, which will probably not be your only reason to
procure this computer.
The definition of appropriate depends upon the question of
using virtualization.
If you want to install Plan 9 on a computer without the benefit of
virtualization underlying Plan 9, then any computer on which Plan 9
can be installed is adequate; however, if you only have one computer,
you will be challenged to set up those aspects of the infrastructure
that depend upon multiple computers.
Also be aware that Plan 9 has not hardware support as deep and wide as that
of any recent GNU/Linux distribution—perhaps the most important
reason to use virtualization there is.
If a virtualizing computer is not an option, then all you need to consider to
determine what is an appropriate computer can be found in the
Supported PC Hardware
and possibly
Other Hardware
pages at the
Bell Labs' Plan 9 wiki
website (but you will skip all the virtualization infrastructure recipes
in this cookbook).
Otherwise, to go whole hog with this cookbook, you will modify the
Supported PC Hardware guidelines already referenced to a subset that
eliminates all the Other Hardware possibilities and considers the
hardware restrictions of your chosen GNU/Linux hosting system.
At this time the cookbook only has recipes for the
Debian
distribution of GNU/Linux, so its
amd64 Installation Guide
must be considered, especially the
Supported Hardware
section.
The virtualization support must also be considered, and the Wikipedia
article about
X86 Virtualization
is a good place to start understanding those requirements.
Step 1-2-4: Computer and Network Administration Skills
It is not enough to be able to be able to use UNIX-style systems as a
non-privileged user to complete this project.
You must understand the computer from the point of view of a system
administrator at some hard to define minimum level.
If you have installed a UNIX-type operating system on any computer and
know enough about Ethernet networking to set up a home network with an
Internet gateway and a DNS server, you should be prepared.
If not, consider installing Linux From Scratch as was mentioned
earlier to round out your skillset.
Step 1-2-5: Miscellaneous
If you install Debian you will need to download at least 300 MB of files.
Plan 9 itself will take about 100 MB.
You may need up to two USB-sticks: one of no more than 256 MB capacity to
use for booting the Debian Installer; the second vfat unit needs just a
couple MB of free space for four text files.
Both can be repurposed once their contents are no longer needed.
Subsection 1-3: Intellectual Property Considerations
The short statement is there are no lengthy, fine print EULAs or dire piracy
warnings to be found in these parts;
"Freely ye have received; freely give."
To be specific:
Step 1-3-1: This Cookbook
Except where otherwise noted, content in this document
is licensed under the standard Creative Commons
Attribution–ShareAlike 4.0 International License (left-click on
the icon to see the terms and conditions).
Source code (scripts) are licensed under
GPLv2
the
terms and conditions
of which are included in this directory's LICENSE file.
In simple terms, they mean you may use, modify, and redistribute, possibly
for profit, everything included in this document (technically the files in
the vp9cb directory) as long as you maintain the attributions
within and redistribute any changes and extensions you make under
the same terms and conditions as the originals; otherwise, you will be in
violation of the terms and liable to incur the corresponding penalities for
doing that.
So play nicely with others as you were taught in kindergarten.
Notice this document does not distribute the Plan 9 and Debian software and
documentation you will use if you follow these recipes—those you will
download, use, and possibly modify and/or redistribute according to their
own IP licenses, conveniently described next.
Step 1-3-2: Plan 9
Although it started out proprietary, in 2002 the source code for Plan 9 was
liberated under the Lucent Public License v1.02, according to the
License
section of the Plan 9 from Bell Labs article at Wikipedia.
The section further states the current copyright holder, Alcatel-Lucent,
authorized distribution under GPLv2 in February 2014, as reported in
this article
at The Register.
Look at the dated Licensing section of the
Overview
article at the Bell Labs' Plan 9 web site for additional information.
Step 1-3-3: Debian
Because this project only requires packages from the main repository,
all Debian software used herein is distributed under solid open source
licenses.
Anything in main may be reproduced and redistributed as long as the licenses
and source code are included in the distribution.
Visit the
What Does Free Mean?
web page at debian.org to start looking into the details of the licenses
used for IP affiliated with the good folks at
Software in the Public Interest
that emerged out of early Debian organizational changes.
Subsection 1-4: Conventions
Italics are used for word emphasis, non-alphanumeric keynames, file
paths, and names of things like buttons and icons.
The keynames will be used as either a verb or a noun depending upon the
context.
Bold is used for alphanumeric and punctuation characters, enclosed in
braces when they are to be typed (except when grouped in more than one line
with each line understood to be terminated by Enter), or parentheses
when they are not. Clickable links look like
this.
Understand capturing screenshots for this document takes time so wallclock
time portrayed in the screenshots will appear incoherent at times.