|
|
Abstract
Presents step-by-step instrunctions to define a virtual hard
drive and virtual machine in a suitable GNU/Linux host, then
install the August 2, 2014 version of the Bell Labs plan9.iso
therein producing a functional Plan 9 stand-alone terminal.
|
 Except where otherwise noted, content in this document
is licensed under the standard Creative Commons
Attribution–ShareAlike 4.0 International License.
Except where otherwise noted, content in this document
is licensed under the standard Creative Commons
Attribution–ShareAlike 4.0 International License.
Source code (scripts) are licensed under
GPLv2.
|
Virtual Plan 9 Cookbook
Section 3: Install Stand-Alone Terminal
Click on the lines following to jump down to their content:
Subsection 3-1: Define the Virtual Disk
Subsection 3-2: Download the Plan 9 Installation ISO
Step 3-2-1: Enable vmadm to Create Images
Step 3-2-2: Download the ISO image
Step 3-2-3: Validate Checksum and Decompress
Subsection 3-3: Define the Plan 9 Virtual Machine
Step 3-3-1: Page 1 of 5 — General
Step 3-3-2: Page 2 of 5 — First Boot Source
Step 3-3-3: Page 3 of 5 — RAM and CPUs
Step 3-3-4: Page 4 of 5 — Disk Drive
Step 3-3-5: Page 5 of 5 — Advanced Options
Subsection 3-4: Customize the Virtual Machine Configuration
Step 3-4-1: Overview Panel of Customization
Step 3-4-2: Processor Panel of Customization
Step 3-4-3: Sound Panel of Customization
Step 3-4-4: Video Panel of Customization
Subsection 3-5: Install Plan 9 from the ISO
Step 3-5-1: Task configfs of Plan 9 Installation
Step 3-5-2: Task partdisk of Plan 9 Installation
Step 3-5-3: Task prepdisk of Plan 9 Installation
Step 3-5-4: Task fmtfossil of Plan 9 Installation
Step 3-5-5: Task mountfs of Plan 9 Installation
Step 3-5-6: Task configdist of Plan 9 Installation
Step 3-5-7: Task mountdist of Plan 9 Installation
Step 3-5-8: Task copydist of Plan 9 Installation
Step 3-5-9: Task bootsetup of Plan 9 Installation
Step 3-5-10: Task finish of Plan 9 Installation
Subsection 3-6: Reboot Plan 9 from the Virtual Disk
Subsection 3-1: Define the Virtual Disk
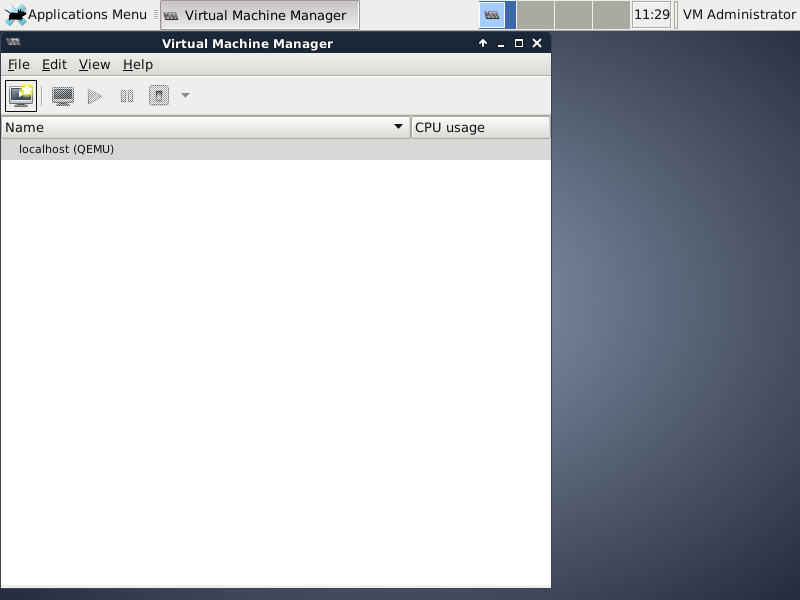
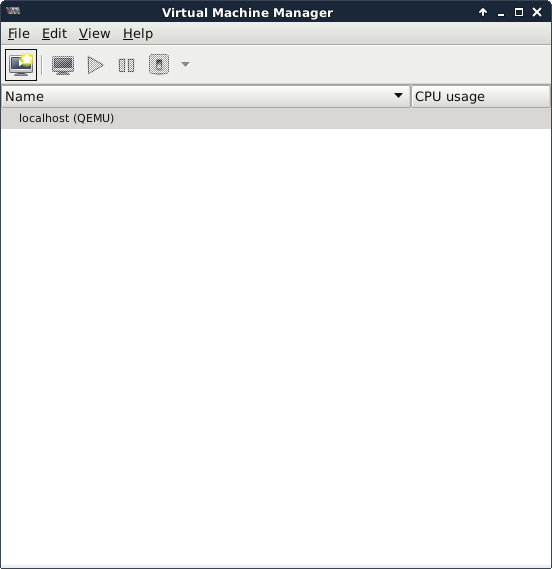
While logged onto the vmadm user in the XFCE GUI environment
of the p9host system built in the previous section (or other
system that supports virt-manager), open the Virtual Machine
Manager application.
[Well, to be brutally honest about it, actually I'm still collecting
screen shots using the vp9cb virtual machine—yes, that
means I'm running libvirt, qemu, and virt-manager
inside a virtual machine.
This is called second-level and it's how you know you have
industrial-strength virtualization at your disposal (just don't
expect it to set any speed records).
Anyway, please continue to substitute p9host for vp9cb and
10.220.186.202 for 10.220.186.205 whenever you encounter
them.
Also, kindly ignore times and dates.
Thank you.]
The screen should look a lot like:
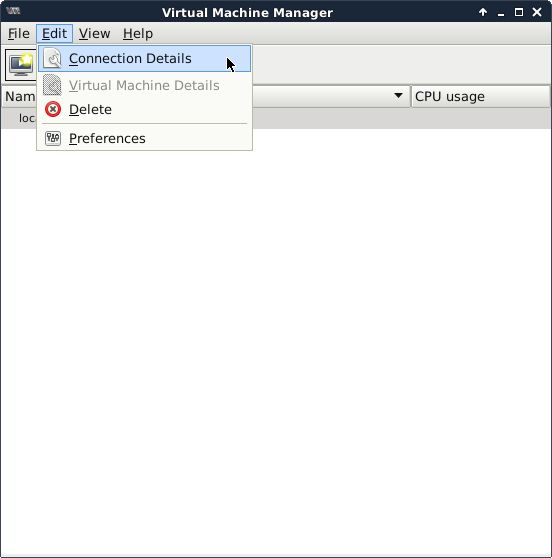
Left-click on the Edit menu bar item, then left-click on the
Connection Details item that is pulled down.
This will act upon the current (and only) connection,
localhost:
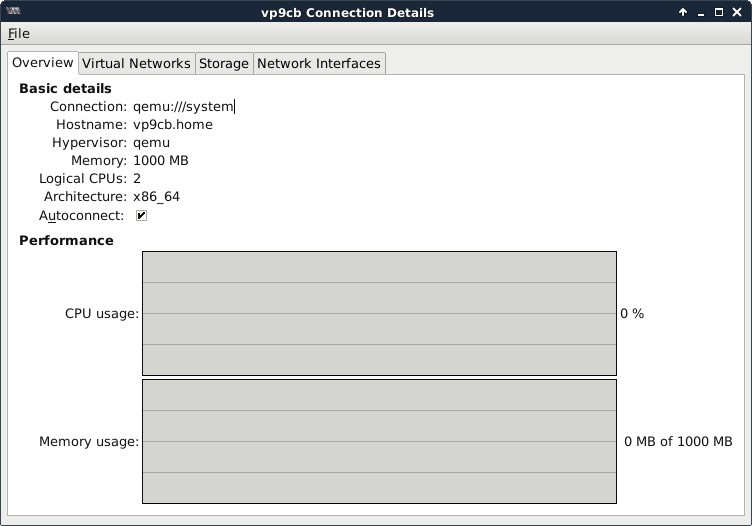
The Overview tab shows general information about the
localhost hypervisory environment:
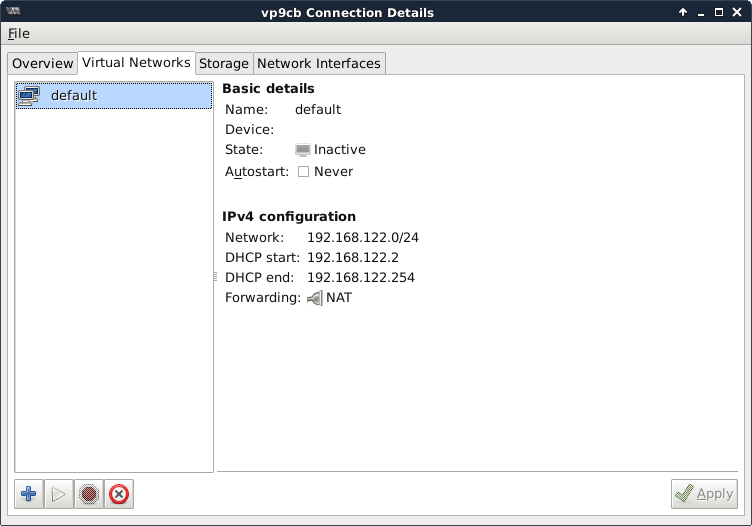
The Virtual Networks tab shows only the default and inactive
NAT virtual subnet the hypervisor has provisioned (this project
will not utilize this facility directly):
After left-clicking on the pull-down icon to the left of the
IPv4 Configuration header in the display, the Network
Interfaces tab shows status information about the br0
network interface the hypervisor has active, including its address:

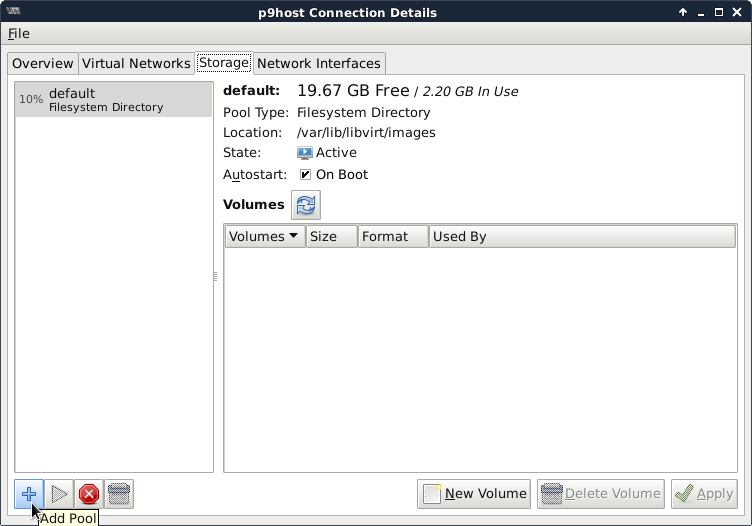
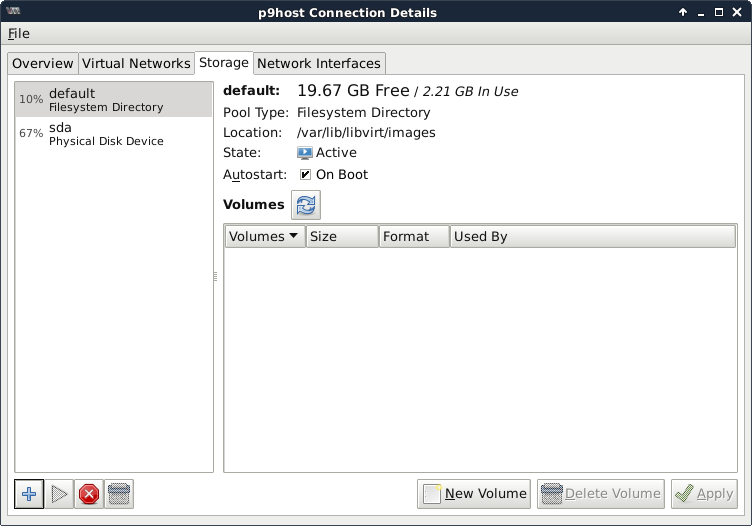
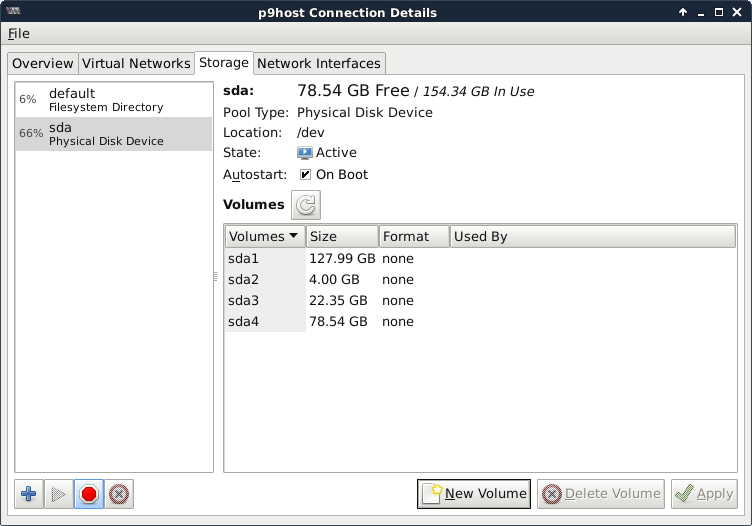
The Storage tab shows status information about the storage pools
the hypervisor is managing, which currently offers only the
automatically installed default pool.
Default is a filesystem directory pool, meaning its virtual
disks (volumes to virt-man) are carved out of the
filesystem in which the Location directory,
/var/lib/libvirt/images, resides, in this case, p9host's
root partition.
Thus the utilization information applies to the p9host root
filesystem.
I want to install Plan 9 into a different type of storage
pool, and begin defining the storage by left-clicking on the
Add Pool icon as shown:
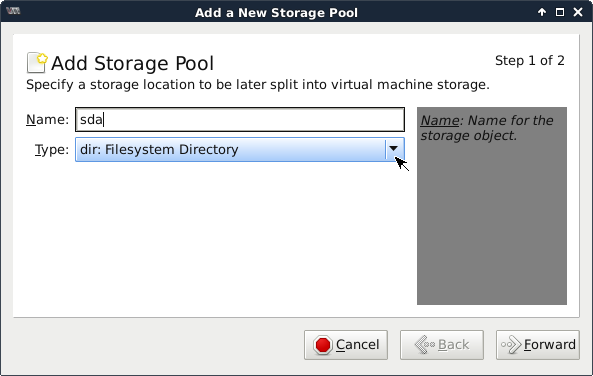
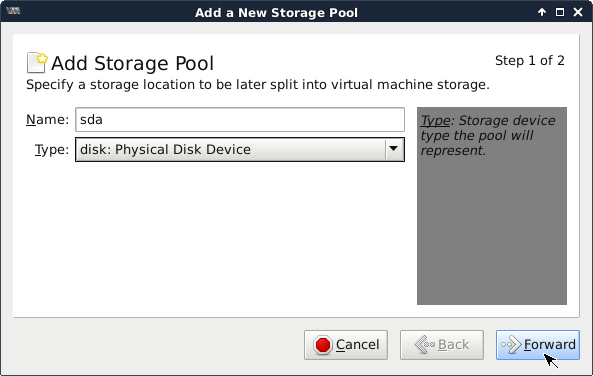
I'll name it after the physical device the pool will manage, so
I type {sda} into the Name: box—you should of course
set up the virtual disk you planned for this project.
To select the pool Type:, we left-click on the pull-down icon:
I left-click on the Disk item:
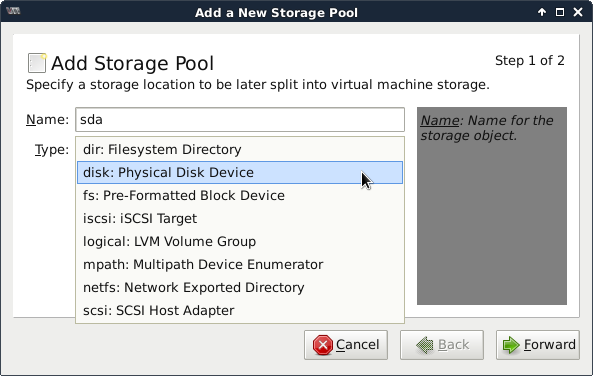
then left-click on the Forward item:
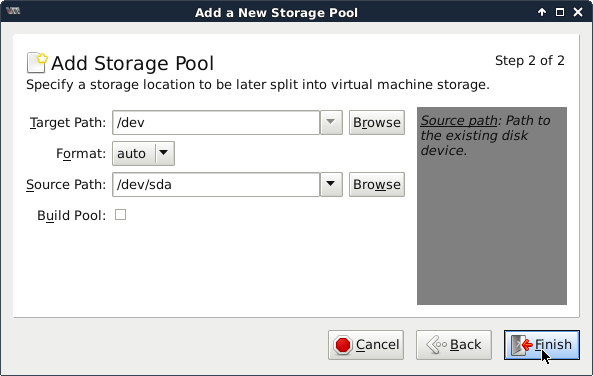
allow the Target Path: to default to /dev and the Source
Path to default to /dev/sda, and left-click on the
Finish icon:
I see a new pool below the default pool in the column on the left:
I left-click on that new item:
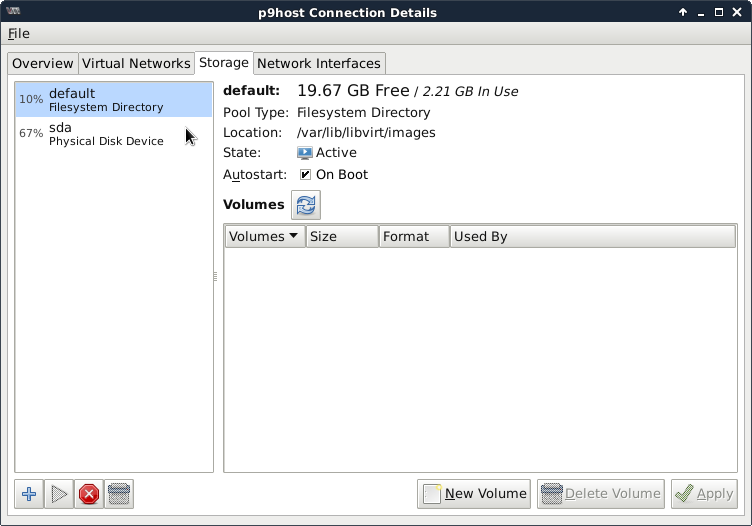
and I see its details.
Notice volumes in this context are real disk partitions.
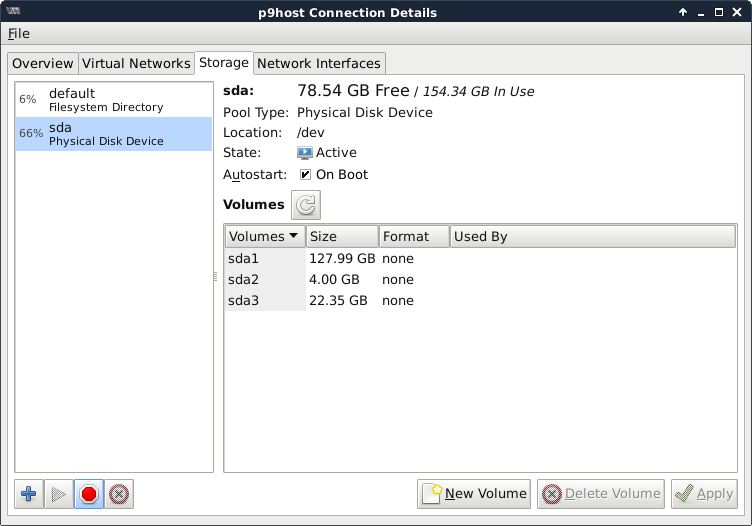
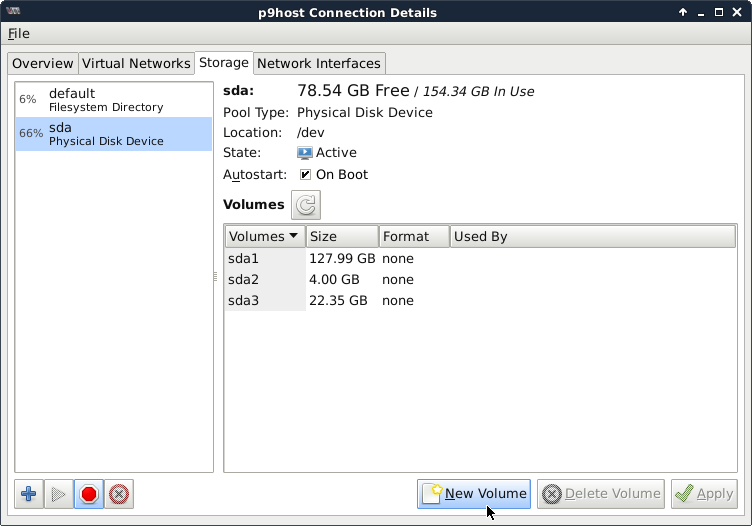
I will allocate the remaining 75 GB of free space on
the drive to create the fourth primary partition,
starting by left-clicking on the New Volume icon:
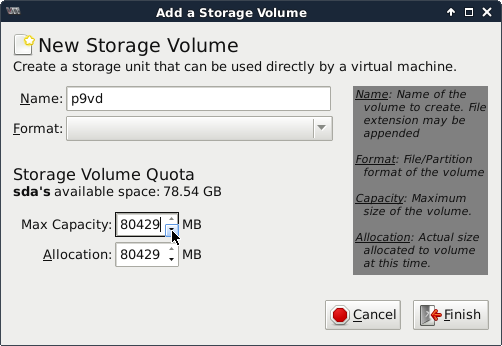
I will name it to remind me this is the Plan 9 virtual
disk—you can call your volumes what you please.
To more easily set the maximum and initial values to
all that's allocatable, we type in a number larger than
what is available in the Allocation box, then left-click
on the Max box:

which sets both to the correct maximum.
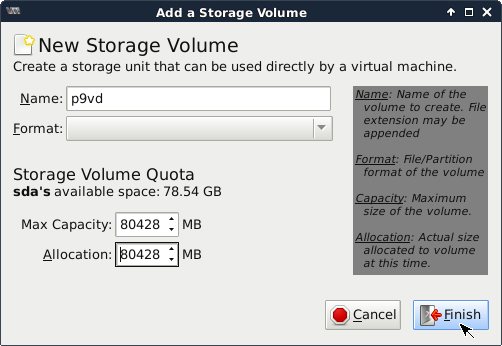
As there is a bug with trying to actually get that amount,
we back them both down by one by left-clicking once
on the Decrement icon of the Max box:
Happy with the choices, we left-click on the Finish
icon to make it so:
After some amount of time spent formating the new volume, the
Storage panel is revealed again.
Although the new volume now is seen in the list of volumes, notice
the available space on the disk has not updated.
To resolve that we left-click on the Refresh volume list icon
next to the Volumes header:
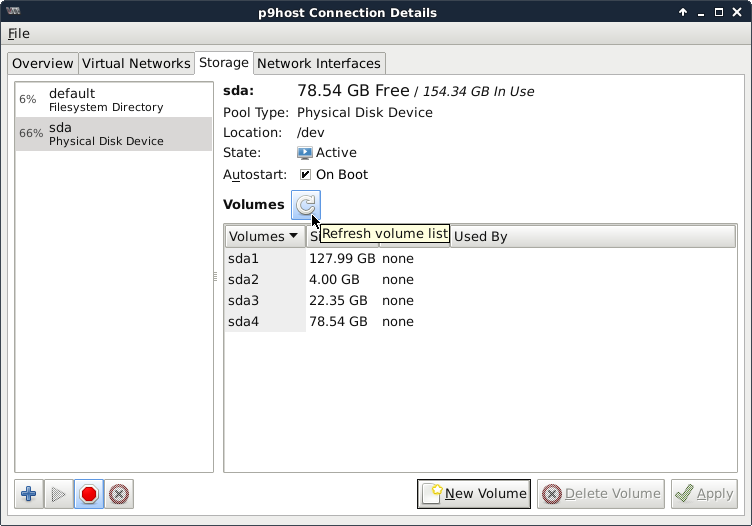
and now the space utilization is correct.

Now that the area to carve up for virtual machine
filesystems has been provided, we leave the
Connection Details dialog by pulling down the File menu
icon and left-clicking on the Close item that pops up:

which returns us to the main virt-man window:
We are ready to download the Plan 9 installation ISO
which means leaving the Virtual Machine Manager
application for a little while, then we will return
to define the Plan 9 virtual machine.
Subsection 3-2: Download the Plan 9 Installation ISO
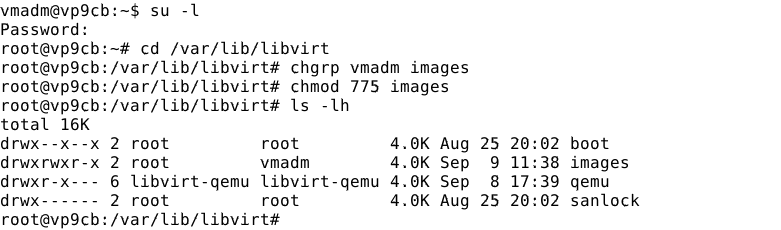
Step 3-2-1: Enable vmadm to Create Images
The first step toward downloading the Plan 9
installation ISO is to enable vmadm to download
into the /var/lib/libvirt/images directory.
In a root shell terminal session, run the following
commands (modified as needed for your project):
cd /var/lib/libvirt
chgrp vmadm images
chmod 775 images
ls -lh
Your session should look like this.
Step 3-2-2: Download the ISO Image
Left-click on the Application Menu icon then left-click
on the Web Browser item that drops down to start Iceweasel.
The
main page of the Bell Labs wiki
is the place from which to start.
Go there by entering
https://9p.io/wiki/plan9/plan_9_wiki
as the URL to visit.
Left-click on the
Download
link at the bottom of the green box in the upper-right of the page:
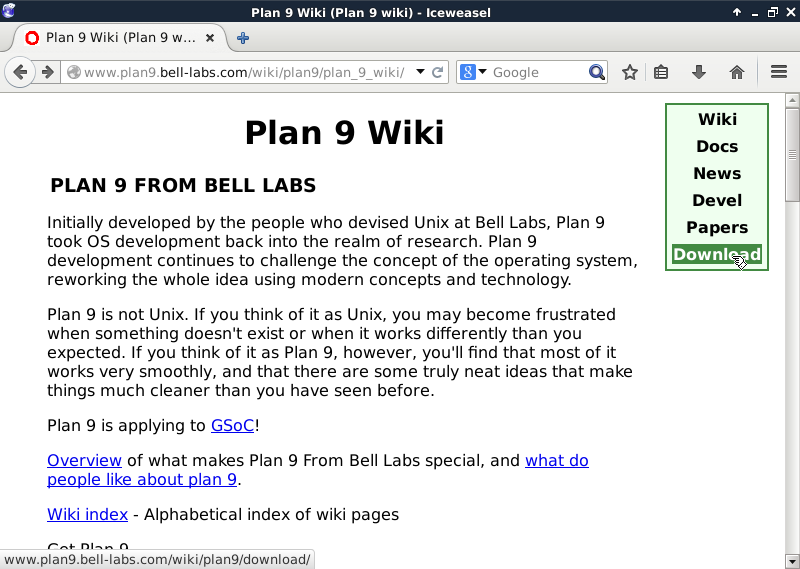
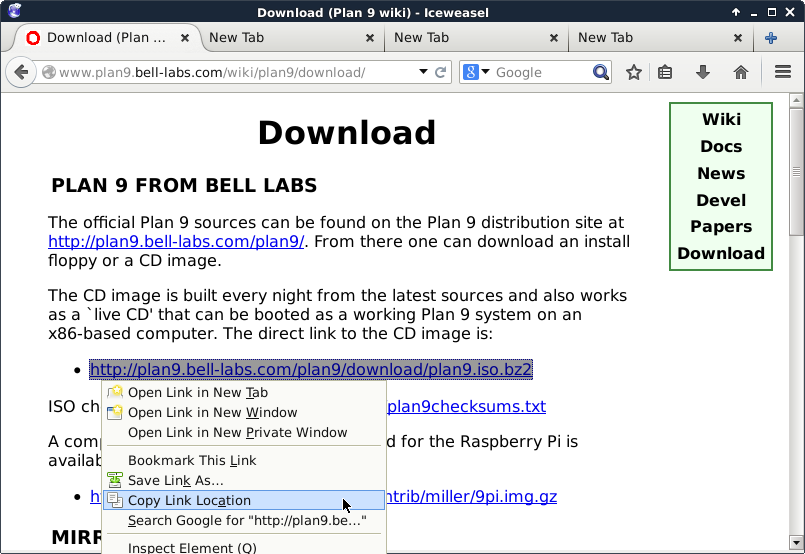
to bring up the page with the links to the downloadable
ISO ("CD image") file and the checksums file.
Do not left-click on the ISO link; rather, copy the
link's URL by a right-clink on the link and a left-click
on the Copy Link Location item that pops up, as shown:
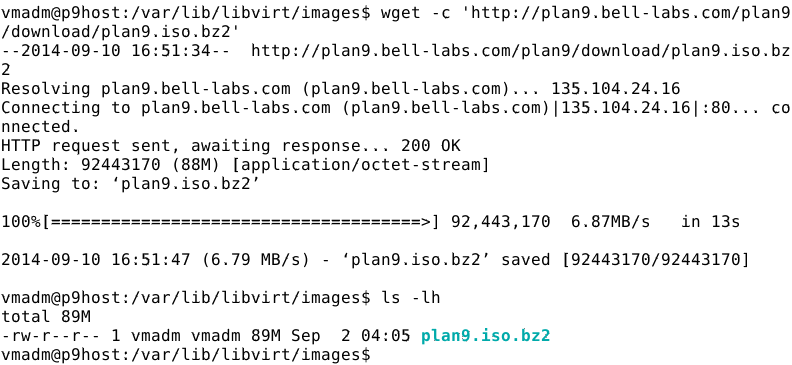
Now get to a shell prompt for the vmadm user (not root)
and run the {cd /var/lib/libvirt/images} command.
Then type {wget -c '}, right-click on the terminal
screen, left-click on the Paste item that pops up, type
another apostrophe {'}, then Enter.
This starts the download (your speed will likely vary
from mine).
When it has finished successfully, run an {ls -lh}
command to verify it exists and has the right timestamp.
This sequence of commands should look almost identical
to this:
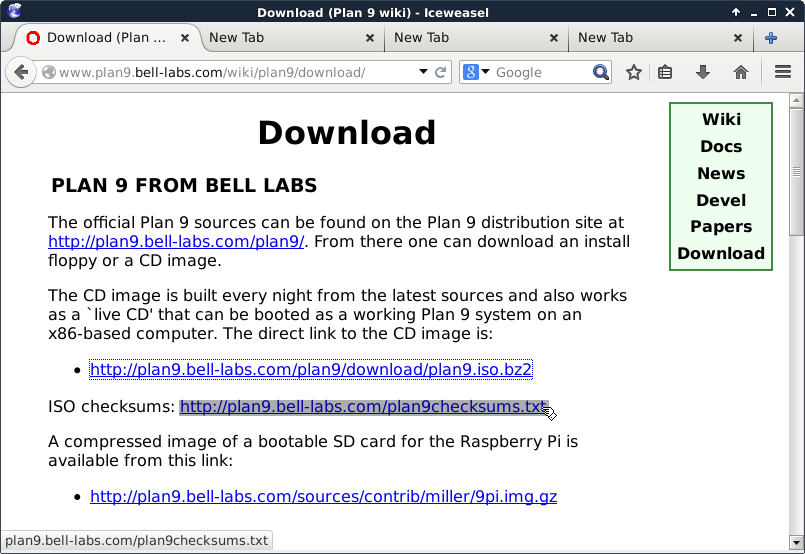
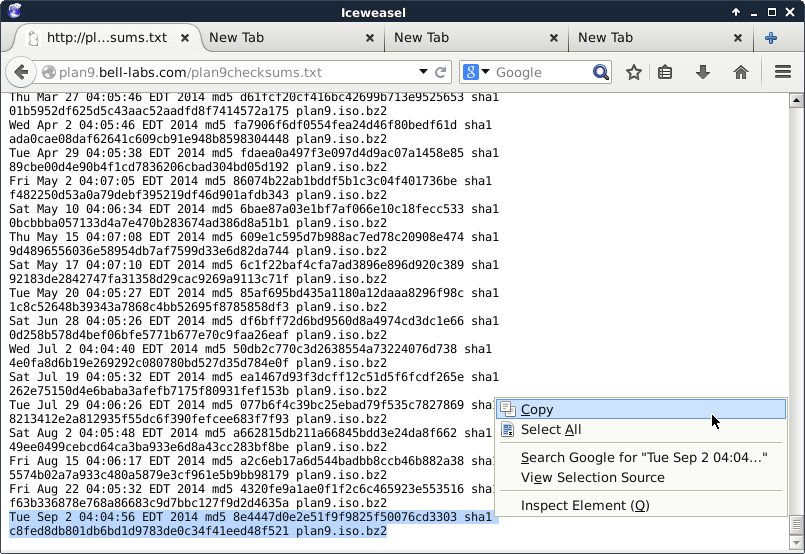
Step 3-2-3: Validate Checksum and Decompress
Now you need to validate the ISO file's SHA1 checksum.
Go back to the browser and open the ISO checksums
file by a left-click on the file's link:
Scroll to the line (it should be the most recent at the end) for
the ISO file just downloaded and select it by a left-click drag
from the first character on the first line to the last character
on the second line and release.
Then right-click on the selection and left-click on the
Copy item that pops up:
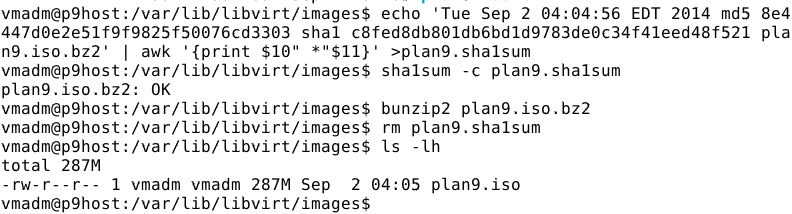
Go back to the vmadm command prompt and type {echo '},
then right-click on the terminal and left-click on the
Paste item that pops up, then type the following exactly:
' | awk '{print $10" *"$11}' >plan9.sha1sum
and Enter.
Once that goes well, run the {sha1sum -c plan9.sha1sum}
command to validate the ISO file.
If that is "OK", next decompress the ISO by running a
{bunzip2 plan9.iso.bz2} command.
Use {rm plan9.sha1sum} to remove the no longer needed
checksum file, then check your work with another {ls -lh}
command.
It should all look pretty much like this:
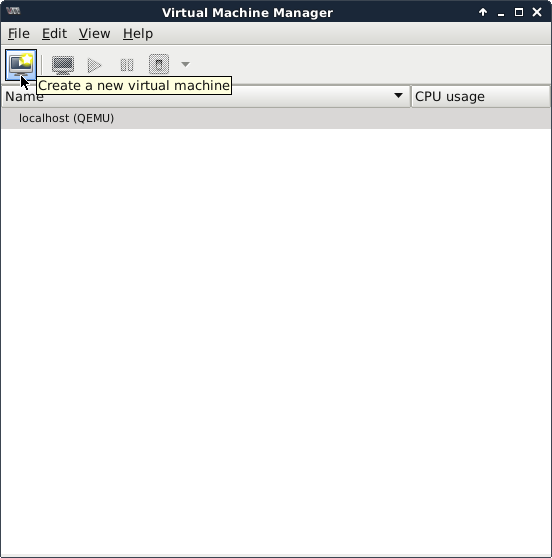
Subsection 3-3: Define the Plan 9 Virtual Machine
Return to the Virtual Machine Manager application's
main window and left-click on the Create a new
virtual machine icon:
Step 3-3-1: Page 1 of 5 — General
[You should not see that warning about KVM.
KVM is not available in a first-level virtual machine, only
to a first-level virtual machine, which is why second-level
performance is sub-optimal.]

My vm's name reflects its future role: Plan 9 Bell Labs
Server, but you may use what you think best.
The default installation type, local install media, is what
this recipe calls for.
We left-click on the Forward icon to proceed.

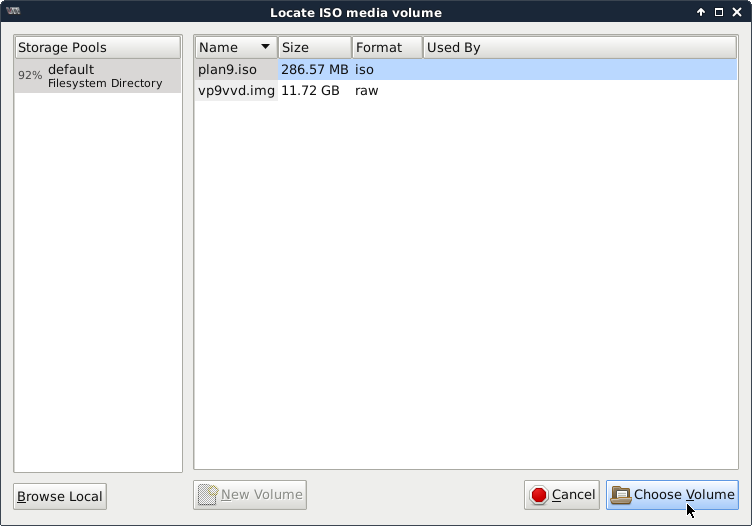
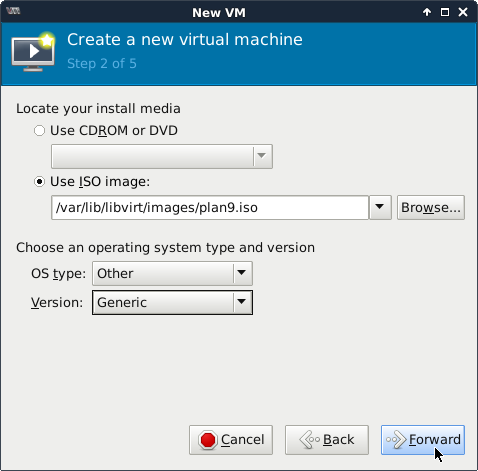
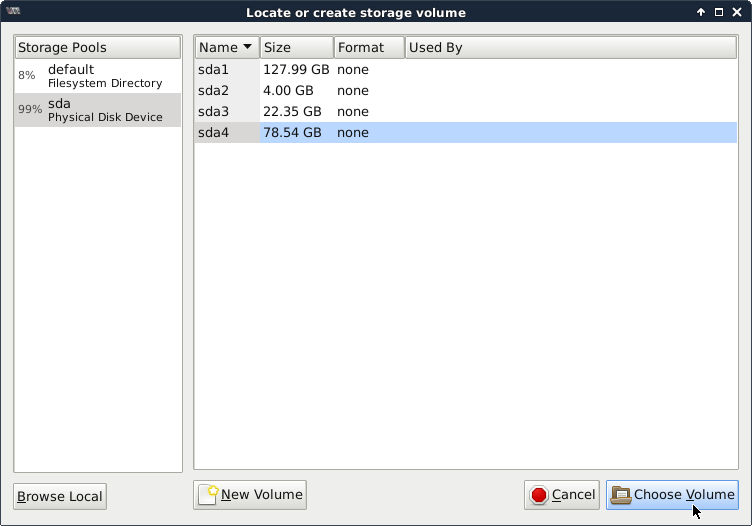
Step 3-3-2: Page 2 of 5 — First Boot Source
We select the Use ISO image: radio button and
left-click on its Browse icon.
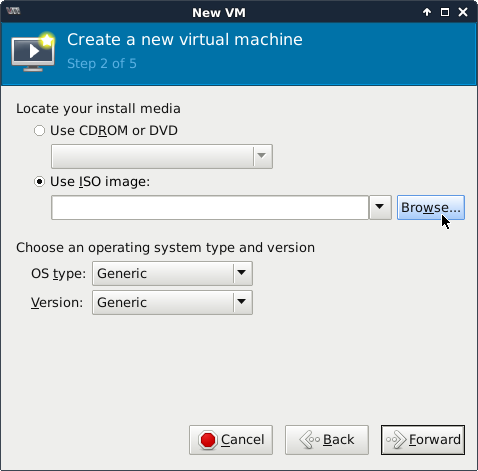
We left-click on the plan9.iso line to select it and
left-click on the Choose Volume icon.
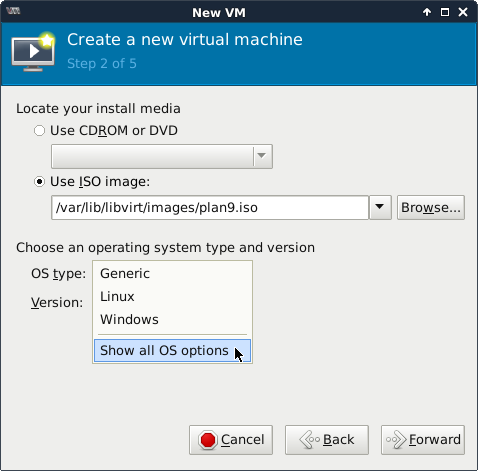
We left-click on the OS type: pull-down icon and
left-click on the Show all OS options item that drops down.
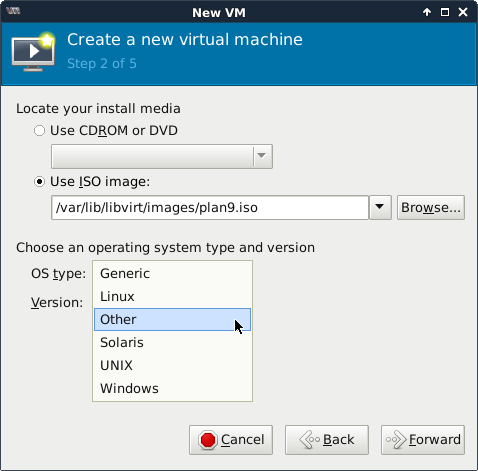
We left-click on the OS type: pull-down icon again but
this time left-click on the Other item that drops down.
We left-click on the Version: pull-down icon and
left-click on the Generic item that drops down.
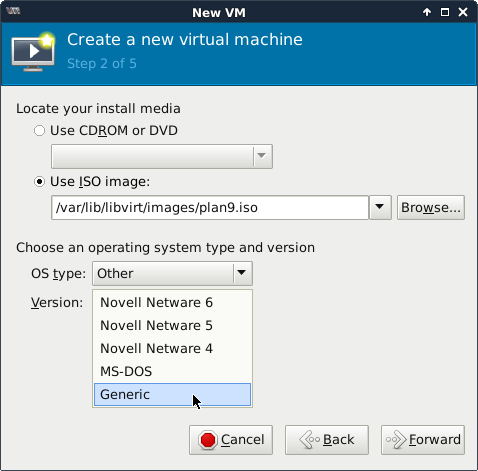
We left-click on the Forward icon to proceed.
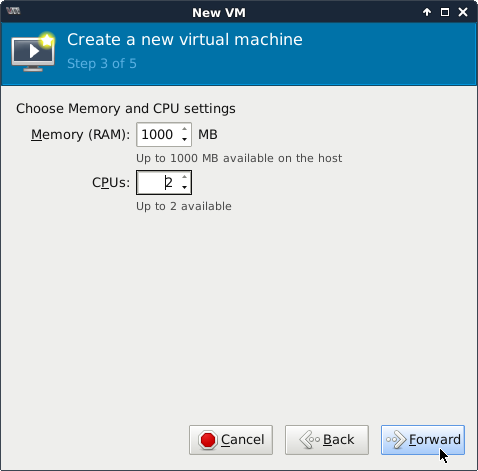
Step 3-3-3: Page 3 of 5 — RAM and CPUs
We set these as makes sense for the project
platform, remembering they can be adjusted
later if necessary, then left-click on the
Forward icon to proceed.
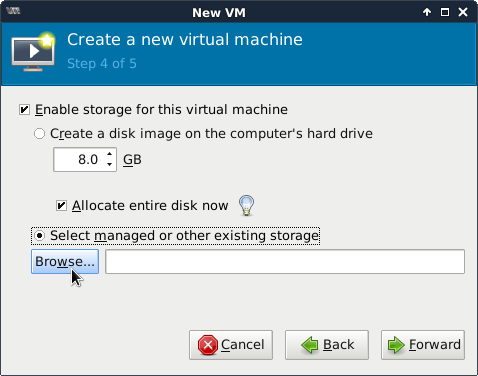
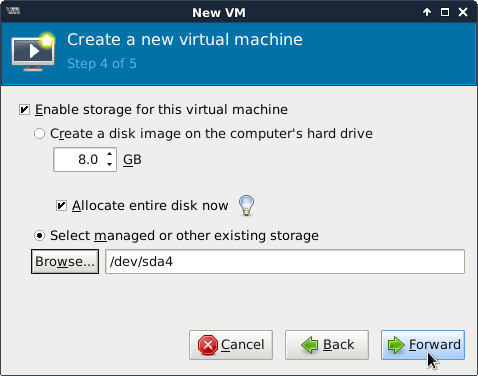
Step 3-3-4: Page 4 of 5 — Disk Drive
We left-click on the Select managed or other
existing storage radio button and left-click
on its Browse button.
I left-click on the sda item under the
Storage Pools column—you click on
what is necessary to select your vm's storage volume.
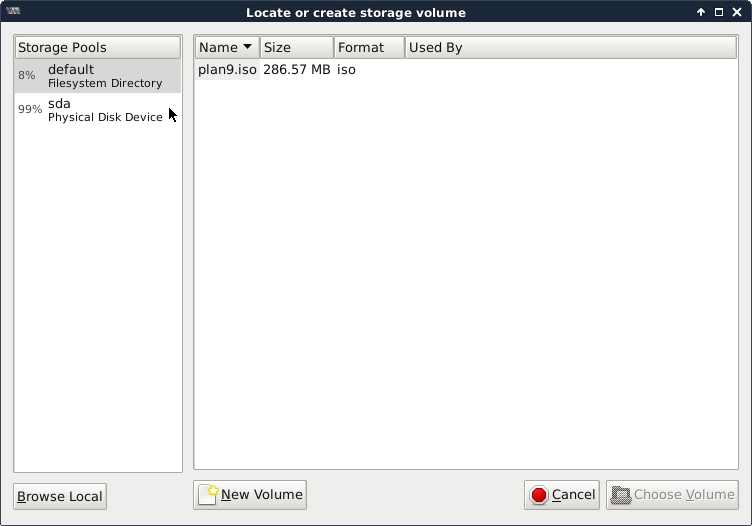
I left-click on the sda4 item in the second
column (you highlight your volume) and we left-click
on the Choose Volume icon.
We left-click on the Forward icon to proceed.
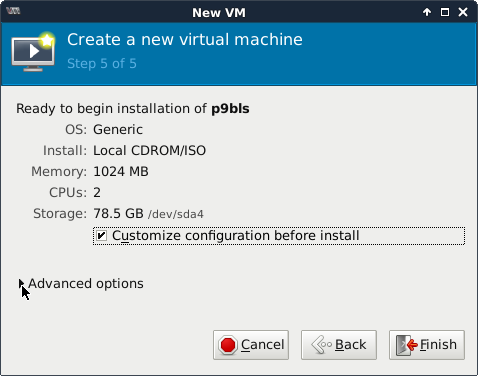
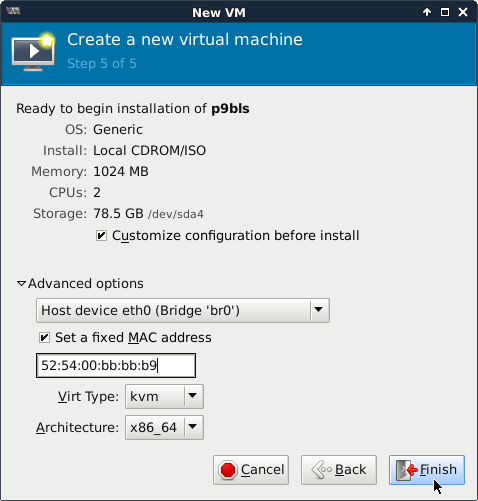
Step 3-3-5: Page 5 of 5 — Advanced Options
We left-click on the Customize configuration
before install checkbox and left-click on the
Advanced options pull-down icon.
A virtual fixed MAC address for the vm's NIC
has been suggested.
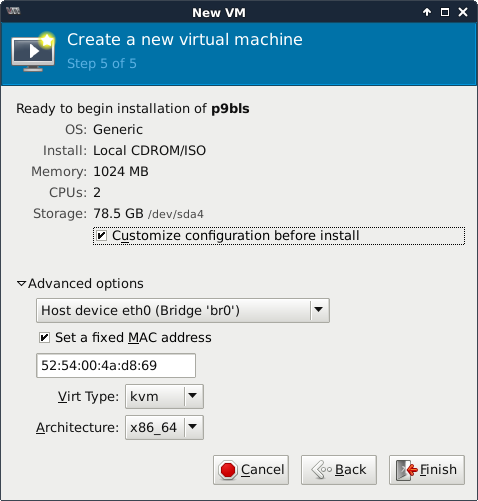
Prefering to have a MAC address more indicative
of the vm using it, I change the last three bytes,
but you can choose not to or use different values.
Be sure Virt Type and Architecture
are properly set.
We left-click on the Finish icon to proceed.
Subsection 3-4: Customize the Virtual Machine Configuration
We begin the advanced tailoring of the virtual machine
prior to its first instantiation that will boot the
virtual CD-ROM ISO.
I will show all changes my platform receives and skip
panels that don't require adjustments.
You should review all options on all panels to ensure
all are correct for your platform.
Visit the
virt-manager website
and perhaps the
libvirt website
if you have questions about any of this.
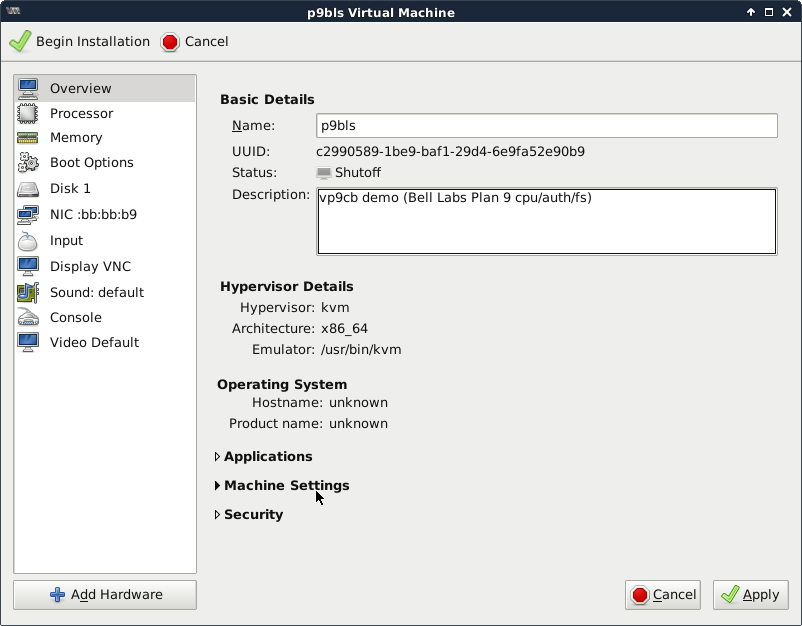
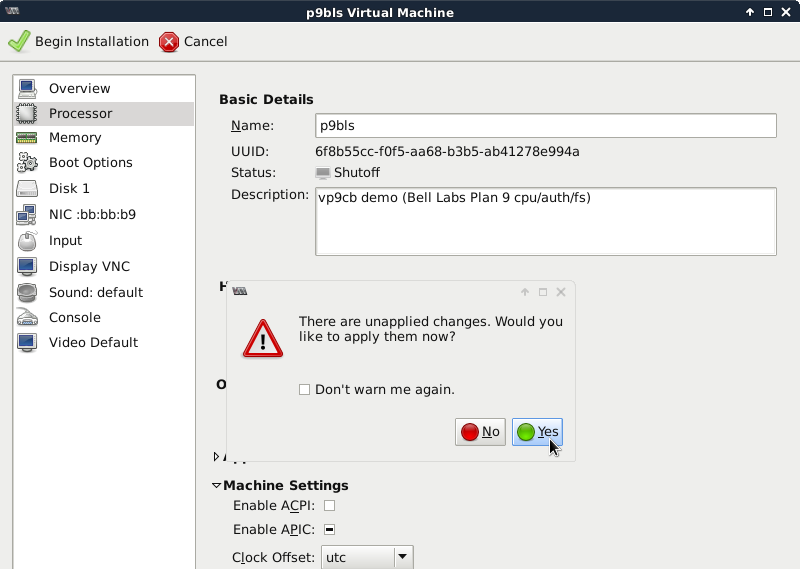
Step 3-4-1: Overview Panel of Customization
I enter a description of this vm—its mission.
You enter what you consider appropriate, what will
help members of the vmadm group to differentiate
this vm from all the others.
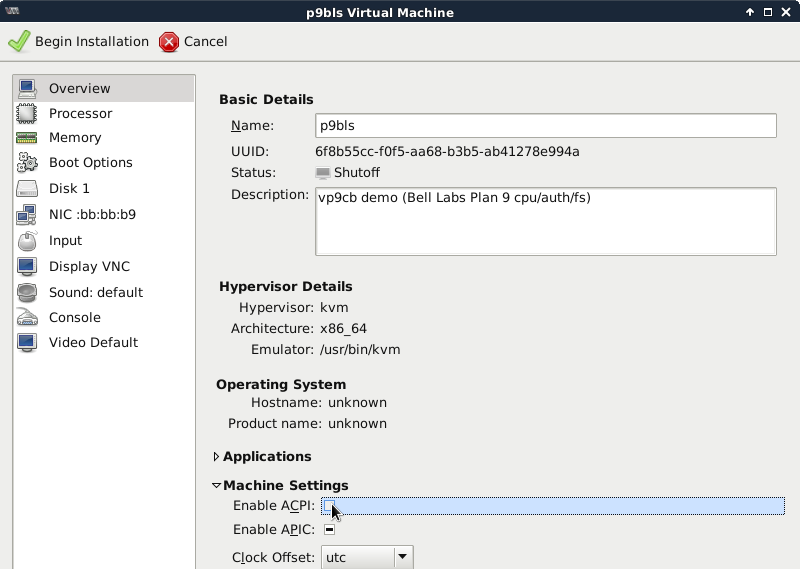
I left-click anywhere on the Machine Settings line to
pull down its details (note the bottom row of icons
is about to be pushed down below the viewing area on
my screen).
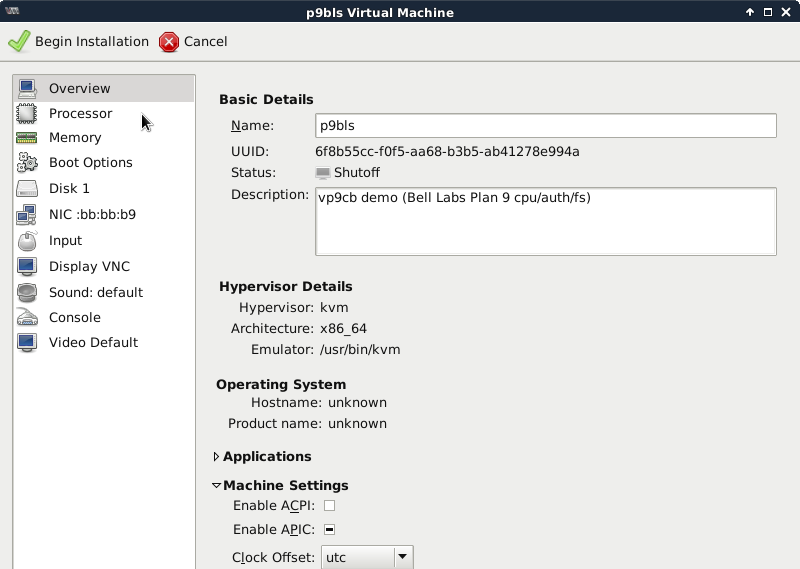
I left-click on the Enable ACPI: checkbox until it is
empty.
If you can see the Apply icon, left-click on it (I
can't get it to return but I'm not doomed).
We left-click on the Processor item in the left column
to change to that panel.
Because I haven't clicked the Apply icon that was pushed
off screen, I am asked to apply my changes, which I do
by left-clicking the Yes icon in the pop-up.
Hopefully this will not be what you experience.
Step 3-4-2: Processor Panel of Customization
I left-click on the Configuration line to pull
down its details and left-click on the Copy
host CPU configuration icon to have virt-man
fill in the Model.
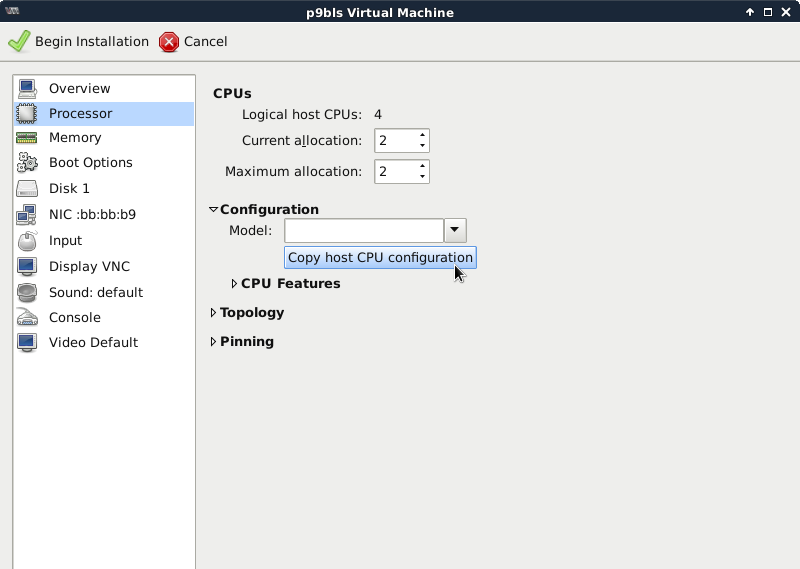
I check the value reflects reality and resolve
any discrepancy.
I apply the changes and left-click on the Sound:
default item in the left column to change to that
panel.

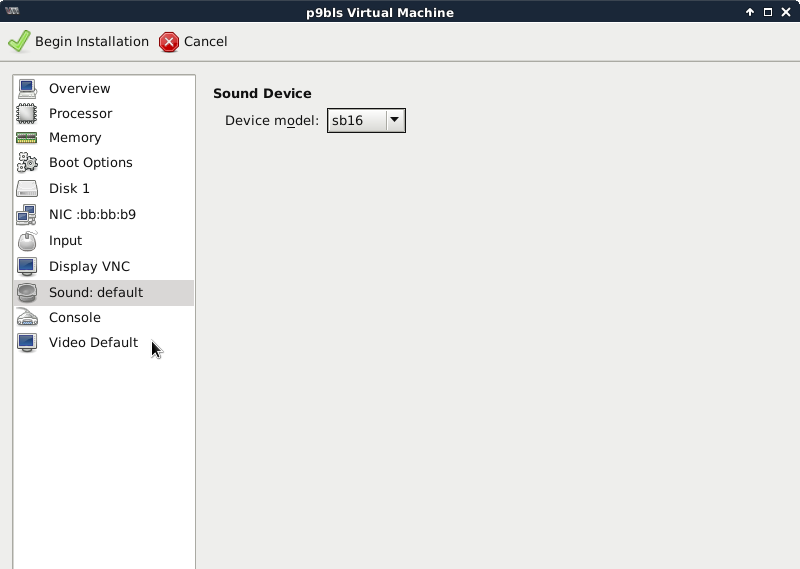
Step 3-4-3: Sound Panel of Customization
I left-click on the pull-down icon of the
Device model: line and left-click on the
sb16 option.
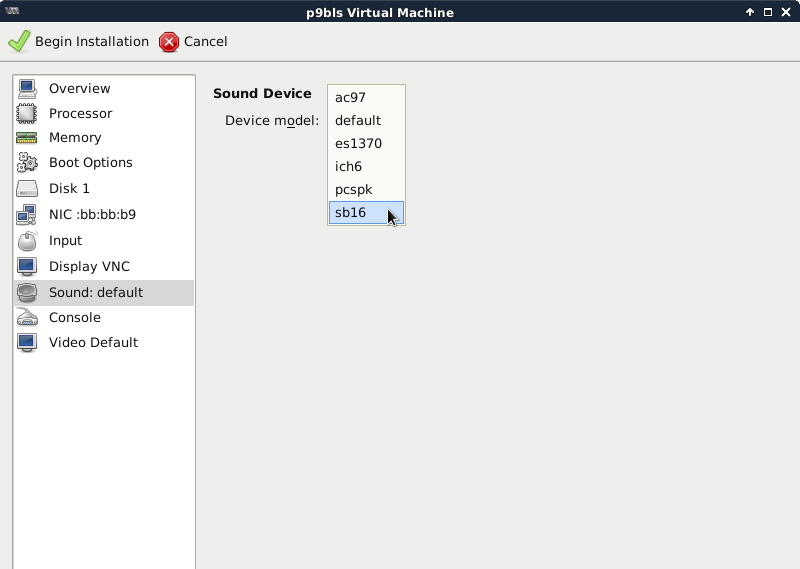
I apply the changes and left-click on the Video
Default item in the left column to change to that
panel.
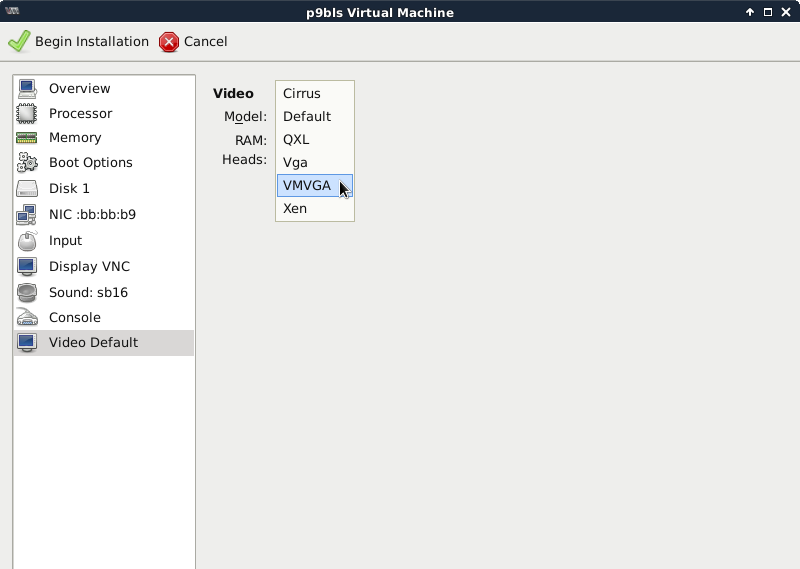
Step 3-4-4: Video Panel of Customization
I left-click on the pull-down icon of the
Model: line and left-click on the VMVGA
option.
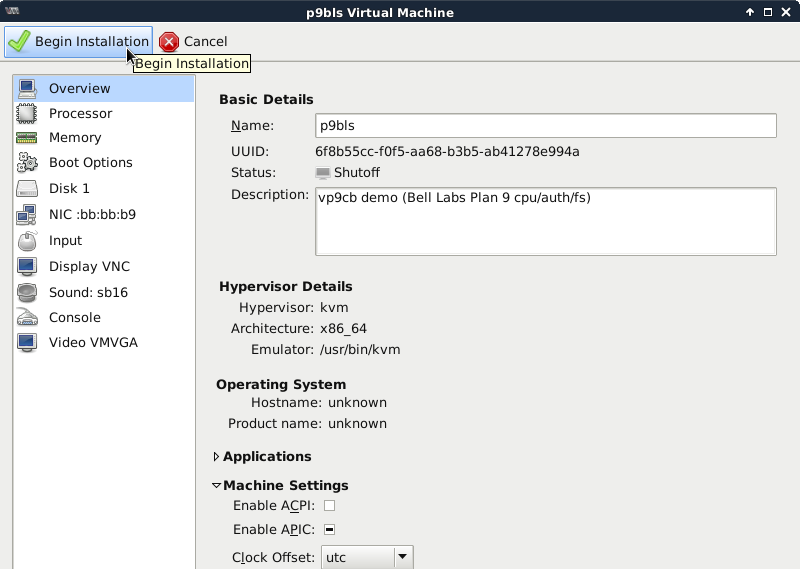
I left-click on the Overview item in the left
column again to be able to respond to the apply
dialog for the video change, but you may be able
to simply apply the change.
Either way, now that we're finished with setting
up the vm, we left-click on the Begin Installation
icon.
Subsection 3-5: Install Plan 9 from the ISO
Now virt-man finishes the customizations,
creates an instance of this vm, and (this
time only) causes it to boot from the
installation device we defined.
If a problem forces me to reboot the installer,
I have always deleted and recreated the vm.
If you find a way around that, let me know so I
can document that here.
We are
here
in the Plan 9 Installation Instructions.
A flash of black announces Plan 9 executable
code has started running on your computer!
I will perform reverse video transformations
on these black background Plan 9 non-GUI screens
using the GIMP, however.
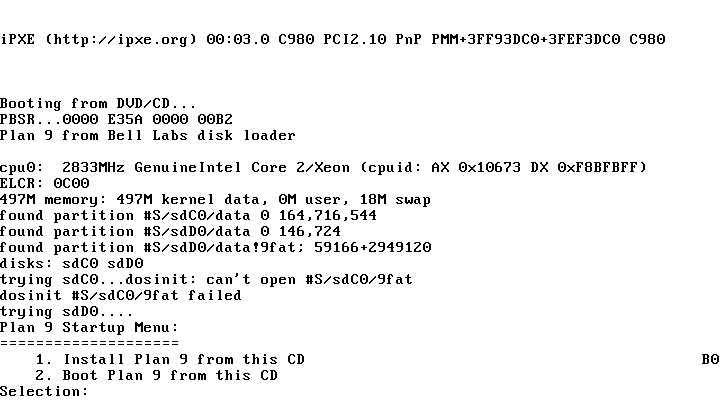
In short order you should get to the first
question (if not, the Plan 9 Installation
Instructions should be consulted and if
necessary, ask on
#plan9 at freenode
(but be sure you've done your homework and be
respectful).
Assuming you are new to Plan 9, it is very
important to avoid experimenting with the
interface by key presses and mouse clicks
not directly in the recipe until you know
what you're doing.
You can get lost very easily and will be on
your own to find your way back to the path.
It may take a lot of time to figure out how
to recover.
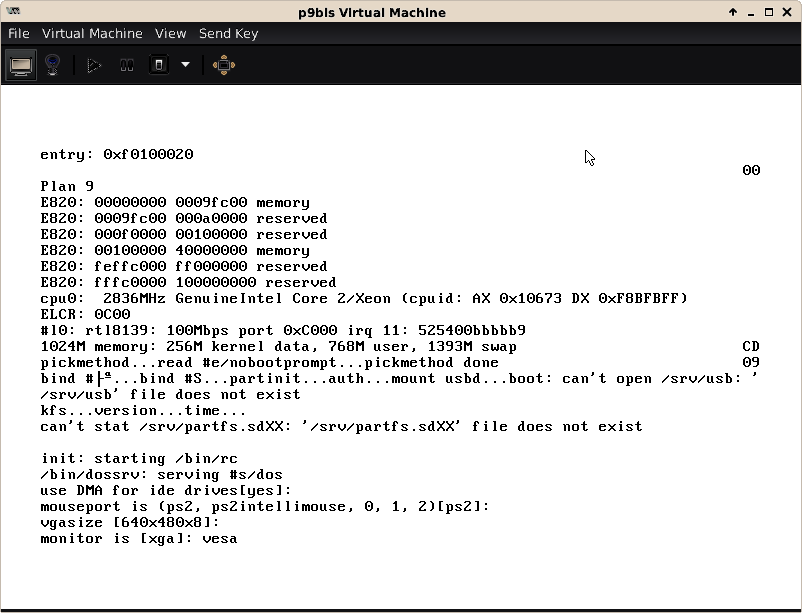
Type {1} and Enter.
After a little while, you'll be asked the next
question, use DMA for ide drives[yes]:, as shown:
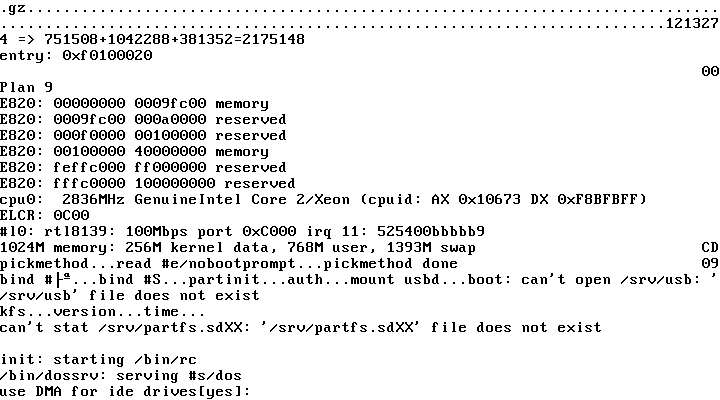
Since libvirt supports the default, just
Enter for that question.
To the next question, mouseport is (ps2, ps2intellimouse,
0, 1, 2)[ps2]:, libvirt supports this default,
too, so just Enter again.
The vgasize [640x480x8]: question's default is what
I need to facilitate taking diminutive and readable
screenshots as well as documenting some difficulties
associated with that option.
However, you can choose something larger and more colorful
if you can deal with the differences that causes between
what is on your screen and what is in this book.
Good choices are {800x600x16} and {1024x768x16}.
For the next question, monitor is [xga]:, type
vesa but hold off on Enter; instead, take
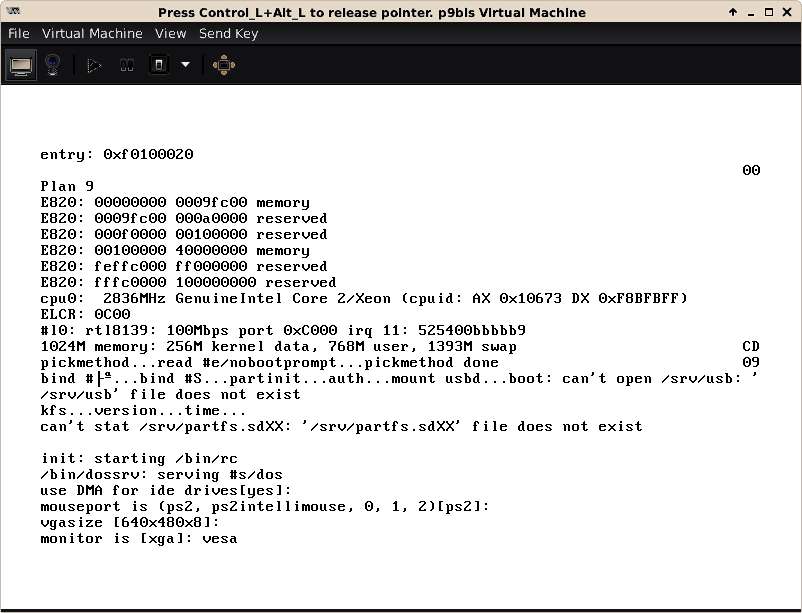
a look at that mouse pointer.
That is the XFCE pointer and indicates the mouse
is not dedicated to the virtual machine.
[Note your pointer, solid black inside a white border, is
reality.]
The passthrough of the mouse inputs to the virtual machine
can be odd when its operating system is Plan 9, so you
should avoid doing that.
Instead you want to dedicate the mouse and its pointer to
the vm's OS.
Now left-click once with the pointer in that general
vicinity to make that transition now:
Where did the pointer go?
At this time there is no Plan 9 pointer because the
rio window system is not in control of the screen.
But if there were a Plan 9 pointer, it would look
like a black hole in this universe because it is solid black.
The point is the XFCE pointer ceases to exist—the
mouse is now dedicated to the virtual machine.
The title bar has been updated with a prefix that
tells you how to release the mouse to X again
(while serving to remind you who owns the mouse
when its pointer is inside the vm sceen).
Now press the prescribed key combo, the Ctrl and
Alt keys to the left of the space bar.
The screen should look like the previous screen
again and the pointer is again free to be moved
outside the vm screen.
In addition to the left-click to dedicate the mouse,
you can also dedicate via the same key combo—it
in fact toggles the mouse dedication state.
Also note holding one of the keys down while repeatedly
pressing and releasing the other is not interpreted
as multiple toggle events.
Now Enter to continue with the boot.
After a bit of activity, you should be entertained
by the Plan 9 GUI (and I can stop reversing the video):
Now you can see the Plan 9 cursor hiding in the
top left corner of the active Plan 9 window.
The XFCE pointer is still where we left it.
You won't be able to move the Plan 9 pointer until
you toggle ownership while the XFCE pointer is
within the vm's window (then the XFCE pointer ceases
to exist as you've already seen, but you know how to
bring it back).
You won't need to move the Plan 9 pointer to
perform the installation, but I'll show you what it
looks like out of the corner:
You might have noticed the vm console window is
hanging off the bottom of my screen again.
I need to do something about that, and so do you
if you are also experiencing the same thing.
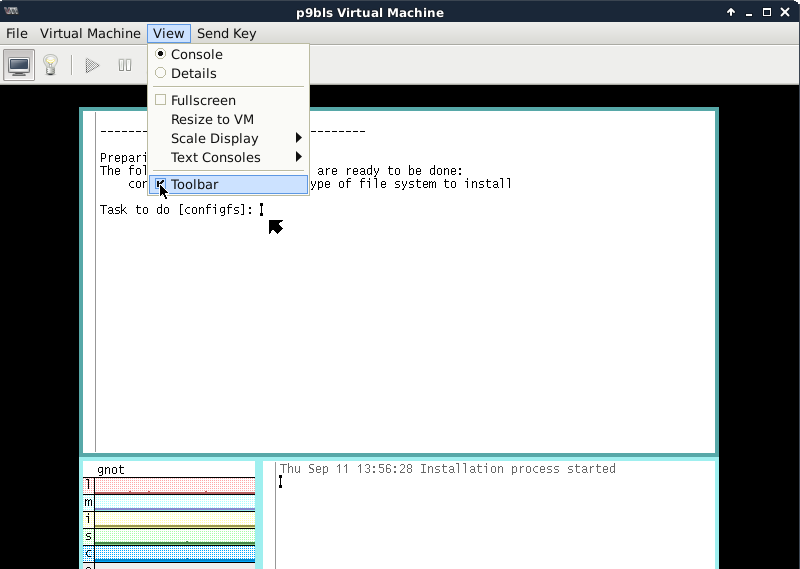
There's nothing in that bar of icons underneath
the console's menu bar that we can't activate via
the menu bar, so let's dispense with it.
We move the X pointer to the View item in the
menu bar and left-click once to pull down the
Toolbar checkbox and left-click on the checkbox:
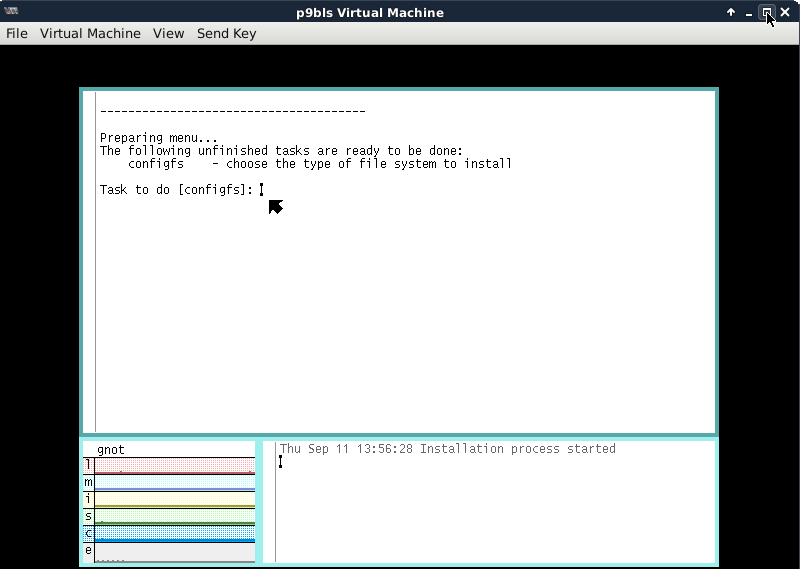
That worked for me:

If that didn't help you, we can maximize the
vm window in the usual XFCE way, a left-click
on the maximize icon as shown:
That pulls my Plan 9 windows up a little closer
to the menu bar.
I hope it helped you sufficiently.
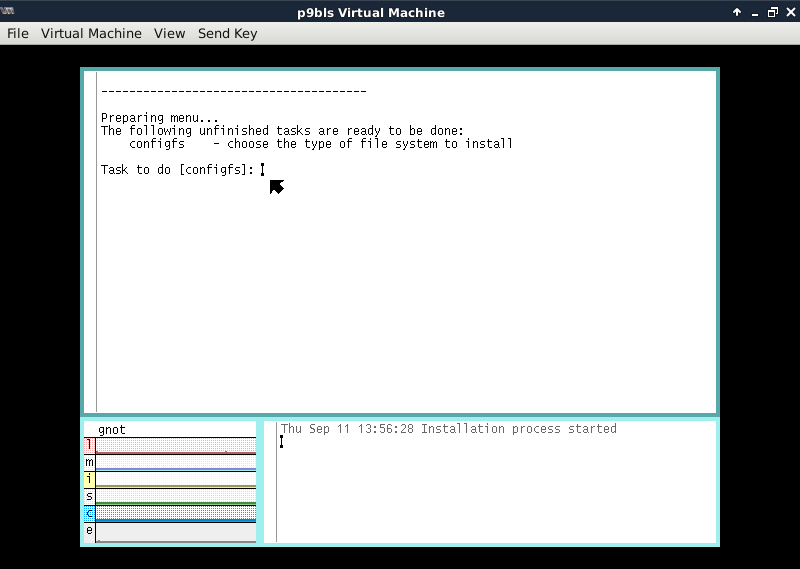
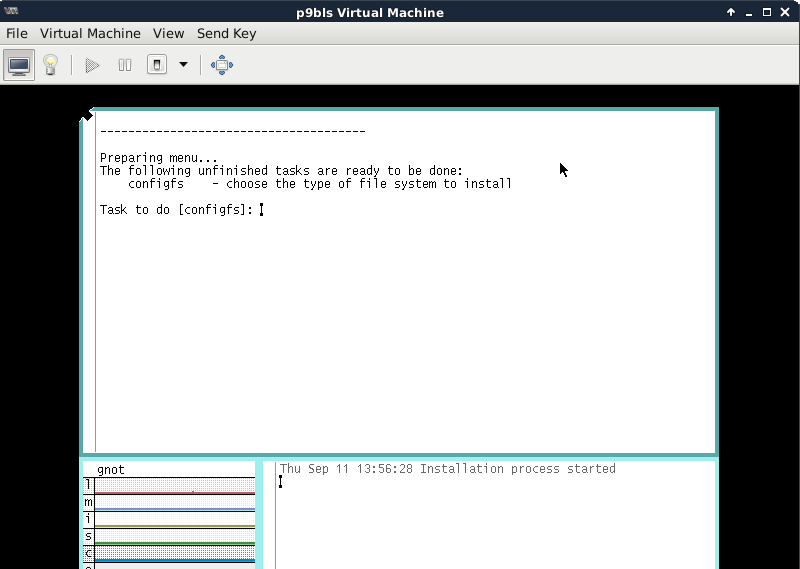
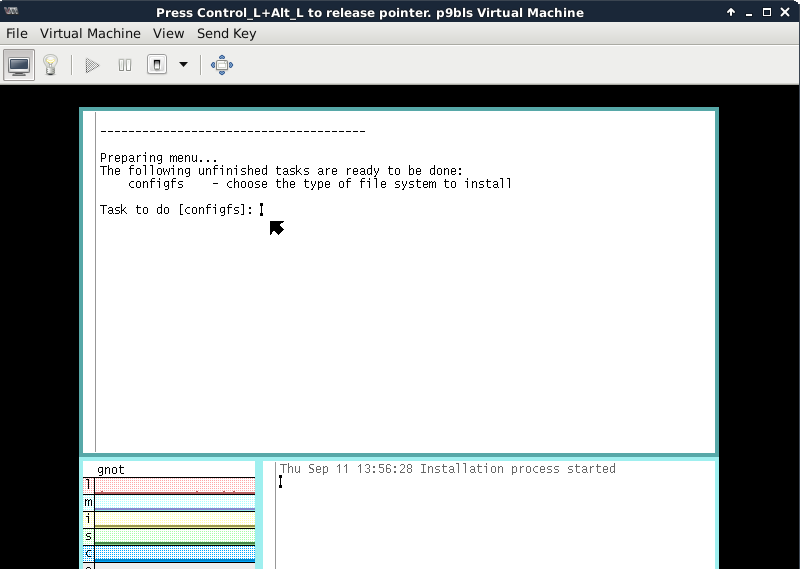
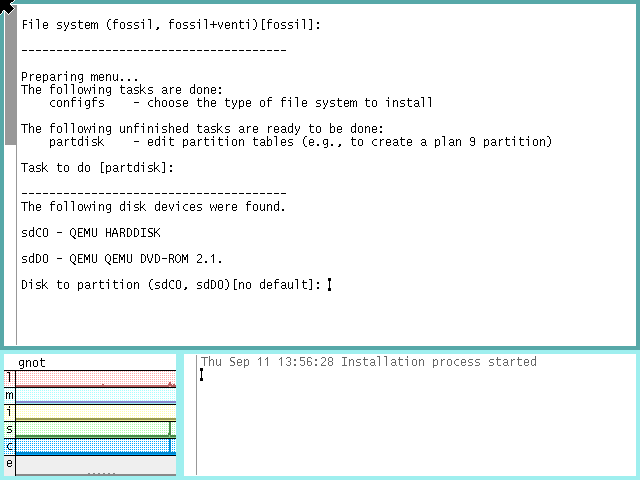
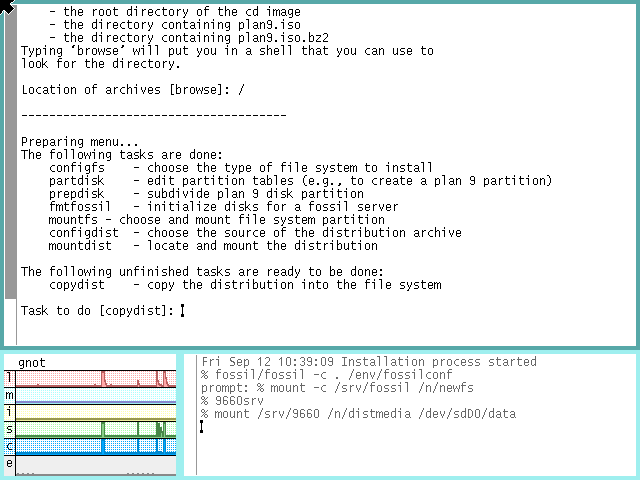
Step 3-5-1: Task configfs of Plan 9 Installation
Note the bold I-beam icon on the last line shows
where text you type will be placed in the screen.
Input text must be entered in the correct
place in the display to be seen by the application
when you Enter.
If you move the I-beam to a different line, what
you type simply replaces the displayed characters
you overtype.
So if you manage to move the I-beam, you need to move
it back to the right location for application input
before you type that input.
If you leave the pointer under the control of XFCE,
the I-beam will stay where it needs to be.
This will be explained in the first tutorial Plan 9
will present at the end of this section.
Enter to start the configfs task:
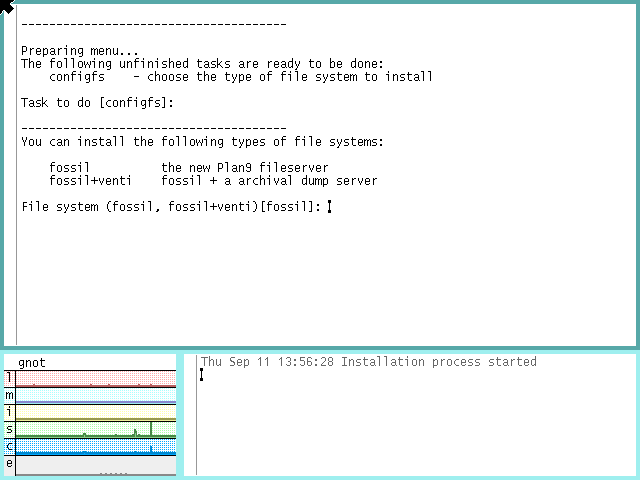
We simply take the default here via Enter
(we'll install venti in the next version
of the cookbook).

Step 3-5-2: Task partdisk of Plan 9 Installation
Enter to start the partdisk task:
The correct response should be obvious.
We type {sdC0}:

and Enter:
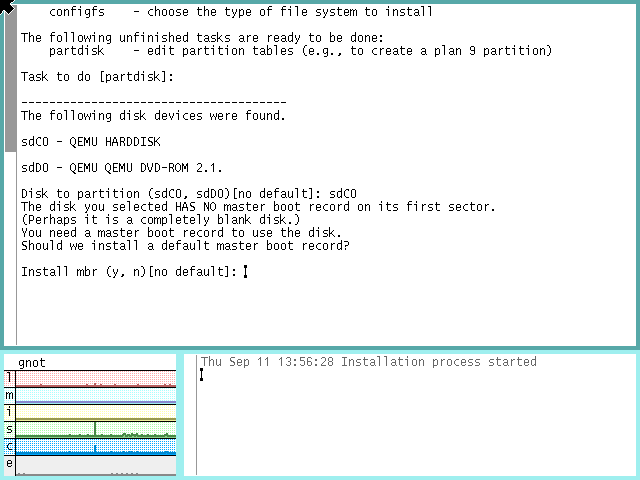
Perhaps it is a completely blank disk, indeed.
Do not miss an important reality in this
analysis—Plan 9 believes it is dealing
with a physical hard drive.
The project's plan for this hard drive
provides for multiple partitions for future
use with an MBR that will only be used by
Plan 9 virtual machines.
Thus we type {y} and Enter:
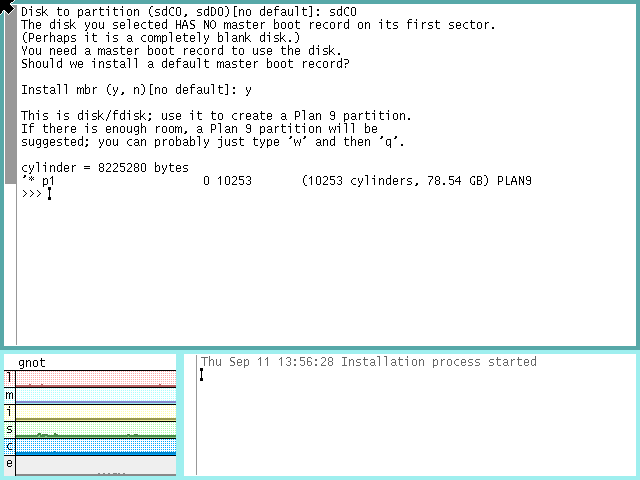
The installer has suggested it take the
entire disk.
We have other plans, however.
Note that 131 cylinders are almost precisely
equal to 1 GB.
We delete the first primary partition and
create a new ~20 GB one:
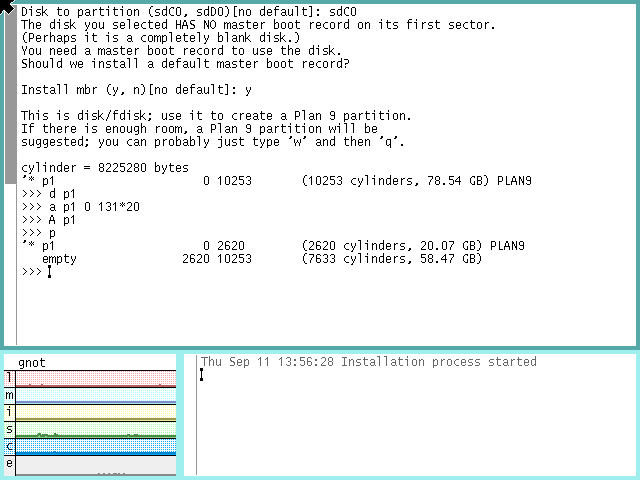
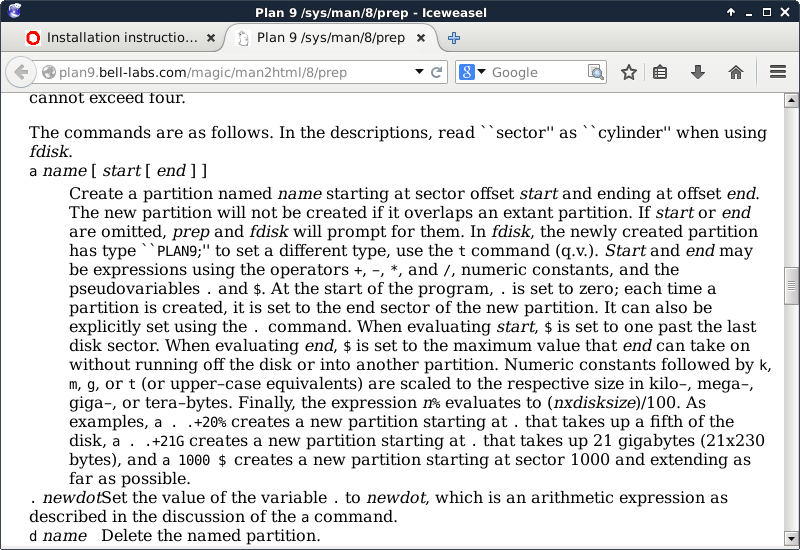
Whence sprang such incantations, you ask?
Well, the Installation Instructions include
a link:
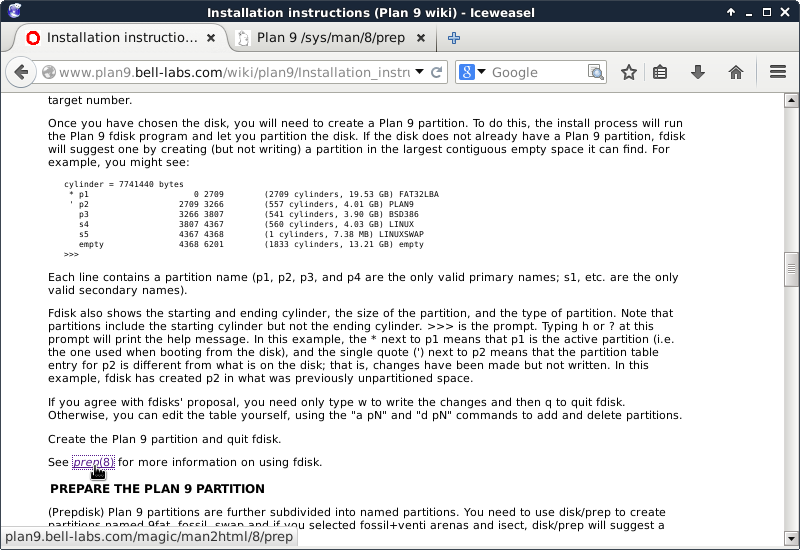
to the needed tome:
We type a {w} and Enter to
commit the changes, then {q}
and Enter to finish partitioning:
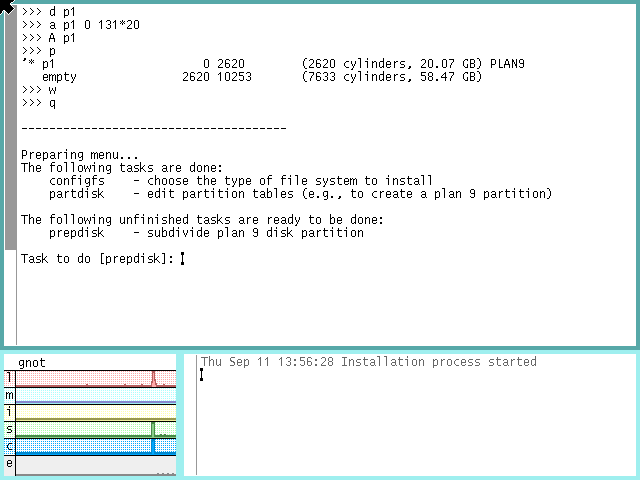
Step 3-5-3: Task prepdisk of Plan 9 Installation
Enter to start the prepdisk task:
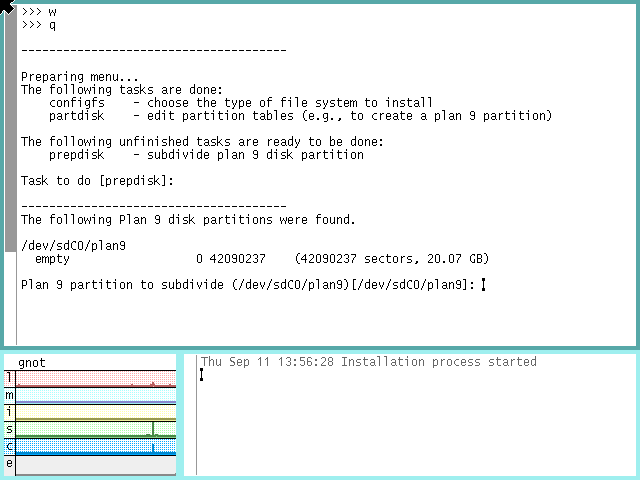
Make sure it found the partition you intended
before you take the default via Enter.
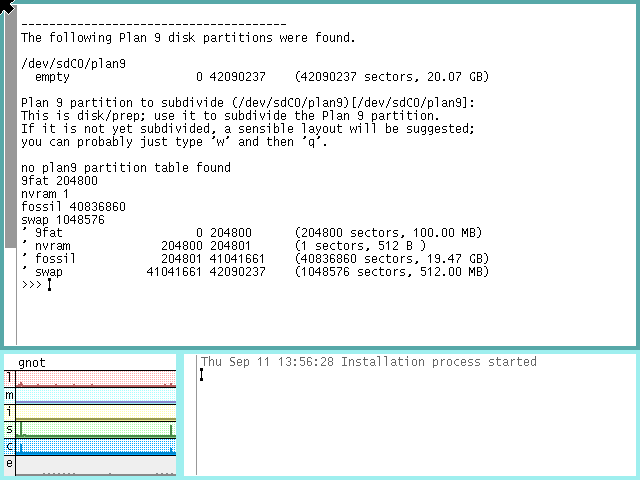
This shows how prepdisk thinks we should carve up
the partition (somewhat like a primary partition
used to provide multiple logical partitions, but
this is a facility managed by prepdisk, not
partdisk, and can be applied to multiple primary
partitions.
This breakdown is acceptable for my purposes, so
I use the {w} and {q} subcommands
(with Enters) per the instructions.
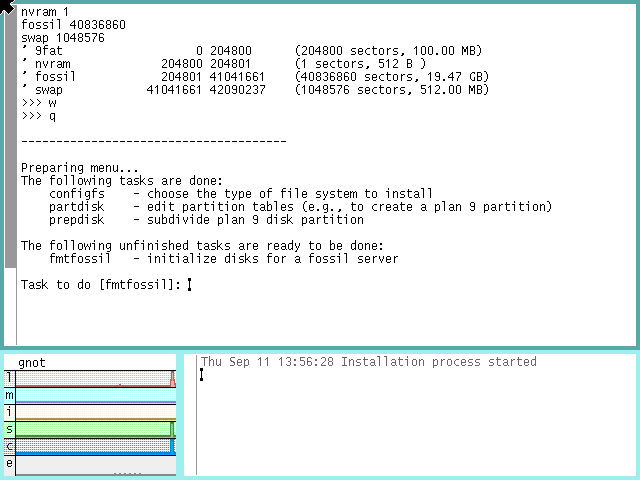
Step 3-5-4: Task fmtfossil of Plan 9 Installation
Enter to start the fmtfossil task
(there is only one fossil filesystem to format, so
we can accept the default for the question via
Enter when asked, as shown without
a separate screenshot).
There are no other responses needed for the task to
complete.
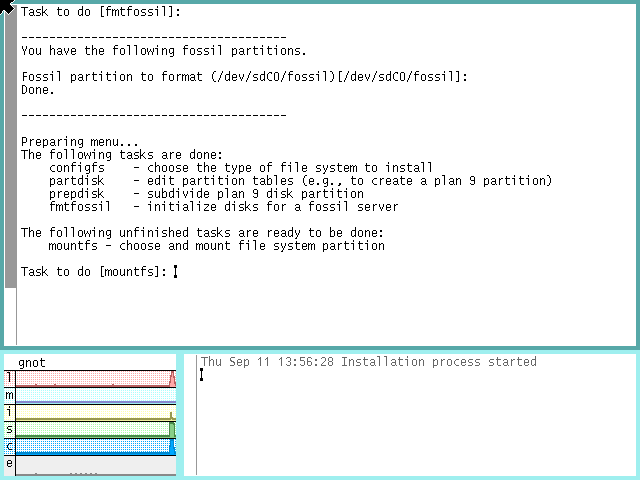
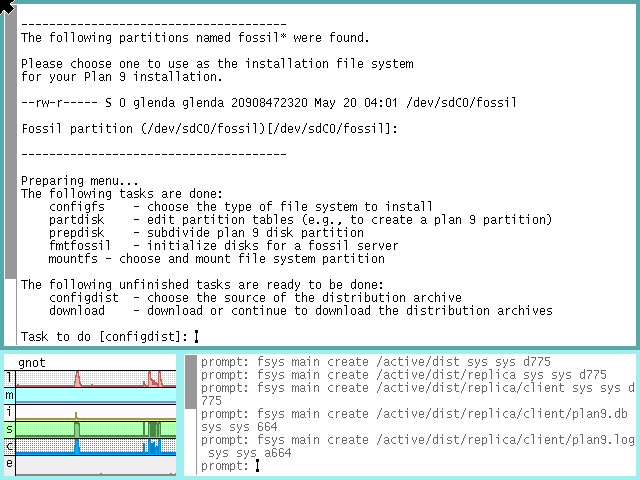
Step 3-5-5: Task mountfs of Plan 9 Installation
Enter to start the mountfs task
(as with the fmtfossil task, there is only one
choice, which we handle the same way, and no other
responses to make).
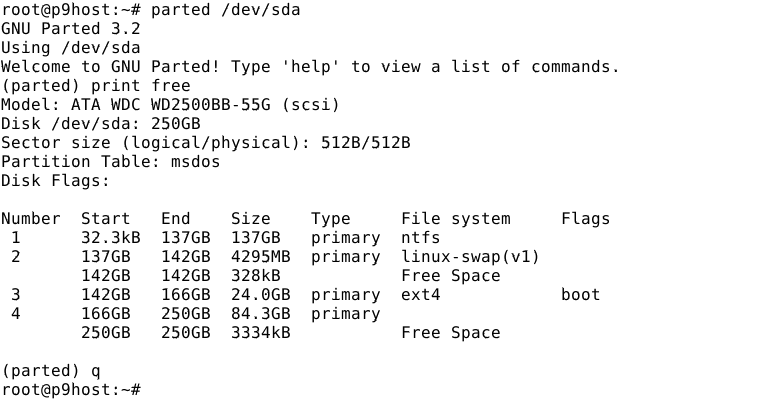
Let's look at Sid's view of this activity to observe
the invisibility of this virtual disk.
The parted utility still does not know how the
partition is being used:
and the kernel does not have it mounted:
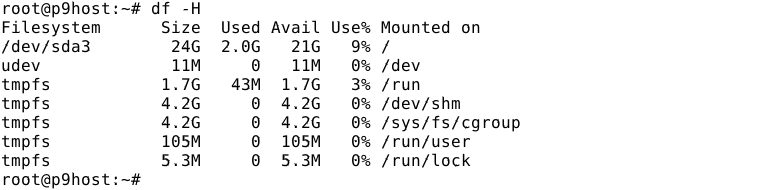
Thus, all I/O to the partition depends upon the
permissions of /dev/sda and /dev/sda4
for authorization:

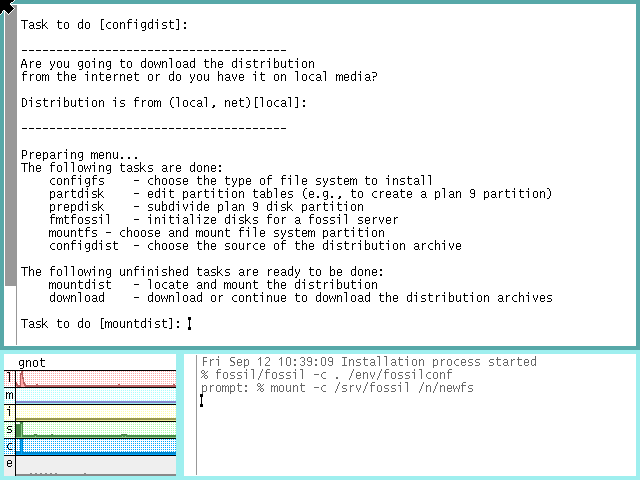
Step 3-5-6: Task configdist of Plan 9 Installation
Enter to start the configdist task,
and accept the default of local via Enter
at the appropriate time.
There are no other responses to make for this task.
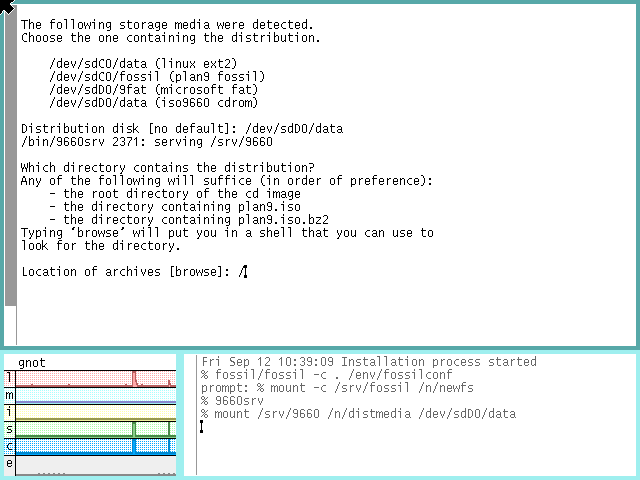
Step 3-5-7: Task mountdist of Plan 9 Installation
Enter to start the mountdist task,
type in the name of the distribution disk,
{/dev/sdD0/data}, when asked:

and Enter.
Since /dev/sdD0/data is the CD-ROM image,
we type {/} for this question and Enter.
Now mountdist does its job and returns for the next task.
Step 3-5-8: Task copydist of Plan 9 Installation
Enter to start the copydist task,
which does not need any direction from us, but will
take a while to copy everything from the ISO to the
hard drive—take a decent break.
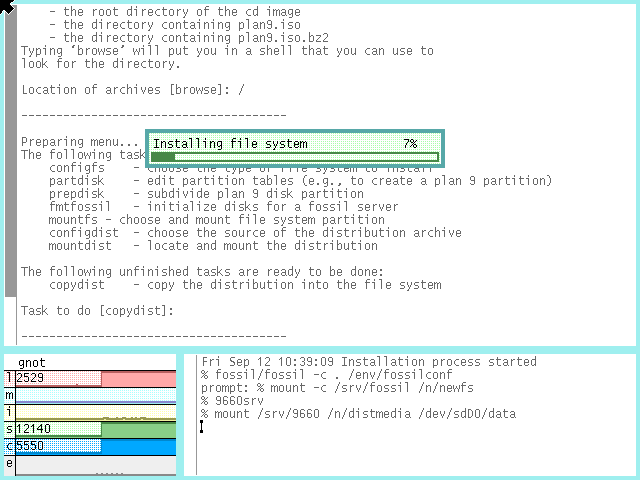
When finished performing copydist, you should see
the following:
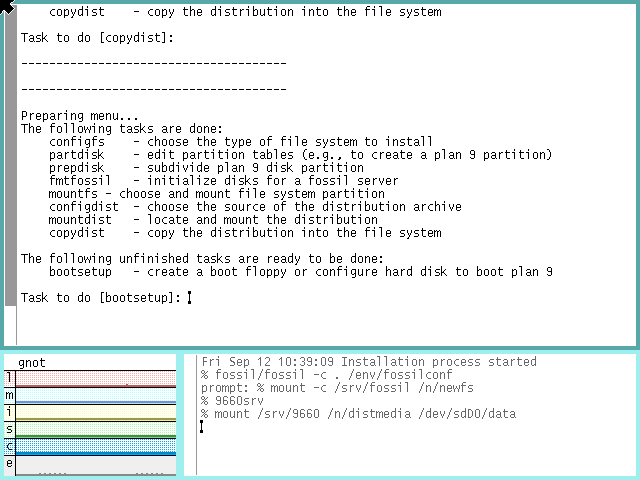
Step 3-5-9: Task bootsetup of Plan 9 Installation
Enter to start the bootsetup task,
then, in response to the boot method question, we
type in {plan9}:
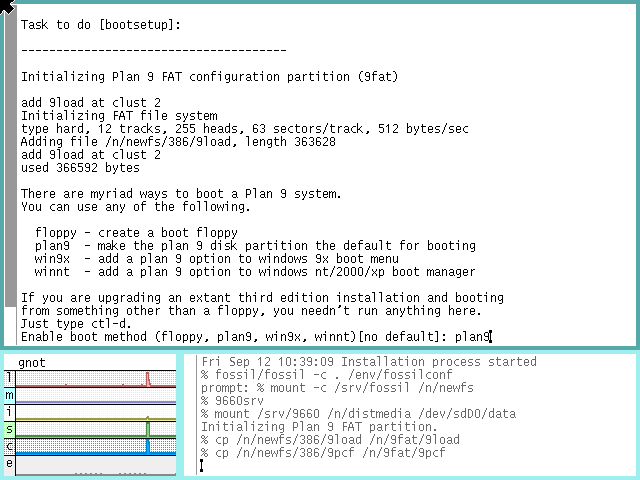
and Enter.
In response to the MBR question, we type {y}:
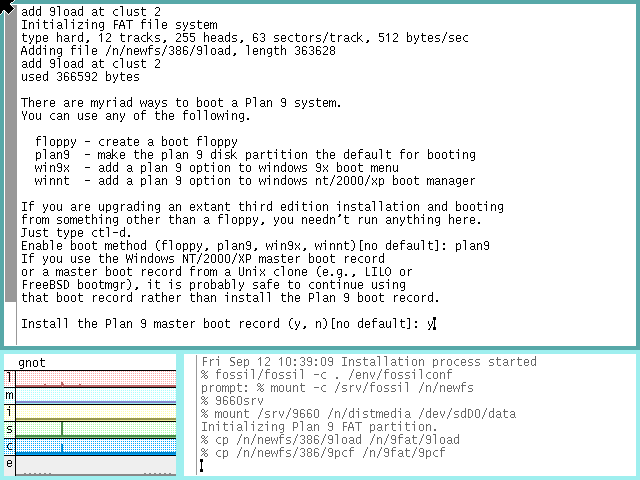
and Enter.
When it is finished performing bootsetup, you should see
the following:

Step 3-5-10: Task finish of Plan 9 Installation
Enter to start the finish task.
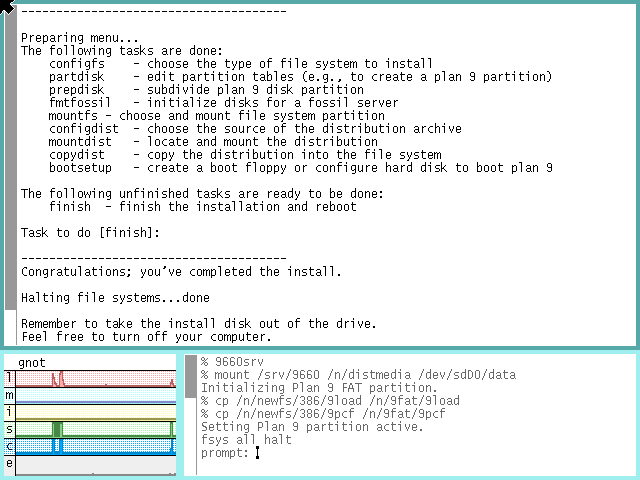
When Plan 9 accomplishes an (fshalt) command, you
can ignore the appearance of continuing activity,
since it doesn't shutdown in the sense of most
operating systems.
The (-r) parameter will cause a reboot to occur
but the installer doesn't specify that for its
invocation of fshalt.
So we will believe what the message says and feel
free to reboot the vm manually.
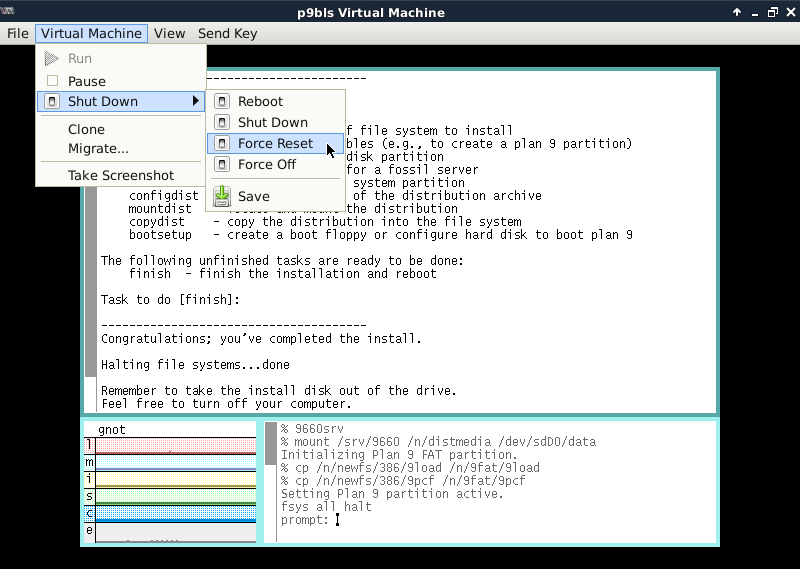
Subsection 3-6: Reboot Plan 9 from the Virtual Disk
To do that, move the X pointer to the Virtual
Machine item in the menu bar, left-click,
mouse-over the Shut Down item that drops down, and
left-click on the Reboot item that pops up (but
let's see what happens if we select Force Reset
instead...).
Since this situation will not cause any data loss,
we left-click on the Yes icon of the pop-up dialog:
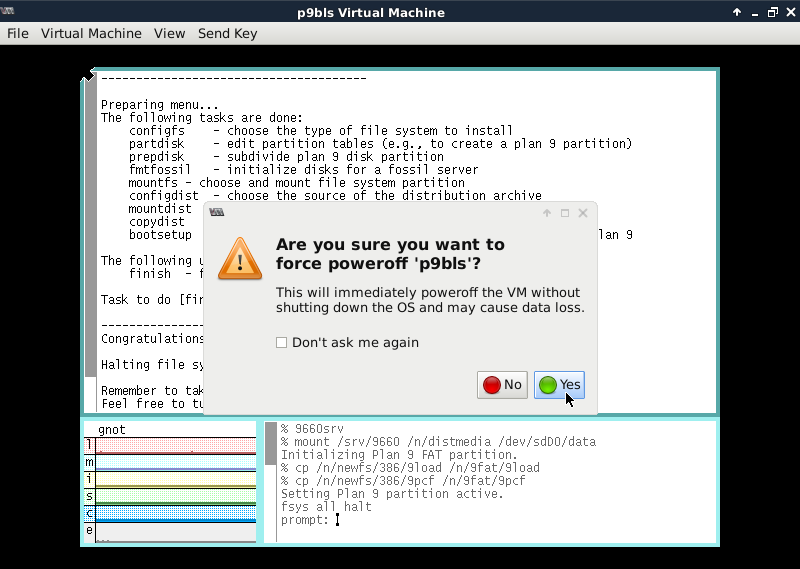
and see the machine does not automatically start
rebooting, it is stopped and its RAM is intact.
When's the last time you used Stop and Start buttons
on a computer? Never? Well, you have them on virtual
computers—that Pause checkbox item in the
pull-down menu.
But this stopped state is not that; rather, it
is a side effect the virtual machine definition changing
the boot device from the initial ISO device to the
primary storage volume.
Normally the Force Reset function will behave like
pressing the reset button on a real computer, just on
the virtual machine, not on the host system.
To start the vm rebooting in this situation, we left-click
on the Virtual Machine icon again but this time we
left-click on the Run item that drops down, and the
black screen o' life appears (but I'm showing it in
reversed video with the help of the GIMP).
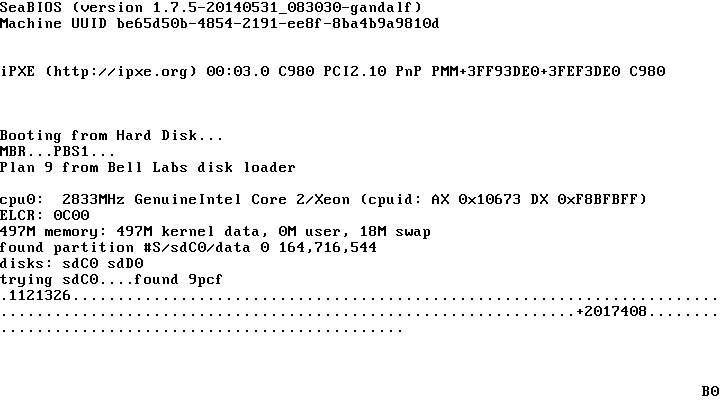
It should differ from the first boot fairly quickly
by processing the virtual hard drive instead of the
virtual CD-ROM.
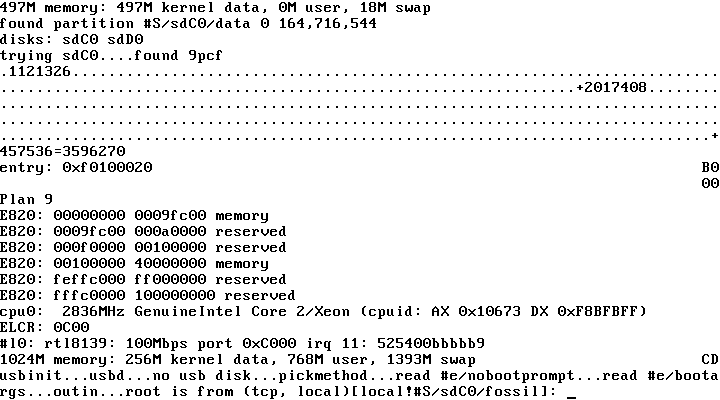
The first prompt is clearly different—it wants to
know what root filesystem to use.
We see it will accept a default that sets the device
and filesystem to load as the fossil sub-partition
of the local hard drive sdC0.
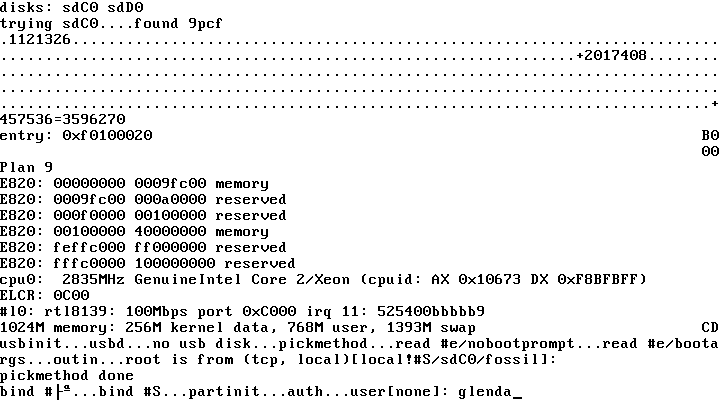
This is what we expected and want, so we Enter:
and get the next question, what user to use for
booting purposes; i.e., which user will "own"
this incarnation of the root filesystem.
For this standard system just installed, that
user is {glenda} (the name of the logo bunny),
so we type that in and Enter.
After a little more activity, the display ends up
looking something like this (hopefully no smaller
than 800x600):

We have arrived at a Plan 9 stand-alone
terminal system at your fingertips!
Start reading through this interactive tutorial
to learn how to work with the GUI (the window
shown in front of the others) if this is all new to you.
Then, if you want to take the time now to
go through the other tutorials, that is fine
(but if this is a 640x480 screen, the acme
tutorial should be deferred until you have
at least 800x600 for it to use).
If, however, you want to get this self-contained
system communicating with the outside world
first, you can defer that step and
proceed to the next section
to transform this platform into a networked,
multi-user, and amazingly distributed yet
highly secure participant in the Plan 9
paradigm.