|

|
Abstract
Provide a step-by-step explanation for converting a
non-networked, stand-alone Plan 9 configuration into
an Internetworking cpu and auth server suitable for
logins from other Plan 9 systems as well as UNIX
systems that support the drawterm package.
|
 Except where otherwise noted, content in this document
is licensed under the standard Creative Commons
Attribution–ShareAlike 4.0 International License.
Except where otherwise noted, content in this document
is licensed under the standard Creative Commons
Attribution–ShareAlike 4.0 International License.
Source code (scripts) are licensed under
GPLv2.
|
Virtual Plan 9 Cookbook — Section 4: Convert Terminal Into Server
This process will implement the changes discussed in
"Configuring a Standalone CPU Server"
at the
Bell Labs Wiki
but that paper is not really a step-by-step recipe.
Instead, this section provides that methodology by
capitalizing on the work of maht, the contributor
of the make_cpuauth rc script referenced at the end
of the paper.
However, that script required significant revision
and should not be used as it currently stands.
The updated version,
term2cpu
is contained in this cookbook's directory along with
a few related others.
Ideally these scripts would be shipped as part of the
ISO; instead, we need to install them into a Plan 9
system that has insufficient securitization and so
no active networking.
A vfat-formatted USB stick fulfills this medium of
transfer requirement without much convolution.
Before we get to that, we will finish the "Installation
Instructions" regarding the
"Changing the Screen Resolution"
and
"Setting Up Correct Timezone"
sections.
Click on the lines following to jump down to their content:
Subsection 4-1: A Quick Look at the Name Space
Step 4-1-1: Our First ls Command
Step 4-1-2: The / Directory
Step 4-1-3: The /root Directory
Step 4-1-4: The /n Directory
Step 4-1-5: Run the 9fat: Command
Subsection 4-2: Preliminary Reconfiguration
Step 4-2-1: Modify plan9.ini vgasize
Step 4-2-2: Modify /adm/timezone/local
Step 4-2-3: Reboot Prior to Major Reconfiguration
Subsection 4-3: Install Scripts From USB
Step 4-3-1: Prepare the USB-stick
Step 4-3-2: Enable Virtual USB Access
Step 4-3-3: Attach USB-stick to Plan 9 Server
Step 4-3-4: Copy USB Files to Plan 9 Server
Subsection 4-4: Run term2cpu to Reconfigure
Step 4-4-1: Set the Reconfiguration Parameters
Step 4-4-2: Reconfigure the Server
Step 4-4-3: Shut Down the Reconfigured Terminal
Subsection 4-5: Finish the Reconfiguration
Step 4-5-1: Boot Up the Server
Step 4-5-2: Set Up Access and New Account
Subsection 4-6: Connect Via Drawterm
Subsection 4-1: A Quick Look at the Name Space
After you have absorbed how to work with the rio GUI (as you
were directed at the conclusion of the preceding section),
delete all the open windows on the desktop and open a new
window as large as your GUI will allow.
It should look pretty much like this:

Before we run that "9fat:" command in the "Installation
Instructions", it would be good to better understand what
it will accomplish.
As an experienced GNU/Linux sysadmin, you understand the
"/" file as the mount point of the system's root
filesystem as specified in the GRUB configuration,
and that other filesystems can be mounted into mount points
within the hierarchy of the / tree, thus becoming logical
extensions of the root filesystem.
You are also aware that some mounted filesystems, like
/proc, aren't disk-resident at all—they are only
fabrications of the kernel that provide a simplified
interface between kernel space and user space.
In the universe of UNIX implementations, there is a single
file space for the entire system shared by all processes
within that system, and it is managed by the root users.
Plan 9, on the other hand, allows all processes to manage
their view of the file space (with some security and
integrity restrictions, of course).
This name space is established by the system for the user
when login occurs, much like the UNIX environment variables
are for UNIX users when they log in.
But the Plan 9 user will redefine the name space as needed,
and subordinate processes or process groups can modify
their name spaces independently of their ancestors'
name spaces; again, much like UNIX environment variables.
Do not overlook the all-encompassing role of the Plan 9 name
space since just about every interface within the system
involves reading from and writing to entities defined within
the name space—Plan 9 contains no ioctl definitions.
Yes, even when interacting with resources on remote
systems—a Plan 9 application usually has no idea
whether the resources it is interacting with are local or
remote, the interfaces are identical once the name space
has been modified to use the desired resources, and the
application may not be involved with that all; i.e., it
may be designed to just use what the name space already
contains.
By the way, the traditional UNIX access permissions
(wrxwrxwrx) are alive and well in Plan 9's name space,
thus they are expanded to control access to everything,
local and remote.
However, the UNIX concept of a superuser did not make the
cut—all Plan 9 users are subject to the access bits.
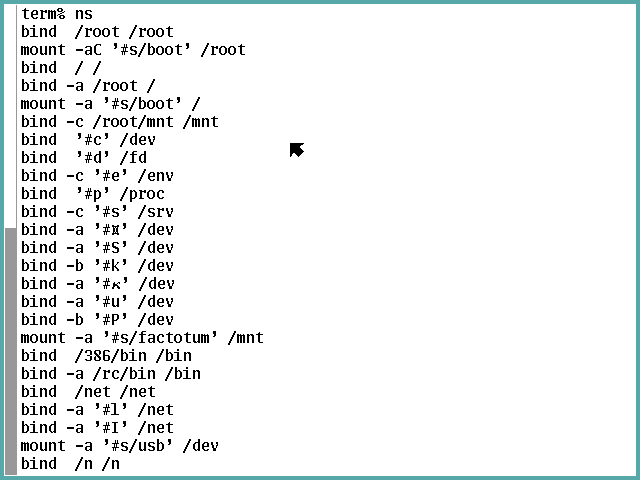
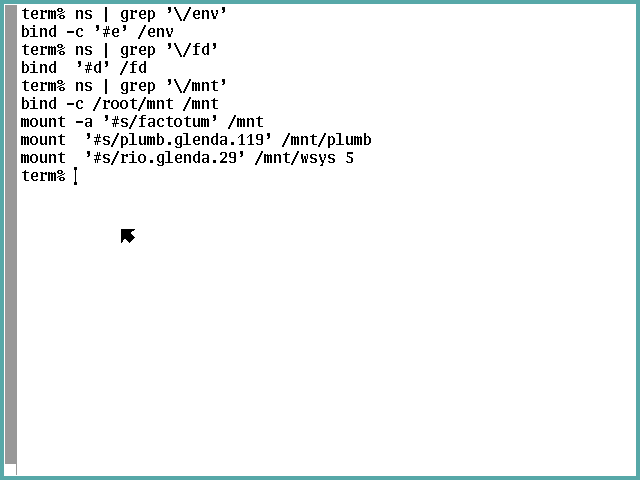
The "ns" command is used to display the name space somewhat
like the UNIX "df" command displays the organization of
mounted filesystems.
Without any arguments, it shows the commands needed to
reconstruct the current name space of the process, in the
order they need to be executed:
As this is a quick introduction, we will gloss over a lot
of important details to focus on the main concepts to get
in mind at this time.
The first main concept involves those bind and mount options
that initially don't look so different.
However, they are associated with a very non-UNIX concept
the Plan 9 developers call "union directories".
A union can be formed of two or more directories that will
then be used as alternative search paths.
The second main concept is those "#_" entities, which
denote kernel drivers that are documented in Section 3 of
the man pages.
The
intro(3)
page provides an overview of this class of widgets and a
"cat /dev/drivers" command will list the device codes of
which the system is aware.
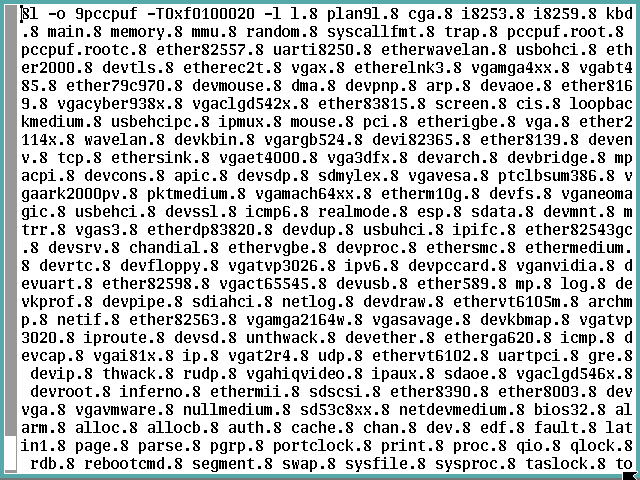
The following table lists all the non-introductory man pages
in section 3 in lexical order of their device codes and
includes the device code (with # prefix), UTF-8 in hex, a
link to its man page, and the title from the man page:
|
#$
|
x24
|
pnp(3)
|
Plug 'n' Play ISA and PCI Interfaces
|
|
#/
|
x2F
|
root(3)
|
the root file system [note "bind '#/'" is illegal—only
the kernel can access this driver directly]
|
|
#A
|
x41
|
audio(3)
|
SoundBlaster or ESS1688 audio controller
|
|
#B_
|
x42
|
bridge(3)
|
Ethernet bridge and IPv4 tunnel
|
|
#D
|
x44
|
ssl(3)
|
SSL record layer
|
|
#F[_]
|
x46
|
flash(3)
|
flash memory
|
|
#I_
|
x49
|
ip(3)
[aka esp, gre, icmp, icmpv6, ipmux, rudp, tcp, and udp]
|
network protocols over IP
|
|
#K
|
x4B
|
kprof(3)
|
kernel profiling
|
|
#L_
|
x4C
|
lpt(3)
|
parallel port interface for PC's
|
|
#M
|
x4D
|
mnt(3)
|
attach to 9P servers
|
|
#P
|
x50
|
apm(3)
|
Advanced Power Management 1.2 BIOS interface
|
|
#P
|
x50
|
arch(3)
|
architecture–specific information and control
|
|
#S
|
x53
|
sd(3)
|
storage device interface
|
|
#S
|
x53
|
sdahci(3)
|
AHCI (Advanced Host Controller Interface) SATA (Serial ATA) storage device drivers
|
|
#S
|
x53
|
sdaoe(3)
|
ATA–over–Ethernet (AoE) storage device interface
|
|
#X
|
x58
|
loopback(3)
|
network link simulation
|
|
#a
|
x61
|
tls(3)
|
TLS1 and SSL3 record layer
|
|
#c
|
x63
|
cons(3)
|
console, clocks, process/process group ids, user, null,
reboot, etc.
|
|
#d
|
x64
|
dup(3)
|
dups of open files
|
|
#e
|
x65
|
env(3)
|
environment variables
|
|
#f
|
x66
|
floppy(3)
|
floppy diskette interface
|
|
#g
|
x67
|
segment(3)
|
long lived memory segments
|
|
#i
|
x69
|
draw(3)
|
screen graphics
|
|
#k
|
x6B
|
fs(3)
|
file system devices
|
|
#l_
|
x6C
|
ether(3)
|
Ethernet device
|
|
#m
|
x6D
|
mouse(3)
[aka cursor]
|
kernel mouse interface
|
|
#p
|
x70
|
proc(3)
|
running processes
|
|
#r
|
x72
|
rtc(3)
|
real–time clock and non–volatile RAM
|
|
#s
|
x73
|
srv(3)
|
server registry
|
|
#t
|
x74
|
uart(3)
[aka eia]
|
serial communication control
|
|
#u
|
x75
|
usb(3)
|
USB Host Controller Interface
|
|
#v
|
x76
|
vga(3)
|
VGA controller device
|
|
#w
|
x77
|
wd(3)
|
hardware watchdog timer
|
|
#y
|
x79
|
i82365(3)
|
Personal Computer Memory Card Interface Association (PCMCIA) device
|
|
#|
|
x7C
|
pipe(3)
|
two–way interprocess communication
|
|
#¤
|
xC2A4
|
cap(3)
|
capabilities for setting the user id of processes
|
|
#æ
|
xC3A6
|
aoe(3)
|
ATA–over–Ethernet (AoE) interface
|
|
#Ι
|
xCE99
|
kbin(3)
|
external keyboard input
|
|
#κ
|
xCEBA
|
kbmap(3)
|
keyboard map
|
|
#
|
xE281B2
|
twsi(3)
|
two–wire serial interface (TWSI) and inter–integrated circuit (IC) interface
|
For now it is enough you are aware these things exist in Plan 9.
If you must understand more before continuing, read the "Name space"
subsection of the "Description" section of the
intro(2)
man page, all of
namespace(4),
namespace(6),
and
"The Use of Name Spaces in Plan 9" paper,
as well as other related links you encounter.
Step 4-1-1: Our First ls Command
Now run the following very familiar commands: "pwd ; ls -l":
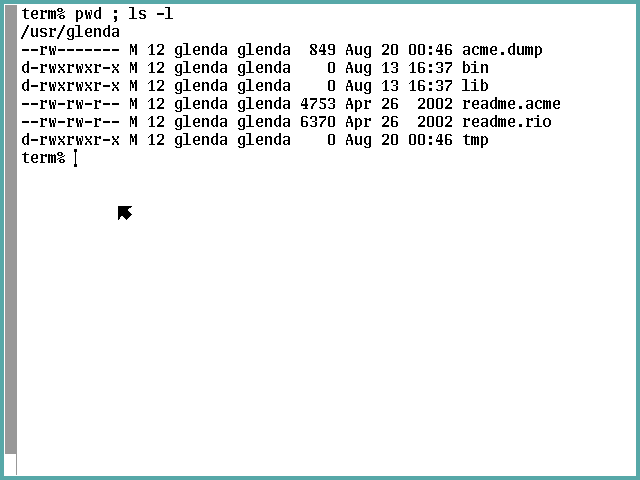
It is clearly easier to point out the differences than the
similarities to what you're used to seeing.
The file types (the first character of the first field)
are limited to the usual "d" and "-" meanings plus the new
"a": append-only file; i.e., not truncatable—no
symlinks, no block or char device mknod entities, no
FIFOs, etc.; just directories and two flavors of file.
There is a new second character inserted into the modes
field, which signifies the entity may be open by only
one process at a time ("l") or not ("-").
There are no other permission possibilities than "w",
"r", "x", and "-"—no sticky, setUID, setGID, or
immutable bits.
There is no hard links count, because there are no hard
links in Plan 9 (nor are there any "hidden" files that
the ls command can tell you about, although "." and ".."
are still there in the sense that they behave as expected
when walking a file path).
Instead of the major and minor device node columns for
only char and block files that you're used to, all entries
display the underlying device character and instance
identifier (the former can be looked up in that table
I provided a few full-screen scrolls back).
If you'd like, take a quick look at the
ls(1)
man page (it really is just one page).
Step 4-1-2: The / Directory
Glenda's home directory is kind of boring, so let's look
at something that ought to be more engaging: "ls -l /":
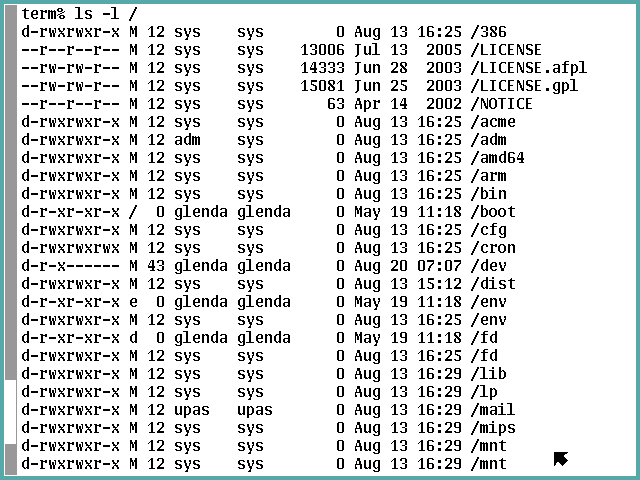
That /dev directory is downright startling, is it not?
We are clearly not in Kansas anymore, Toto.
There are two /env directories
("That's interesting..." notes Captain Sparrow)
and two /fd and /mnt directories, too.
Here's the second part plus the results of an "ls -ld /"
command since the first command did not display the /
directory itself (no dot files or an ls -a option to
show them):
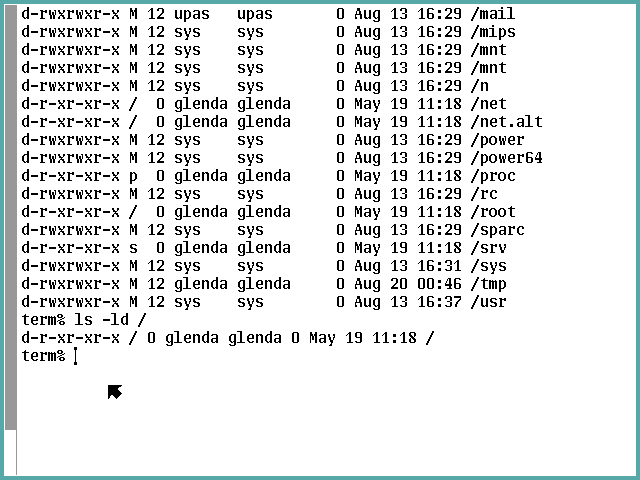
Glenda owns the root directory (both / and /root) but
cannot write to them?
We can explain the duplicate directories with the help
of some analysis of what the "ns" command tells us
about the name space we are examining:
and remembering what namespace(4) told us about /fd
and /mnt: "All empty unwritable directories, place
holders for mounted services and directories."
So even though ls(1) says nothing about it, it is
pretty clear the duplicate directories indicate the
presence of union directory instances.
Presumedly they are displayed in their search order,
and the ns output reveals which is to receive or
reject new entities via the "-c" flag.
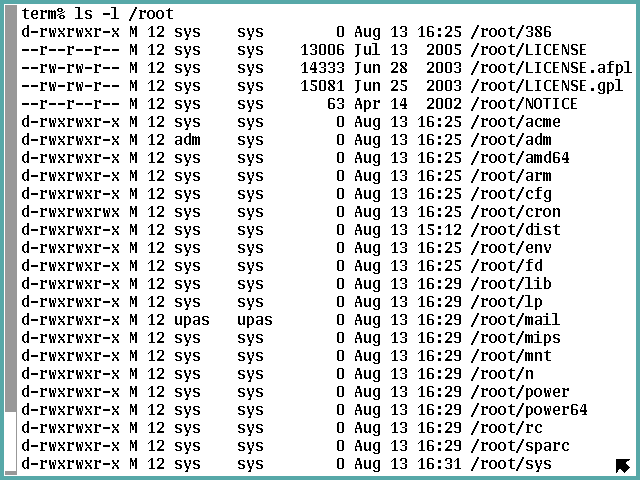
Step 4-1-3: The /root Directory
To answer the / and /root directories we need to
look at the /root directory using a "ls -l /root"
command:
and:
The /root directory appears to be the actual system
root directory in the UNIX sense of the concept.
In Plan 9 its condition is massaged into a custom
view for each process group, each having its own "/"
definition.
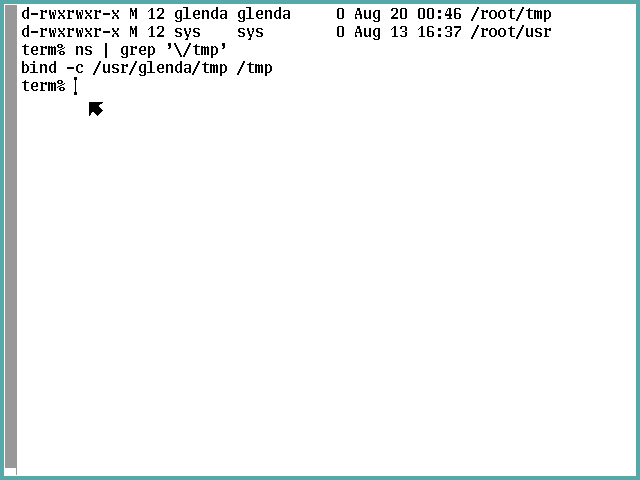
We see this with the /tmp directory that is not a
union directory but is replaced (just as a UNIX
directory used as a mount point becomes hidden).
The ns grep for /tmp shows that Glenda's tmp (in
/usr/glenda) is where /tmp files are served from.
We're almost ready for that "9fat:" command.
Step 4-1-4: The /n Directory
Let's look at directory namespace(4) says is
"A directory containing mount points for file trees
imported from remote systems" via an "ls -l /n"
command (I guess the "n" stands for network):
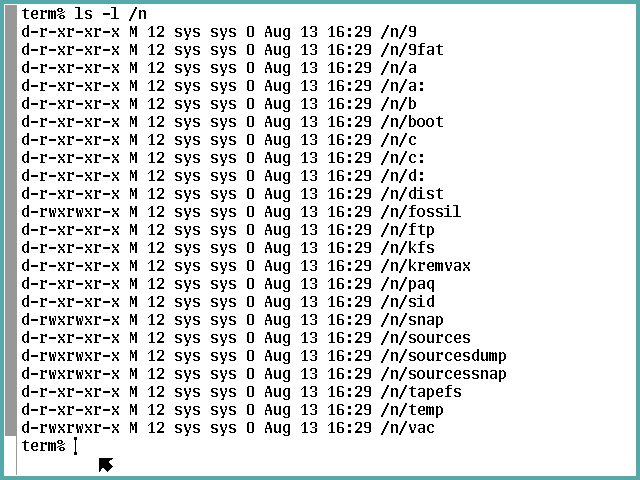
These do appear to be mount points for non-root
partitions Bill Gates would love as well as some
he probably would not.
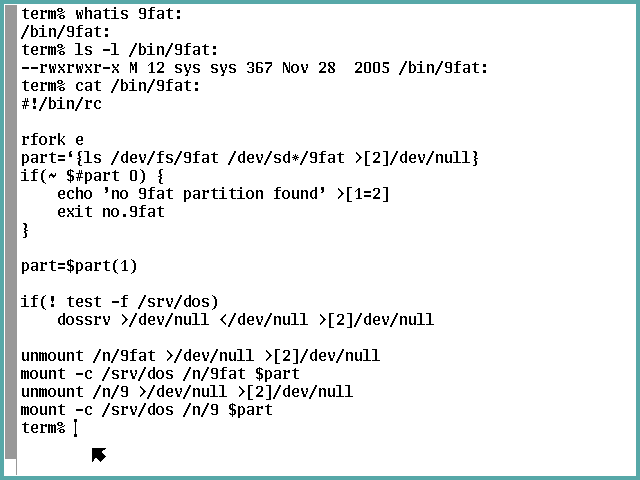
Step 4-1-5: Run the 9fat: Command
So we need to run the "9fat:" command according to
the "Installation Instructions", eh?
There isn't a man page for that.
The rc shell's whatis builtin command says it's
external to the
rc(1)
shell (and you really want to make some time to
study that man document—rc is not sh nor bash).
So we invoke an "ls -l /bin/9fat:" command, see it's
small, and just issue a "cat /bin/9fat:" command to
print the whole thing:
I do hope you are now ready for an exercise:
figure out what this script will do before you tell
it to (consider this an opportunity to study that
rc manual as well as
"Rc — The Plan 9 Shell",
its associated paper).
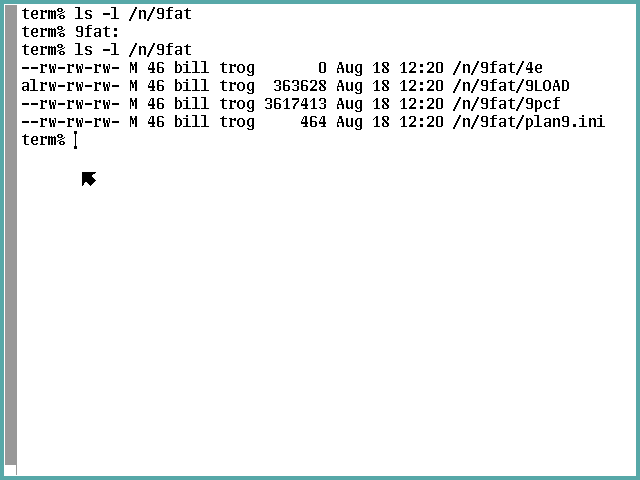
Then run the command and check its outcome.
My verification is to look at /n/9fat before and
after running 9fat: to demonstrate the mount was
successful:
Subsection 4-2: Preliminary Reconfiguration
Step 4-2-1: Modify plan9.ini vgasize
We should be able to disregard monitor redefinition
because we are using a virtual VGA monitor for
which the "vesa" specification should just work.
If you're up for using sam, you won't need to do
exactly what I document here using ed.
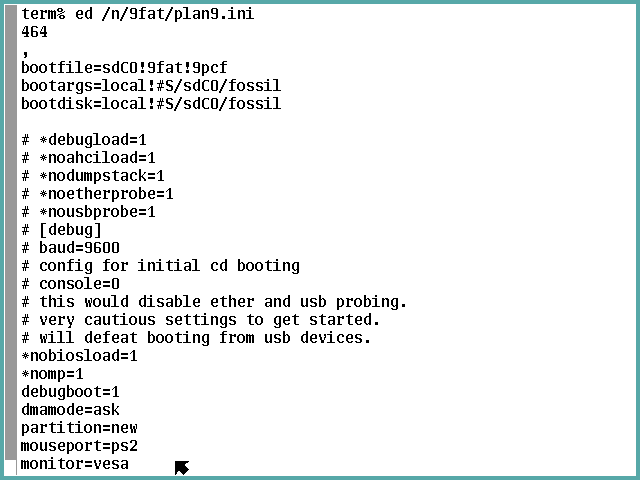
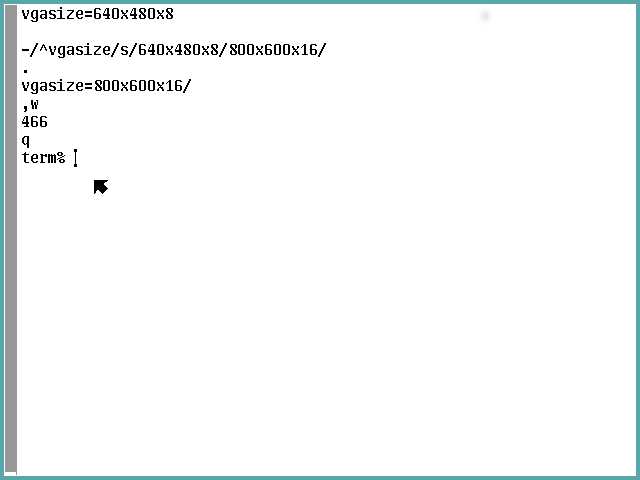
After launching an "ed /n/9fat/plan9.ini" command
and seeing it loaded the expected number of bytes
into the ed buffer, use a "," command to display
all lines in the buffer:
and:
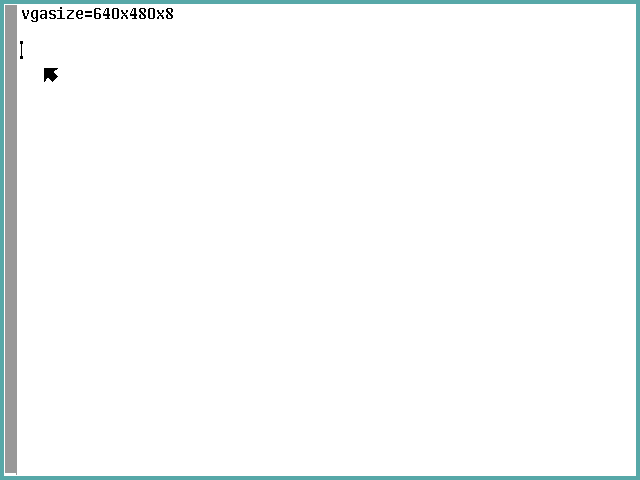
We see the line to change is next to last,
so we could target $-1, but instead I'll
demonstrate targeting using a backwards match:
"-/^vgasize/s/640x480x8/800x600x16/"
following up with "." to show the change,
",w" to update the file, and "q" to quit ed.
Step 4-2-2: Modify /adm/timezone/local
The stand-alone terminal ISO does not permit
logging on as the adm user, so we cannot do as
the "Installation Instructions" instruct.
However, glenda can authorize glenda to access
the namespace as though the user is adm (I told
you the security of this system out of the box
isn't ready for the Internet).
The
con(1)
command and the
fossilcons(8)
server man pages explain the magic we are about
to invoke to empower glenda to act as adm.
First we launch a session with the fossil console
by launching a "con -l /srv/fscons" command which
encourages us to continue with a prompt (sometimes
it is the party in need of encouragement via an
Enter keystroke).
Then we instruct it to make the change via a
"uname adm +glenda" subcommand, which it indicates
was not a problem by giving us another prompt.
All that remains now it is say goodbye by escaping
the session dialog through a Ctrl-\ key combo,
then a lowercase "q", and an Enter keypress.
Now we need to see what our time zone options are,
and we'll just see what we have to work with by an
"lc /adm/timezone" command:
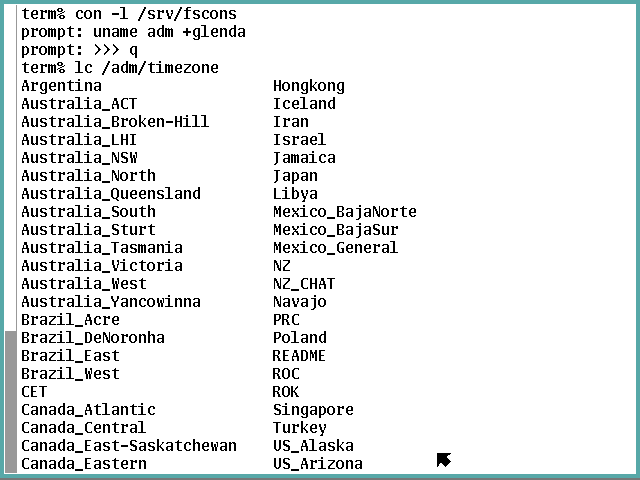
and
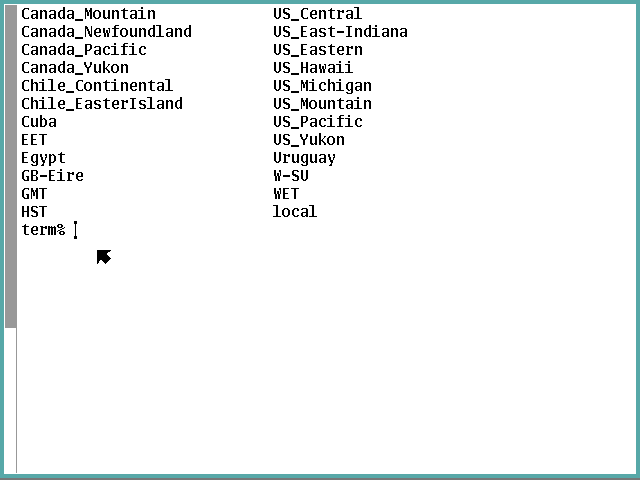
Note that local and README are not good choices here.
For me, US_Eastern is the one, but you choose whatever
works in your situation (refer to the "Installation
Instructions" if you need to roll your own).
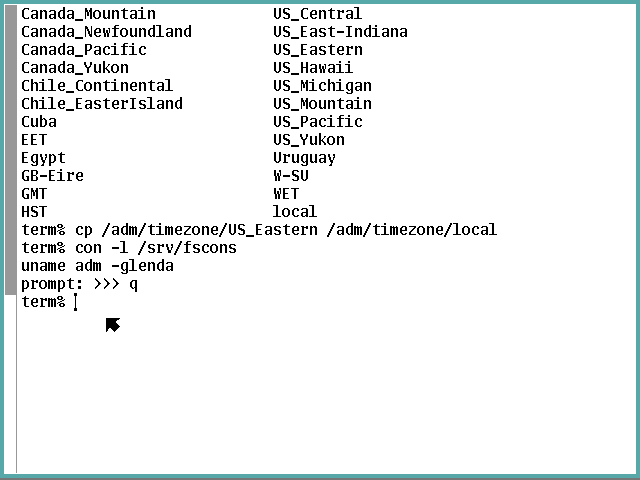
We make our choice the local default by running a
"cp /adm/timezone/US_Eastern /adm/timezone/local"
command or its ilk, then (if you're like me), we take
away glenda's new superpower on general principle:
Step 4-2-3: Reboot Prior to Major Reconfiguration
Our virtual machine environment seems to require
the vm to be forced off for Plan 9 to be able to
use see some types of reconfiguration when
rebooting, so we modify the procedure documented in
"Installation Instructions" under the "Shut Down"
heading.
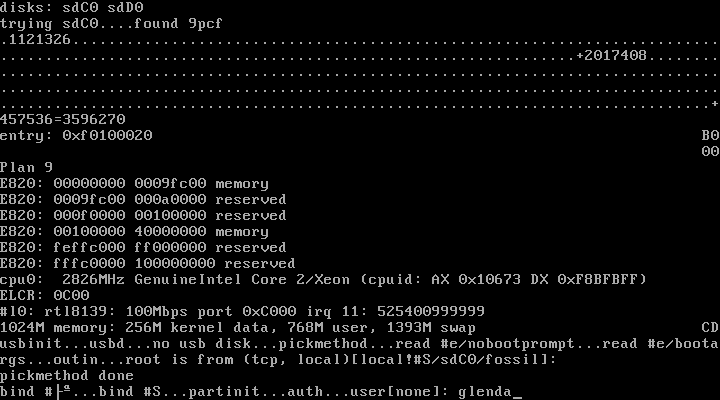
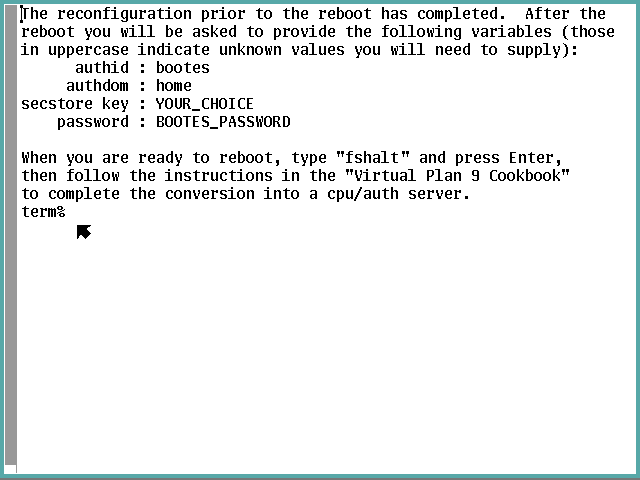
We command "fshalt" and let the system
quiesce to the following point:

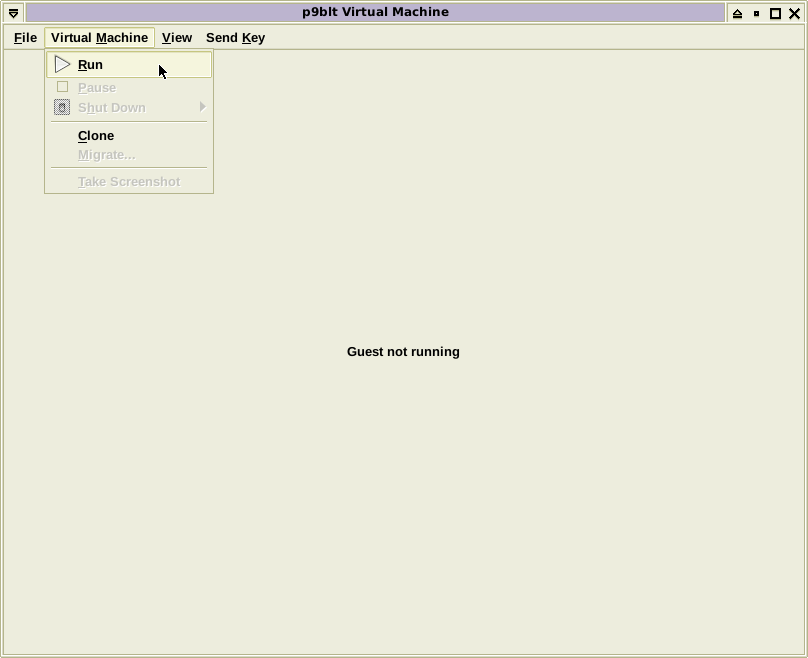
Now we ensure we have the XFCE pointer, then
left-click on the Virtual Machine item in the menu
bar, mouse-over the Shut Down item that drops down,
and left-click on the Force Off item that pops up,
then left-click on the Yes icon in the lower left of
confirmation dialog that pops up.
This destroys the instance of the vm and displays
the status window below.
Now we left-click of the Virtual Machine item in the
menu bar once more, but this time we left-click on
the Run item that drops down:
This creates a new instance of the vm and starts it
booting.
Respond to the root prompt appropriately (the default
should still be correct), and specify "glenda" as the
user again.
We should see Plan 9 has customed the windows to make
better use of the available pixels if we expanded
vgasize—here's 800x600 (but the cookbook will
continue along in 640x480 to simplify screenshot
handling):

Now we leave the "Installation Instructions" document
and begin working through
"Configuring a Standalone CPU Server" paper
as promised at the beginning of this section.
Subsection 4-3: Install Scripts From USB
Step 4-3-1: Prepare the USB-stick
There are four text files you need to copy into a
directory of a vfat USB-stick using the p9host
system:
term2cpu
is the main sourcable rc script that reconfigures
the system,
cpu2term
is a just-in-case sourcable rc script that restores
most of the changes made by the term2cpu script,
get_ipv4conf
is an awk script that returns ipconfig parameters
from (1) IPv4 address and (2) CIDR or netmask
arguments, and
env
is an executable rc script that displays environment
variable information in many formats.
I expect you do not need to be told how to prepare
this media, but if that is not the case in your case,
Google is your friend.
Step 4-3-2: Enable Virtual USB Access
In order to attach a USB device to a virtual machine,
the libvirt-qemu user needs to enjoy the same access
to the device root does.
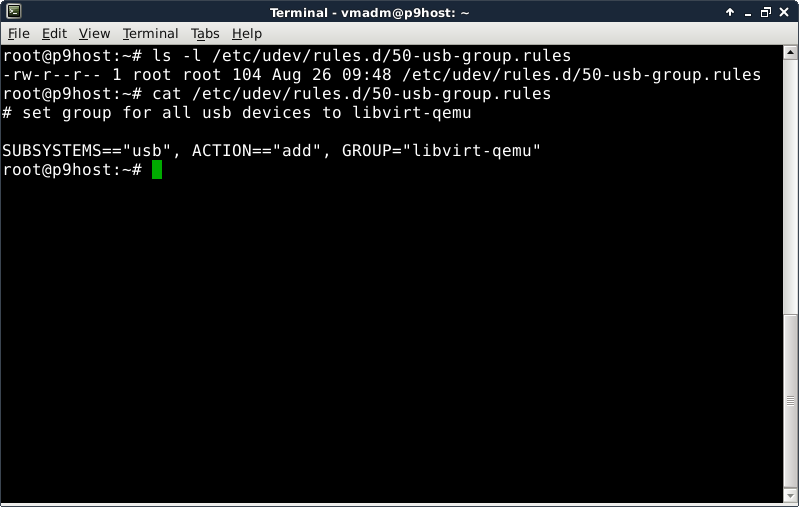
The precise approach approach to use is up to you.
What I did was add a rule to udev to associate any
USB device with the libvirt-qemu group:
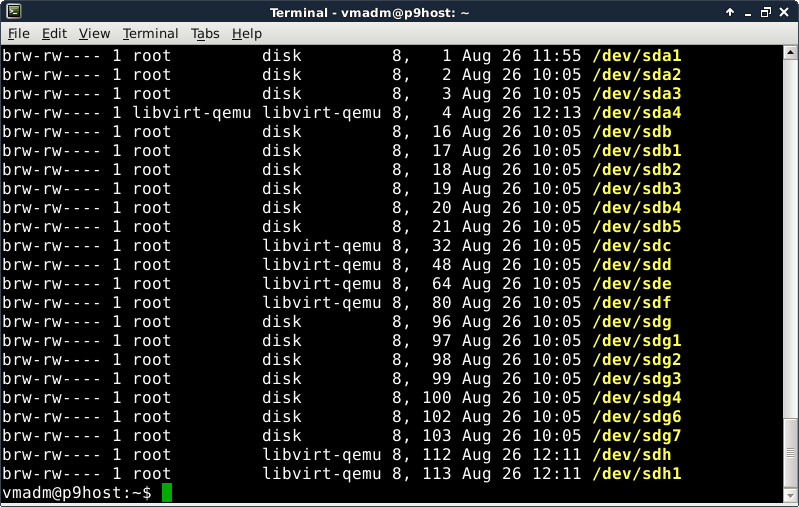
Once that went into effect, the p9host's sd* devices
were affected (sdh is the vfat drive I copied the
files to, and sda4 is not affected by this rule):
Step 4-3-3: Attach USB-stick to Plan 9 Server
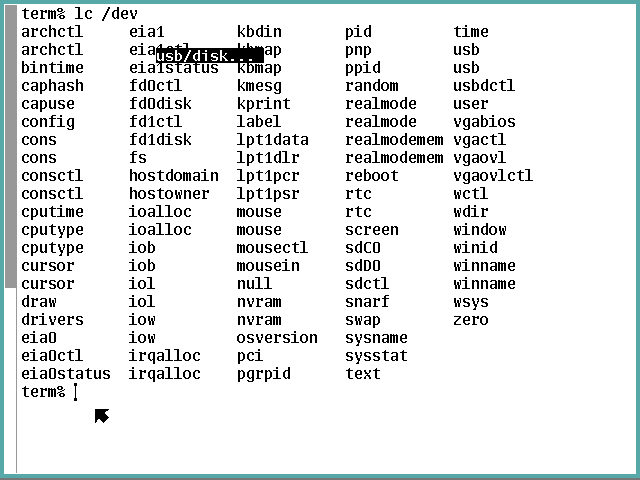
Back in the glenda session we look at the /dev
directory using an "lc /dev" command and see only
the hard drive (sdC0) and ISO image (sdD0) storage
devices—the virtual machine does not know the
USB-stick exists.

This procedure will transfer use of the USB-stick
from the Sid host to the Plan 9 vm.
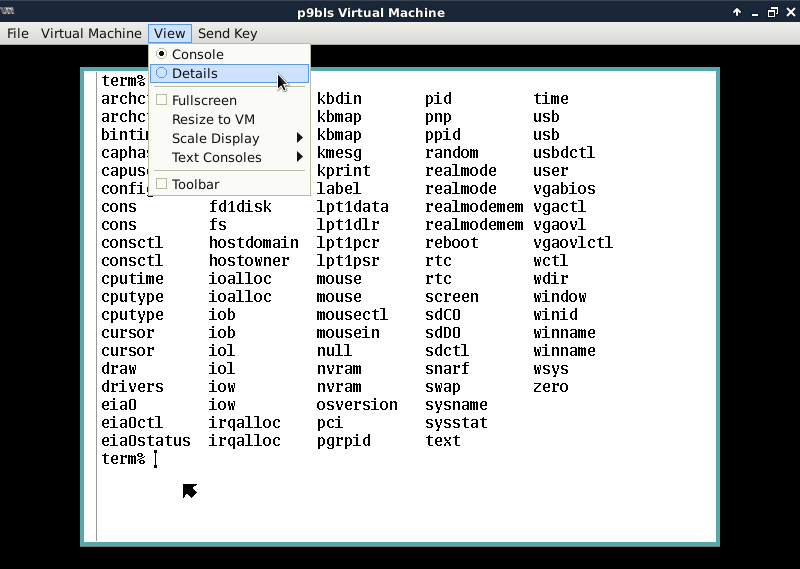
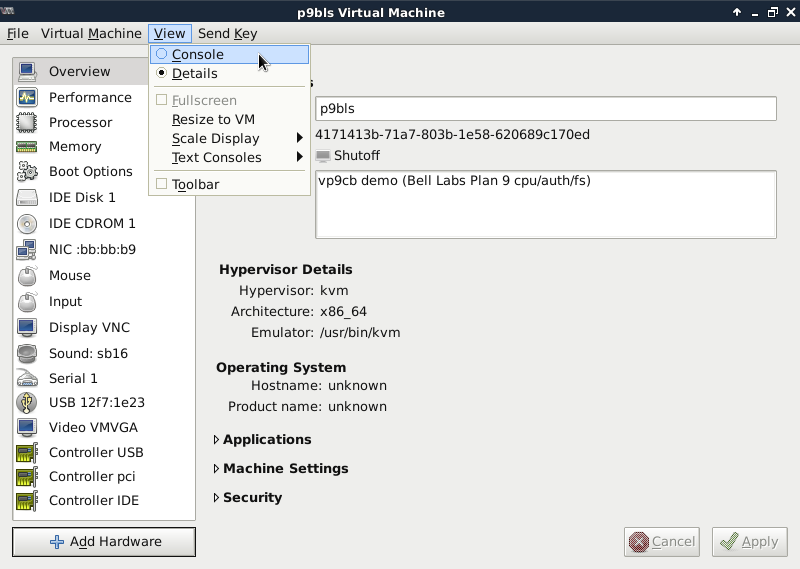
We begin by left-clicking on the View item on the
menu bar, then left clicking on the Details radio
button that drops down to switch the screen from
the console to the vm control panel, like so:
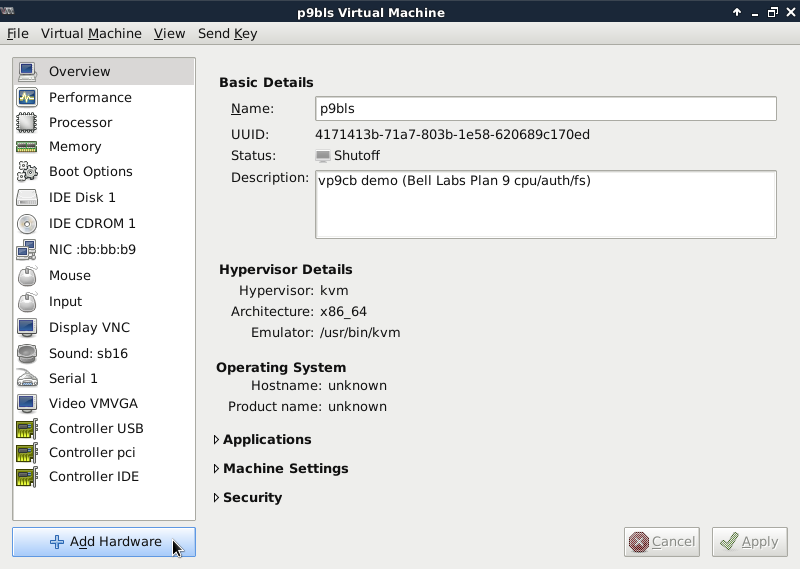
In the Overview panel, we left-click on the Add
Hardware icon in the lower left corner:
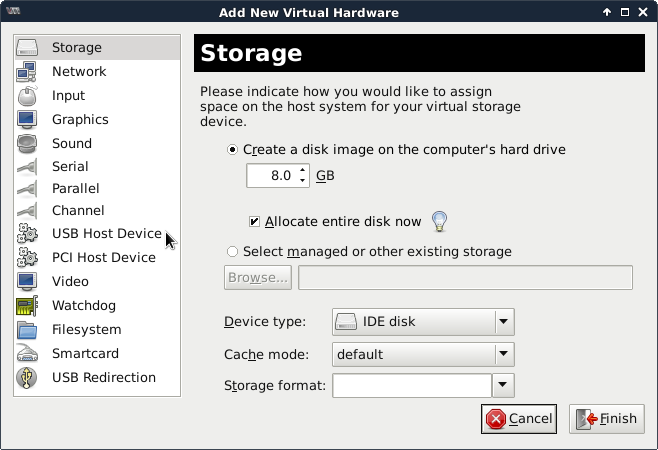
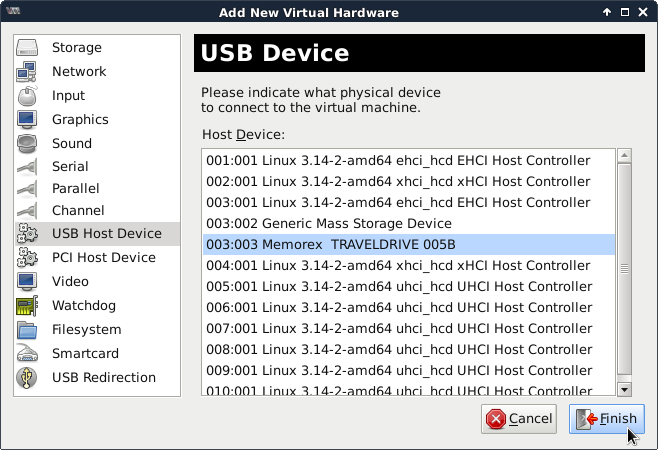
Now we left-click on the USB Host Device item
in the column on the left:
We find the item describing the USB-stick and left-click
on it to highlight it:
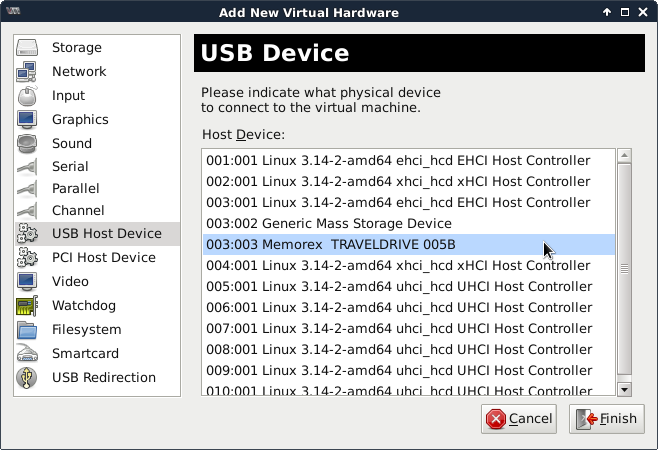
then left-click on the Finish icon in the lower right
corner:
which returns us to the Overview panel.
Notice there is a new device in the form
"USB hhhh:hhhh" listed in the left column.
Lastly we left-click on the View item in the menu bar
again but then left-click on the Console radio button
that drops down to return to the virtual machine's
console:
Do you see the change?
That reverse-video pop-up message that notifies us
Plan 9 has noticed the attachment?
If you don't see it on your display, you'll need to
troubleshoot the failure to process the attachment.
When we know Plan 9 is now aware of the USB-stick,
we issue the "lc /dev" command again to see what its
file name is:
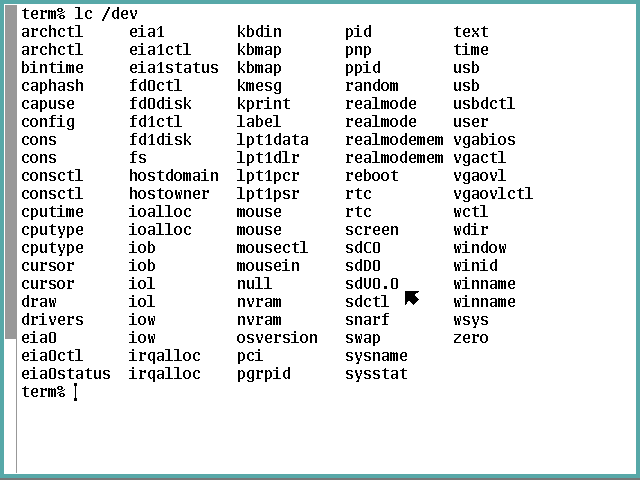
So the new kid on the block is named "sdU0.0".
Let's take another look at what p9host sees:
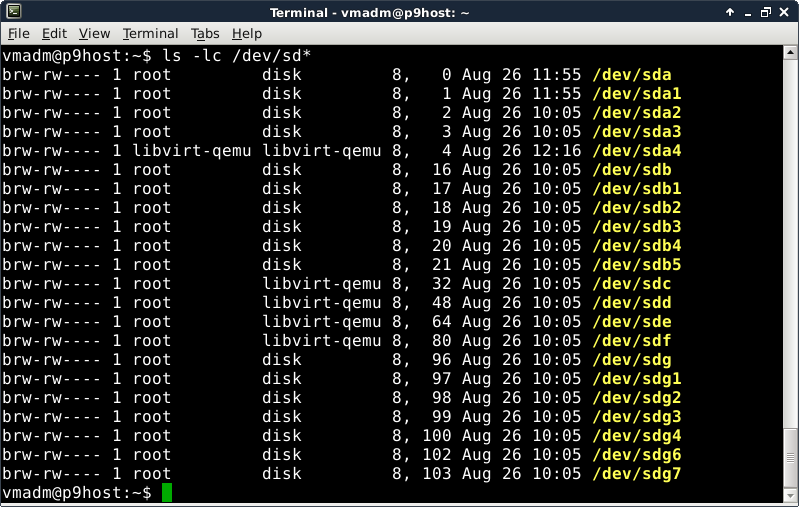
Your block devices for your USB-stick should have gone
to the same place my sdh and sdh1 nodes have gone.
Step 4-3-4: Copy USB Files to Plan 9 Server
We need to make that directory of text files available
to Plan 9 by mounting sdU0.0 as a vfat filesys.
We do that, according to the
usb(4)
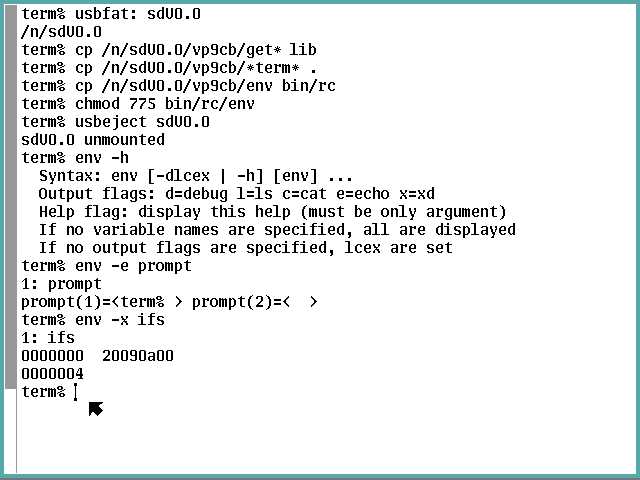
man page, by running a "usbfat: sdU0.0" command, which
tells us where to find the USB-stick's root directory.
Now we can compose the commands to copy the text files
where they need to be installed within /usr/glenda and
also set the executable flags for bin/rc/env while we're
at it, then dismiss the the USB-stick via a "usbeject
sdU0.0" command (detaching the stick from the vm is left
as an exercise for you (hint: look for the Remove icon
in the panel for the USB-stick device).
Now let's check our work with a little tutorial about
Plan 9 environment variables.
If we issue the command "env -h" and all is well, the
env script we installed should display the script's
help information.
If so, then you can understand what a "env -e prompt"
command should do: display the value of the prompt
environment variable using the echo command.
What that displays is the fact that prompt is a list of
two elements containing some white space, a blank for
(1) and a tab for (2), but you can't tell that from
that display.
The "x" display can by invoking
xd(1)
to show the value(s) in hexadecimal, as we see in the
"env -x ifs" results, showing the field separator
variable consists of the blank (20), tab (09), and
newline (0a) values, terminated by a null byte (which
indicates ifs is a list variable with only one element:
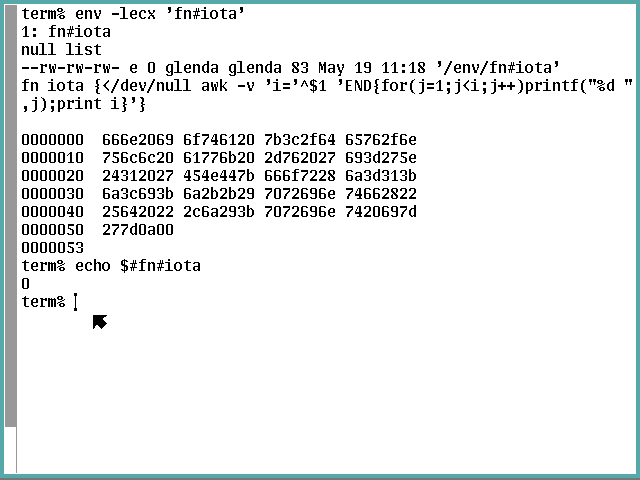
Now let's get everything env will give us about the
fn#iota variable.
Because, in this context, a naked sharp would be
interpreted as a comment-starter by rc, the variable
name must be escaped by enclosing it within
apostrophes (there is no other escape mechanism rc
supports).
The echo display only says "null list" because, as the
"echo $#fx#iota" command following shows, the list
contains zero elements, and echo doesn't deal with
empty lists well (notice the sharps don't need to be
escaped in this context).
The ls display shows the variable is indeed a file
backed by the #e driver and certainly does not hold
zero bytes (what's up with the world-writable
attribute?).
The cat display shows the actual function that was
defined in the env command and persists after it
ends (which is why the following echo command has
something to work with).
To unset a Plan 9 variable, use the rm command on
its /env directory entry.
We launch the heavy lifting reconfiguration script
by issuing a "rc term2cpu" command.
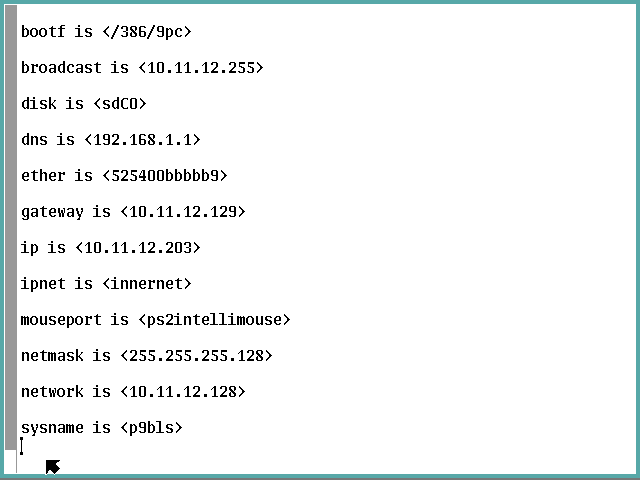
Step 4-4-1: Set the Reconfiguration Parameters
We are immediately asked the first of six questions.
Answer this with the host name you have defined in your
DNS zone for this cpu/auth server.
Answer the second question with the domain name in which
you have defined this cpu/auth server.
Answer the third question with the name you wish to use
in the ipnet entry in the /lib/ndb/local network database
for the IPv4 subnet to which you have connected this
cpu/auth server (this is Plan 9 internal use, not a
concern of DNS).
Answer the fourth question with the IPv4 address of the
primary DNS server this cpu/auth server is to query (in
dot-quad format; i.e, a.b.c.d where a, b, c, and d are
unsigned decimal numbers between 0 and 255 inclusive).
Answer the fifth question with the IPv4 address of this
cpu/auth server (in dot-quad format).
Answer the sixth question with either the CIDR (number of
network bits in the previous IPv4 address, which must be
between 1 and 31 inclusive) or the netmask associated
with the previous IPv4 address (in dot-quad format).
Notice the message(s) before the blank line and deal with
any concerns they mention in the new phase of the parameter
definition process: final answers.

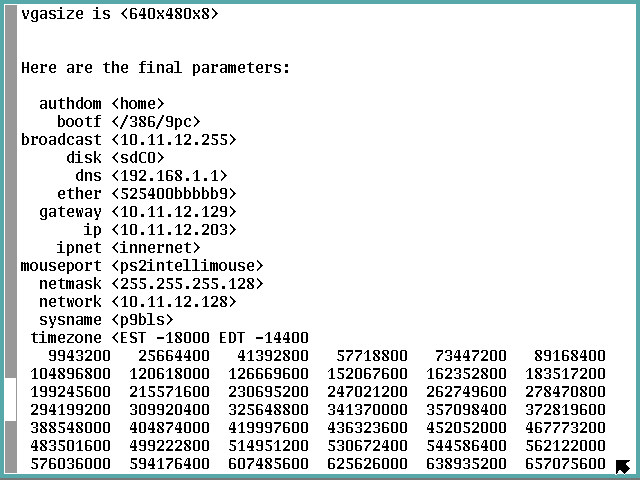
As the screen says, you now have the opportunity to change
what you already provided (perhaps in error) as well as
everything else needed that has been surmised by the script.
You can keep changing a variable if necessary up to the
time you just press the Enter key.
After that point you have to interrupt the script via the
Ctrl-\ key combo and rerun the "rc term2cpu" command to get
it right.
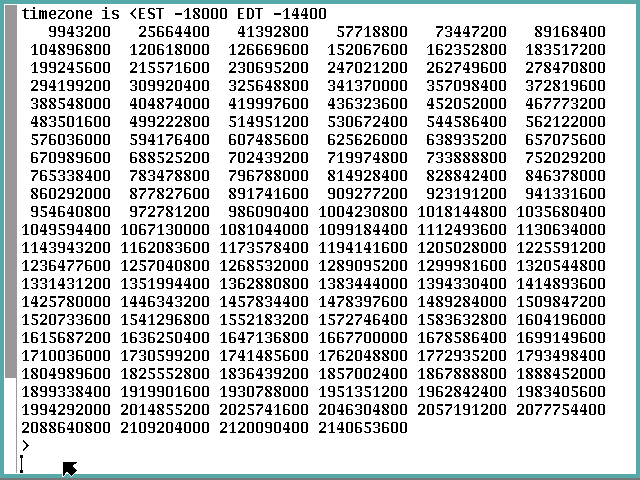
Notice the timezone variable is the actual entry you put
in the /adm/timezone/local file, not the name of the file.
If you want to change it, you'll have to interrupt the
script and change the timezone again before rerunning the
script.
After dealing with the vgasize variable, the final answers
are displayed.
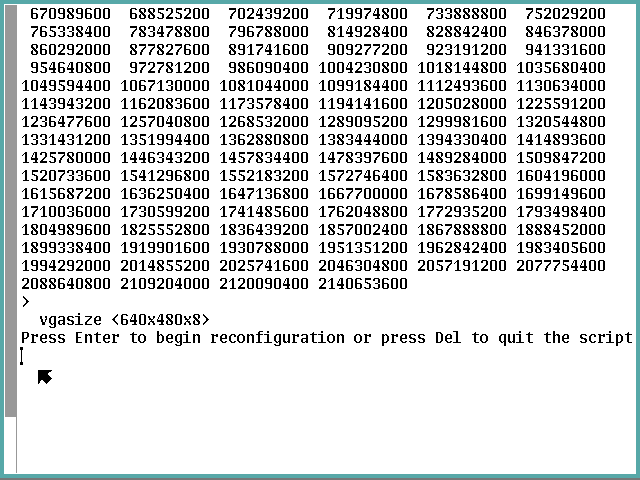
This is your last chance to prevent reconfiguration using
this set of parameters, so look closely and be sure you
are satisfied with the set.
If you have not read past this point before you press the
Enter key, don't press it yet!
Read on first and be certain what the unmodified script
will do is what is right for your project, and if it is
not, press the Del key and edit the script so it will do
what is needed instead.
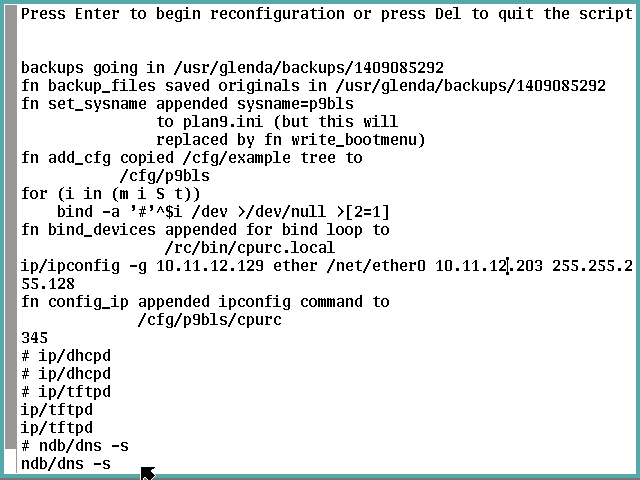
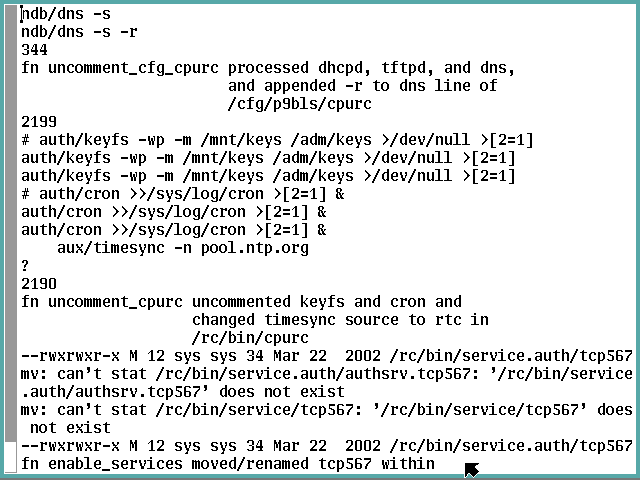
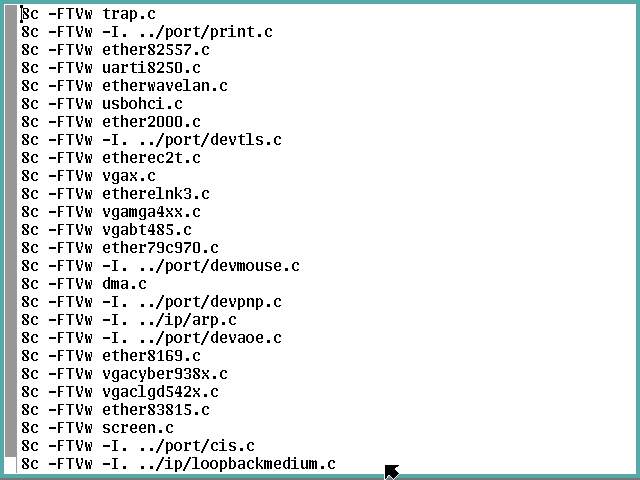
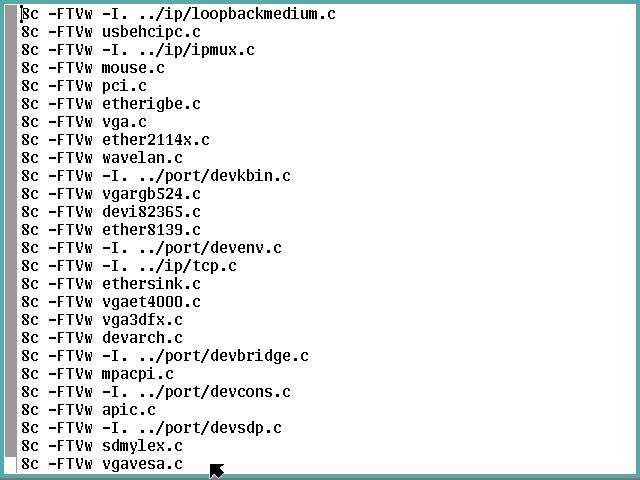
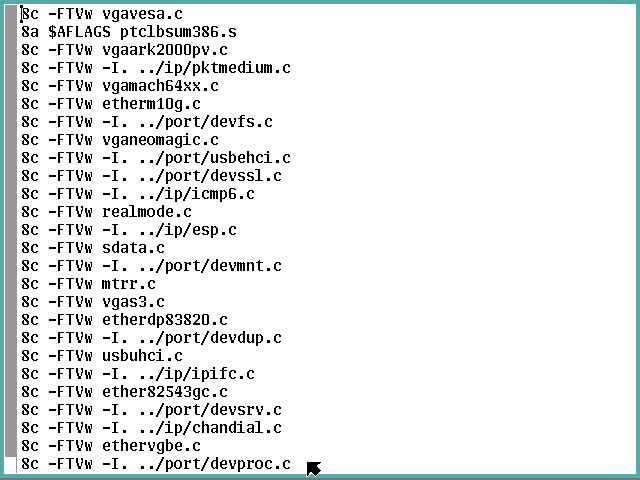
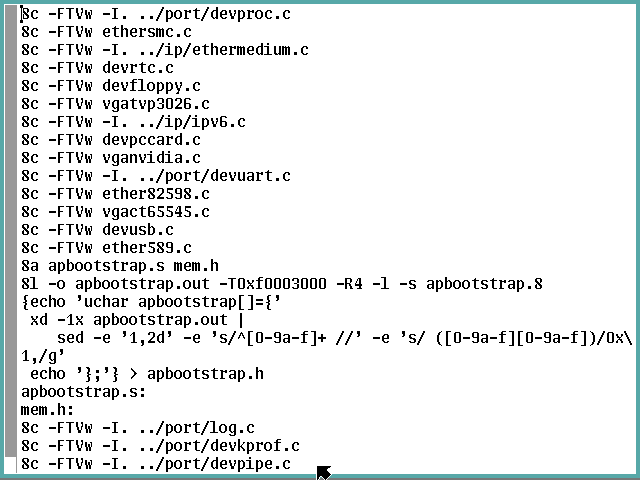
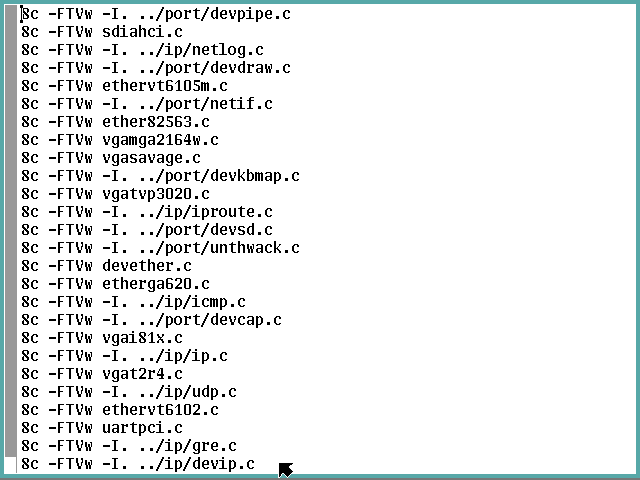
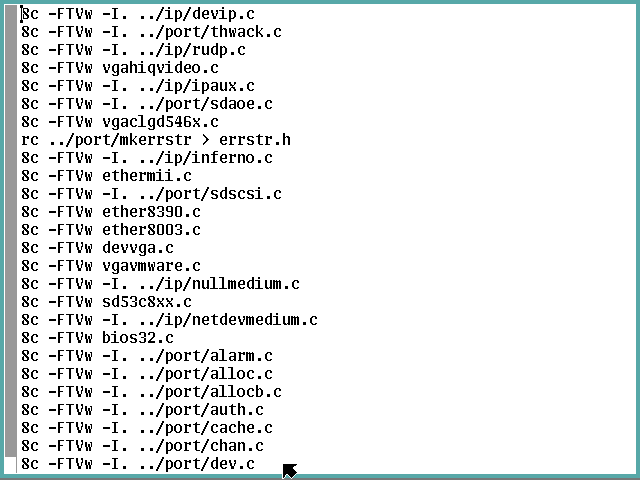
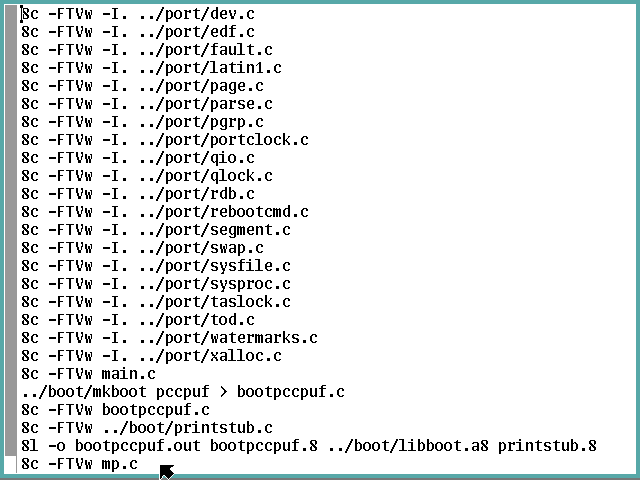
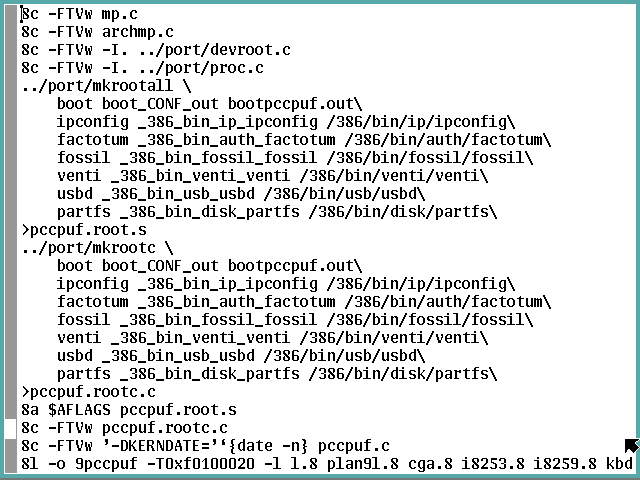
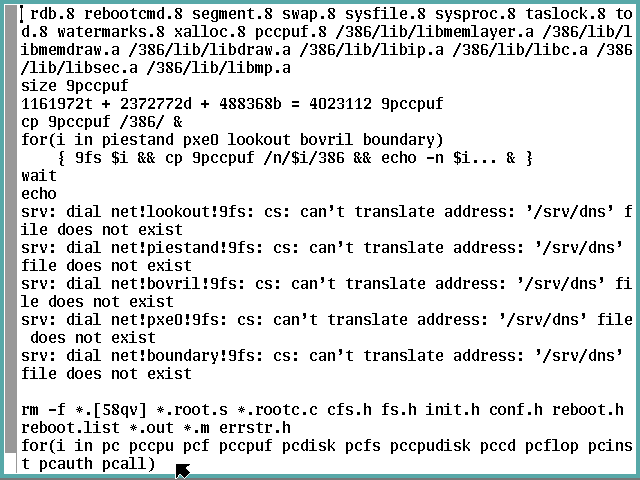
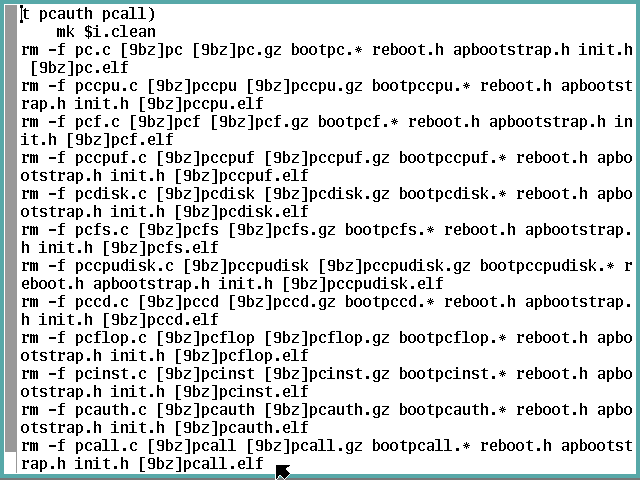
Now it begins.
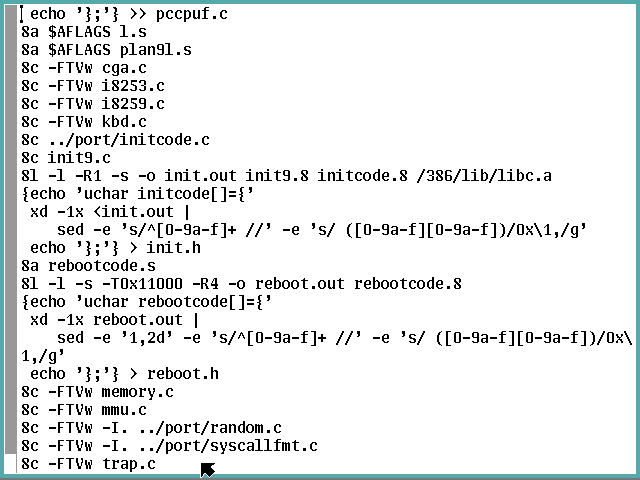
These screen shots are provided to help you determine if
you need to modify the term2cpu script before you let it
reconfigure the stand-alone terminal.
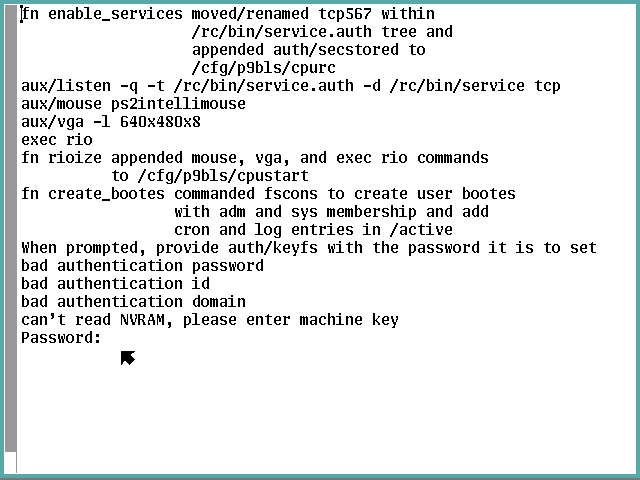
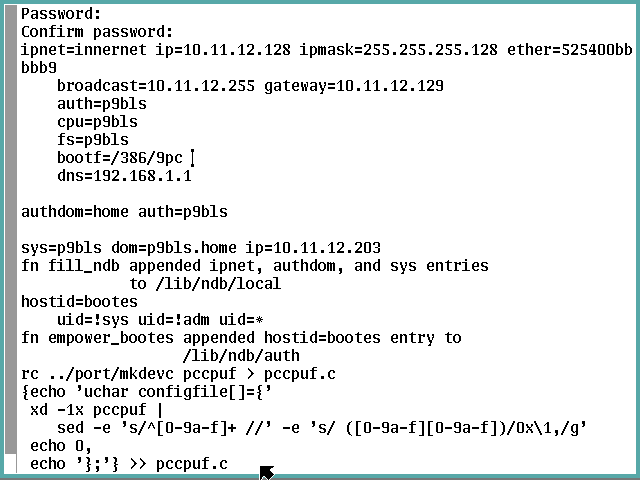
There is only one place where further input is requested,
to say twice what password to set for the NVRAM machine
key (which are not echoed to the screen).
These screenshots can also help identify any deviations
from what the cookbook expects to happen with what you
experience.
This commentary will resume when the script has ended.

It is finished.
Before running that "fshalt" you have this opportunity
to tweak things first.
When ready to proceed, run that command and let the
system quiesce.
Subsection 4-5: Finish the Reconfiguration
Again we virtually cycle the power to the virtual
machine using the Force Off / Run method of shutting
down.
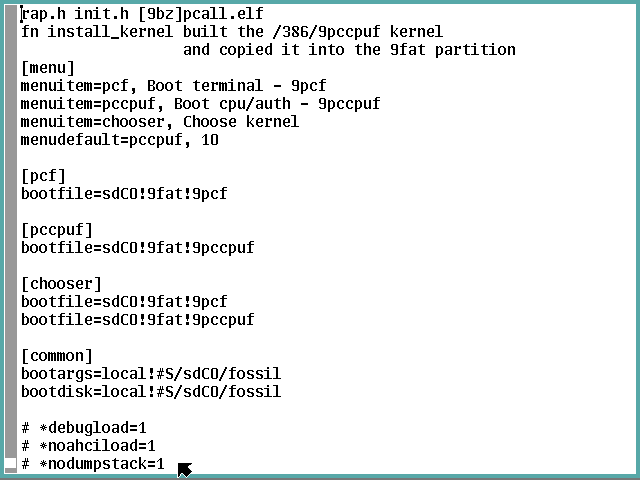
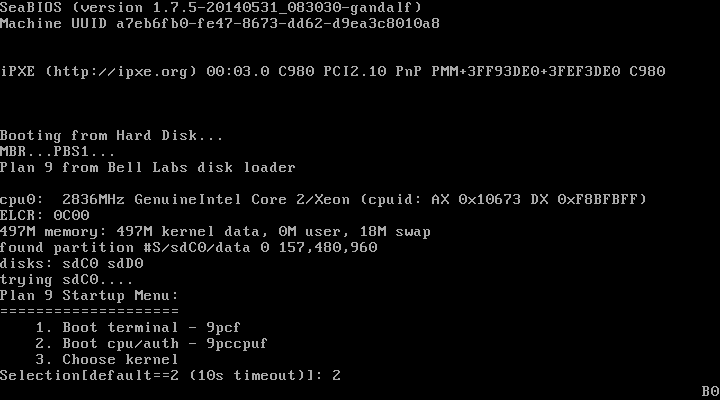
Step 4-5-1: Boot Up the Server
During the boot up, the new menu will ask which kernel,
and we select the one we just built via the "2" option.
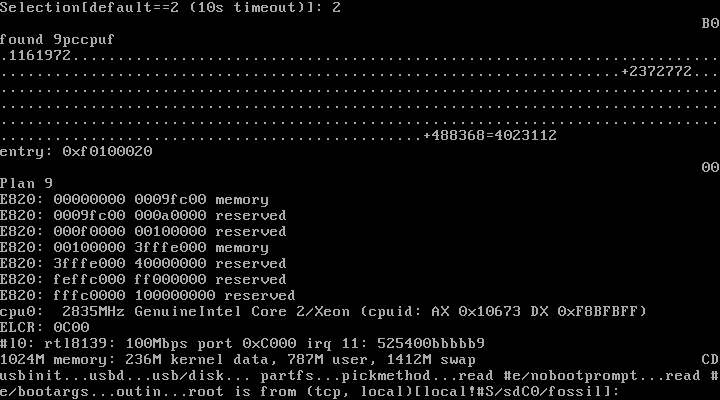
Notice you have ten seconds to respond to this prompt.
Ensure the response is "local!#S/sdC0/fossil", and
override the default if necessary:
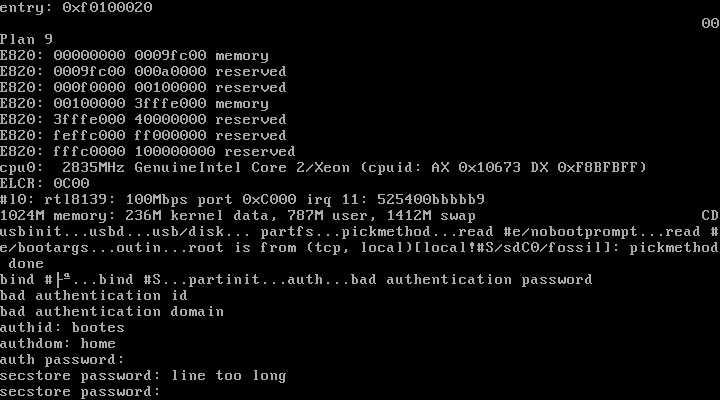
Now we provide the NMRAM reconfiguration information.
Notice the secstore password is limited to 12 characters.
Step 4-5-2: Set Up Access and New Account
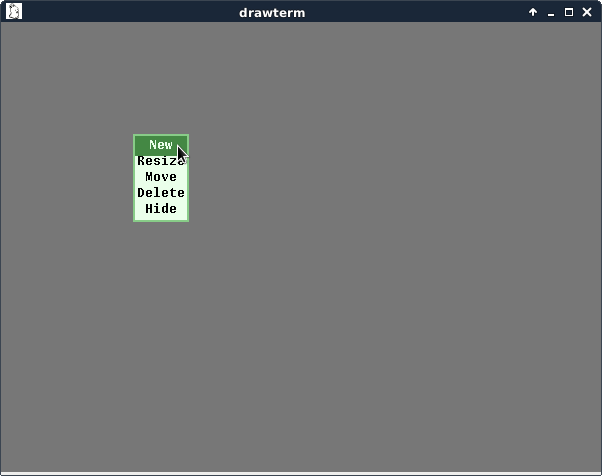
The grey rio background should appear.

Right-click select New and draw a new full-screen
window:

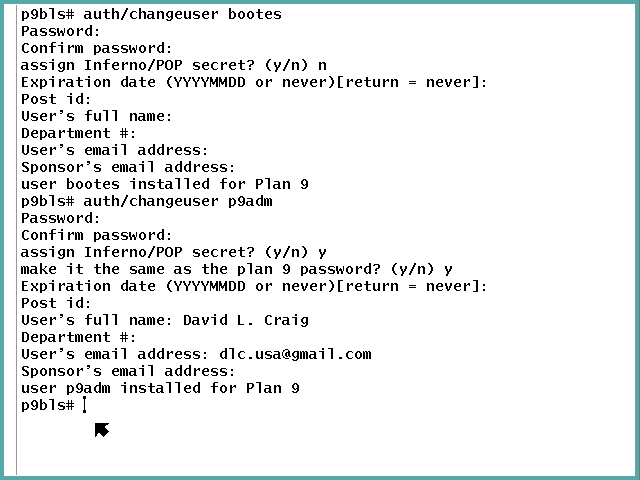
Run an "auth/changeuser bootes" command to incorporate
bootes into the auth server.
Make certain this password is identical to what you
specified for bootes during the NVRAM reinitialization.
Besides 'n' for the Inferno/POP prompt, we only press
Enter for all the other prompts.
Now run an "auth/changeuser" command for the
administrative account you want, changing my "p9adm"
user name to whatever you wish.
This time reply 'y' to the Inferno/POP prompt and use
the same password or another according to your project's
requirements.
Use your real name and email for this account so folks
can find you if they need to.
bootes into the auth server.
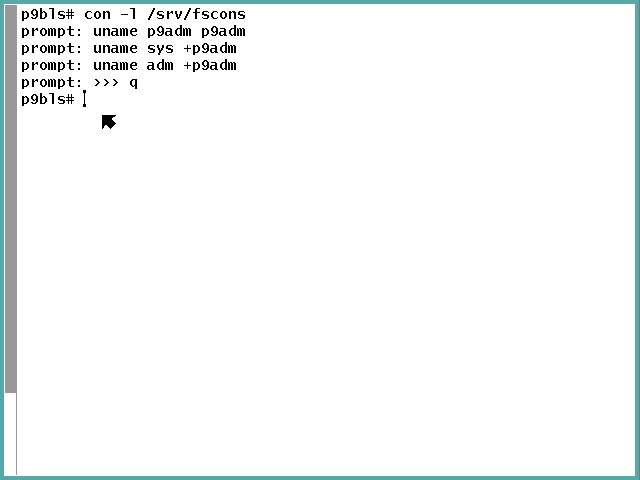
Lastly, modify the fossil access database to know
your admin user and to have sys and adm rights.
window:
Subsection 4-6: Connect Via Drawterm
Here comes the acid test: accessing the server
remotely.
In the p9host user account under Sid, run the
"drawterm -a p9host.home -c p9host.home -s p9host.home
-u p9adm &" command substituting your particulars
for mine:

This window should pop up with the password prompt.
If so, reply with the account's password, and you
should get a prompt.
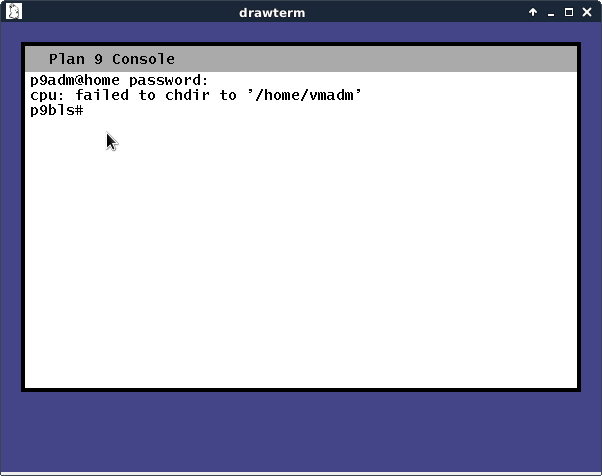
Notice this is not a rio window—there is no
pointer or mouse interaction.
Also the home directory does not exist.
We fix all this by running the "/sys/lib/newuser"
command when a new user logs in the first time.
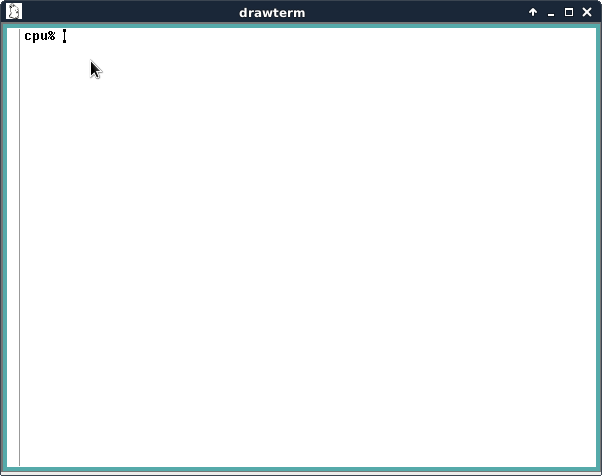
That should result in a rio environment:
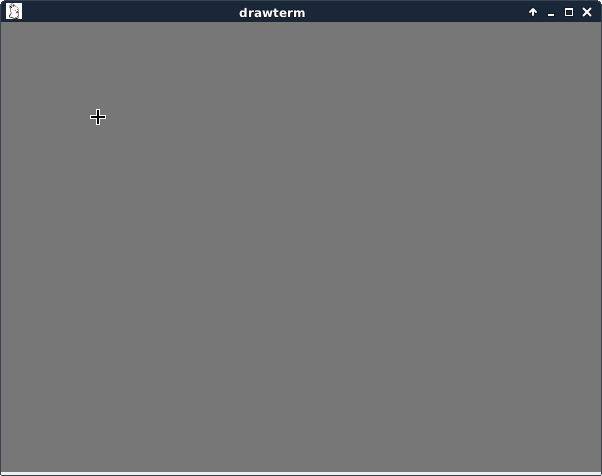
In this X window, the pointers are slightly different
from the virtual machine's console.
Left-click to get to the arrow pointer:

Then right-click brings up the rio menu window:
so you can draw a new window:
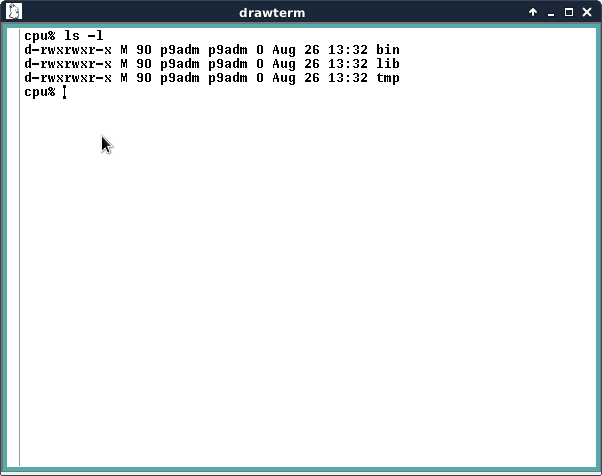
An "ls -l" command confirms you're in your new home
directory on a remote Plan 9 cpu/auth server.
That's it for this recipe.
Have a great time exploring this platform!