|
|
Abstract
Present step-by-step instructions to install Debian Unstable (Sid)
into root and boot partitions of an X86 system supporting
full-virtualization.
A bare machine without any operating system may be used if some
other system is used to create the Debian Live installation media.
The goal is to produce a host system for the Plan 9 guest system
to be installed in the next section.
|
 Except where otherwise noted, content in this document
is licensed under the standard Creative Commons
Attribution–ShareAlike 4.0 International License.
Except where otherwise noted, content in this document
is licensed under the standard Creative Commons
Attribution–ShareAlike 4.0 International License.
|
Virtual Plan 9 Cookbook — Section 2: GNU/Linux Host Preparation
This recipe installs an up-to-date Debian Unstable (codename
Sid—the breaker of toys in "Toy Story") on the project
computer to serve as the virtualization host operating system
for the guest virtual machine to be installed in the next
section.
Sid has some attributes that make it more attractive for this
situation than either Debian Stable (currently codename Wheezy)
or Debian Testing (currently codename Jessie):
-
Sid is nowhere as buggy as its Unstable title suggests.
Although it can break without warning, it seldom has,
which bespeaks the consistent quality of the work performed
by the Debian package maintainers.
As this project is primarily educational and not production,
stability is not the most important consideration.
You do have to be be prepared for more package troubleshooting
than when running Testing or Unstable.
-
Sid has the most current software of the three distributions
mentioned.
This means it will support hardware the others cannot and
offers software enhancements the others do not.
-
Unstable is a rolling distribution—it never gets promoted
to Testing or Stable or Unsupported (well, that last is not
really a promotion).
It merely gets updated (you should probably do that every 24
hours unless you aren't actually running it, but then updating
it is the first thing you do when you bring it up again).
An R&D project free from the distraction of non-trivial
infrastructural migrations promotes the educational experience.
A rolling release replaces scheduled major migrations once a year
or so plus security patching with a little of all that every day.
You may have requirements that make Sid unsuitable for your
project and choose to use the Stable system installed from the
Debian Live USB-stick about to be created without upgrading
that to Unstable.
However, you will have to configure its virtual networking
on your own, as the recipe's incantations do not achive the
desired results.
If you project computer is less than two years old, it may not
be able to use the Debian Live Stable system used to install
the host system in this subsection.
Take a look at the
Jessie Alpha 1 release of the Debian Installer
that became available on March 19, 2014 as an alternative.
Although it is not a live system, it is a downloadable ISO
image that follows a similar process to the Live installer
application.
This document may be expanded in the future to provide the
recipe for using that option.
Click on the lines following to jump down to their content:
Subsection 2-1: Build Installation Media
Step 2-1-1: Download the ISO image
Step 2-1-2: Check the file's checksum
Step 2-1-3: Copy the ISO image to a USB-stick
Subsection 2-2: Boot Debian Live and Check Installability
Step 2-2-1: Backup the Project Platform As Needed
Step 2-2-2: Boot From the Debian Live USB-Stick
Step 2-2-3: Open a root terminal session
Step 2-2-4: Examine Drives Using cfdisk
Step 2-2-5: Install the parted package
Step 2-2-4: Examine Drives Using parted
Subsection 2-3: Run the Installation Application
Step 2-3-1: Launch the installer
Subsection 2-4: Reboot the New Host System and Check Install
Subsection 2-4: Reboot the New Host System and Check Install
Subsection 2-5: Update Old and Install Needed Packages
Subsection 2-6: Reconfigure Networking To Support Guests
The Debian distrbutions of GNU/Linux offers many ways to obtain
and boot a system that will install Debian on a computer.
In this exercise, we will download an ISO-hybrid file for the
Debian Live stable XFCE version suitable for my Gigabyte
X86_64 computer used to demonstrate this cookbook process.
For your own project, visit
the Debian Live install images
page to find an image suitable for you and adjust the following
URLs and filenames used in this subsection as needed.
Step 2-1-1: Download the ISO image
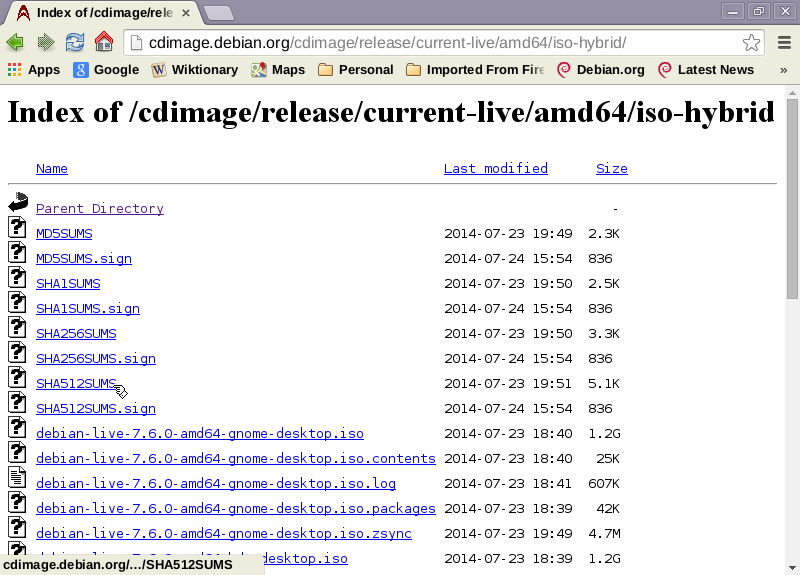
Point your browser at
http://cdimage.debian.org/debian-cd/current-live/amd64/iso-hybrid/
using an appropriate computer (in my case, the same computer being
used to demonstrate this project running a Debian Sid XFCE system
in a partition this project will ignore by and large).
The top of the page should look something like this (800x600):
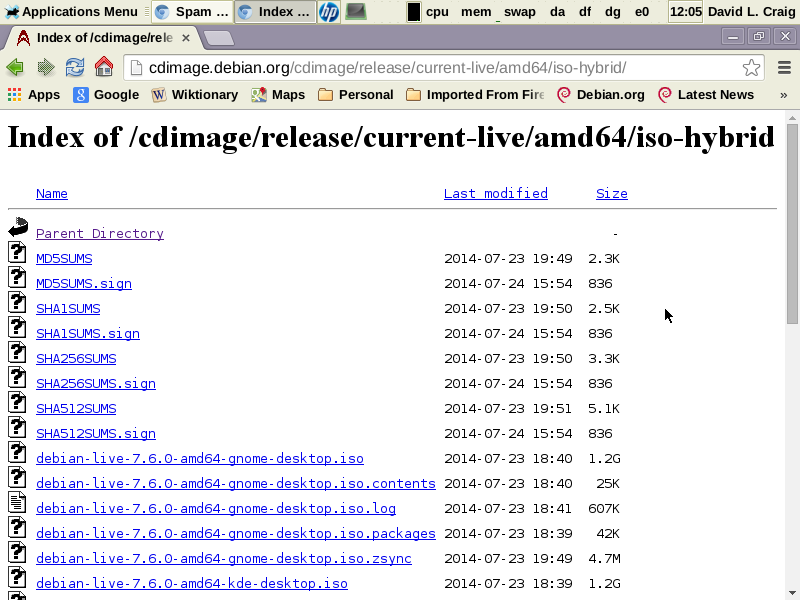
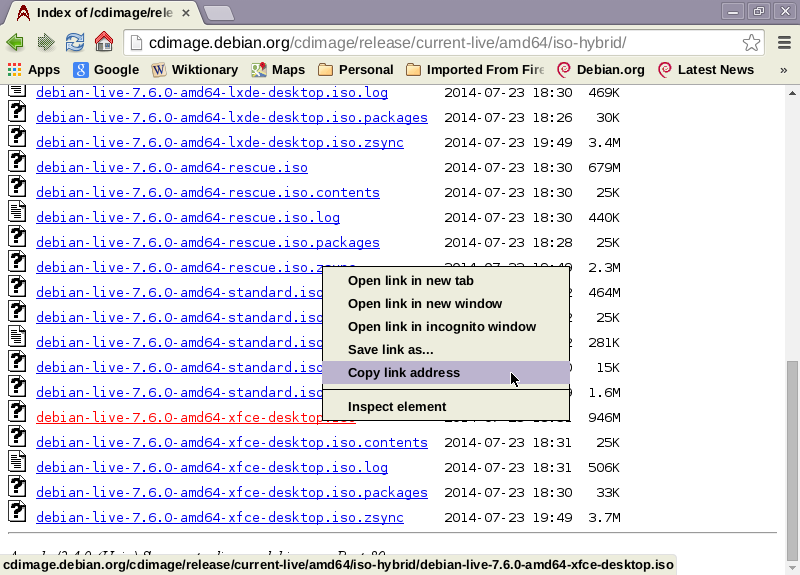
Scroll to the precise ISO file (for me,
debian-live-7.6.0-amd64-xfce-desktop.iso)
and copy its link to the clipboard.
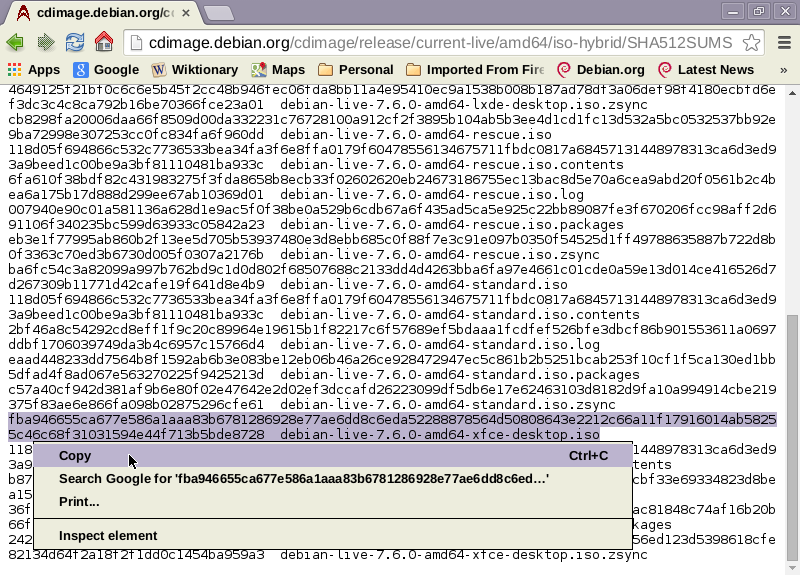
It should look something like the following image before you
click to copy (under XFCE, that pop-up menu is produced by a
right-click on the link you're interested in).
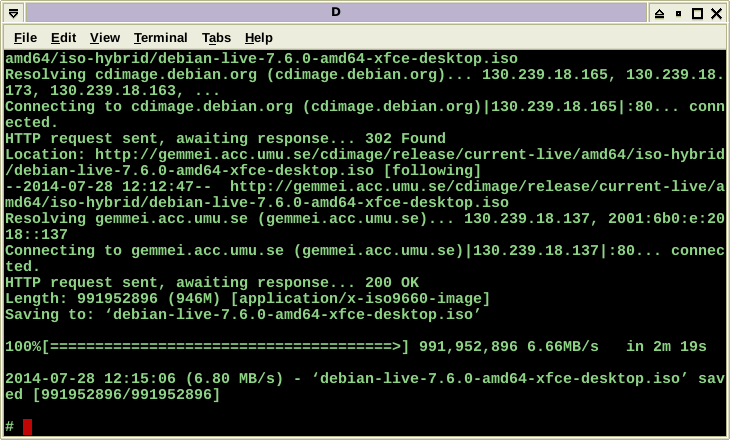
In a root terminal session, cd to /tmp, type "wget -c '",
paste the clipboard where the cursor is, and type the closing
apostrophe—it should look something like this:

Press the Enter key to start the download of about 1 GB.
At the end the screen should look something like this (your
bandwidth is probably different and you should adjust the
expected elapsed time accordingly):
Step 2-1-2: Check the file's checksum
Scroll back up to the top and open the checksums file for the
ISO image (SHA512SUMS for me)—it should
look something like this before you click:
Scroll to the line for the ISO file you downloaded, select it,
and copy it to the clipboard; e.g.,
Back in the root session, type "echo '", paste in the
clipboard, type "' >iso.checksum"; e.g.,

press Enter, then run the appropriate checksum command; e.g.,
"sha512sum -c iso.checksum"—make certain there were no anomalies:

Step 2-1-3: Copy the ISO image to a USB-stick
Insert a big enough USB-stick (aka pen-drive, thumb-drive) into
a USB port of the correct speed for the media, and, if necessary,
determine the block device assigned to it.
Then copy the ISO image byte-for-byte to it (I used the command
"dd if=/tmp/debian-live-7.6.0-amd64-xfce-desktop.iso of=/dev/sdh
bs=8192").
This will require many minutes—USB-1 is not recommended.
Verify there were no errors; e.g.,

Run the approrpiate cfdisk command to verify the USB-stick looks
bootable (in my case, "cfdisk /dev/sdh"); e.g.,
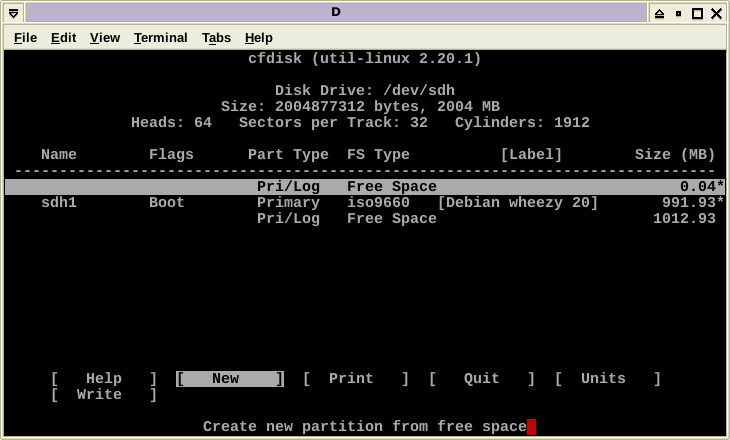
It looks like the media is ready.
Enter two tabs, then Enter to exit cfdisk.
Then run the appropriate command to prepare the system for removal
of the stick from the USB port; e.g., "eject /dev/sdh".
Now the USB-stick can be removed.
I affixed an external label to mine that says, "Debian Live Stable
Wheezy X86_64 Jul 2014".
Last of all, delete the ISO and checksum files from /tmp unless
you want to keep them around for some reason.
You now have a portable Debian Live system you can boot from any
computer compatible with the flavor you selected and that supports
booting from a USB-stick (some BIOS and/or boot loader
reconfiguration might be necessary for that to function).
Subsection 2-2: Boot Debian Live and Check Installability
With your bootable USB-stick in hand, we move to the keyboard of
the X86 platform you have made available to install the host and
guest operating systems of this exercise.
This move, as is the case of my demonstration platform, will be
merely a figure of speech if the same physical system that was
used to build the Debian Live install media in the previous
subsection is also the computer into which you intend to install
the Debian and Plan 9 systems of this exercise.
Or it may indeed be a different machine.
Either way, it may have no software already installed that that
you intend to retain (that is, already or soon-to-be empty
non-volatile storage) or there may be storage areas and/or one or
more bootable operating systems that you want to co-exist with
the new Debian host and its Plan 9 guest(s).
If, when you're done, only the new systems will be resident, you
have a relatively simple installation ahead and can probably get
away with just following this cookbook's recipe relatively blindly
(although you are strongly urged to read and understand everything
to come before you continue actually cooking your project—it's
a great way to avoid starting over again).
If, however, this exercise will not be taking over the computer
completely, you have the responsibility to effectively utilize your
system administration skills to tailor the steps in the rest of
this section to produce the needed host environment to install
the Plan 9 guest systems starting in the next section.
If there is nothing already resident on the project computer that
will ever be missed by anyone for the rest of time, you are being
reasonable if you skip this step.
Otherwise, back up everything not already backed up somewhere that
would induce some degree of despair if it disappeared, even if
there's no way it could disappear.
If you do not know how to back up such data nor are interested in
learning how to do that, you are strongly urged to drop this
project—even more so if it never occurred to you that you
ought to back up such data.
Step 2-2-2: Boot From the Debian Live USB-Stick
If an operating system is currently running on the project platform,
shut it down now.
If the BIOS and/or boot loader of the project computer's firmware
need to be reconfigured to permit booting from a USB-stick, do that
now.
Insert the Debian Live USB-stick in a suitable USB port, then start
a reboot.
In response to the Debian Live menu allow it to default to running
as a live system or explicitly tell it to do so.
If anything prevents something very much like the following image
from manifesting on the computer's screen, use your system
administration skills to resolve the issue(s) (the
Debian Support portal
is an excellent place to begin seeking help).
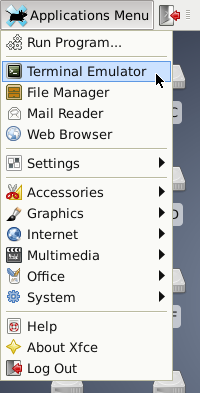
Step 2-2-3: Open a root terminal session
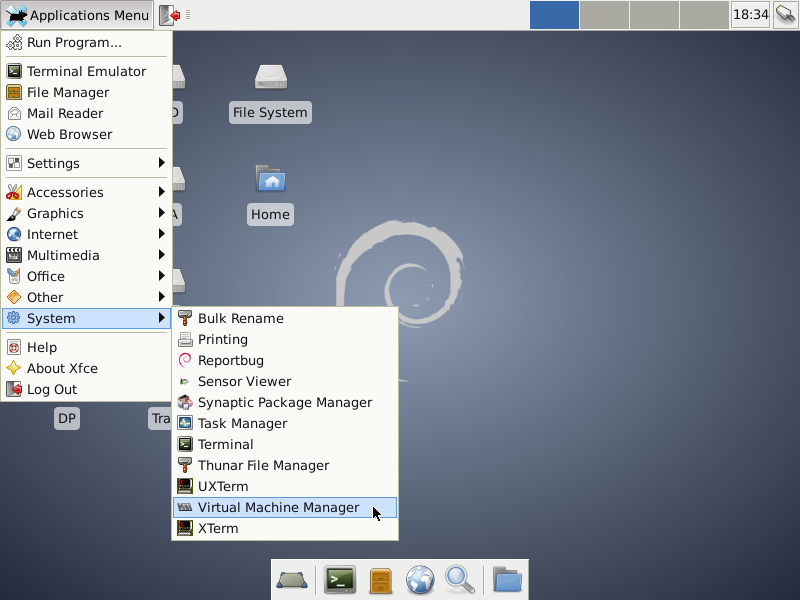
If Debian or XFCE are new flavors of GNU/Linux for you, spend some
time if you can spare it exploring the available applications while
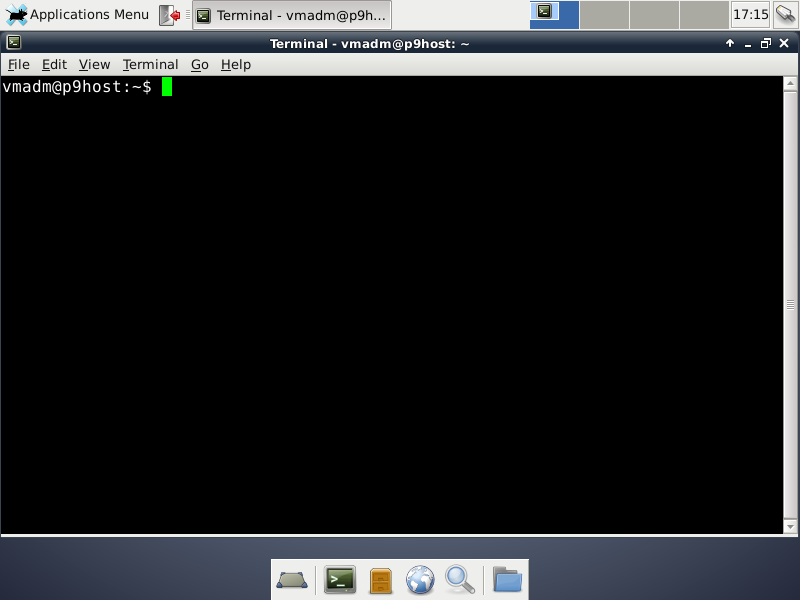
running from the USB-stick. To get a terminal window, first
left-click on the Applications Menu icon in the upper-left corner
of the screen, move the cursor to the Terminal Emulator menu item,
which will highlight, and left-click on that, causing the window to
open, like so:

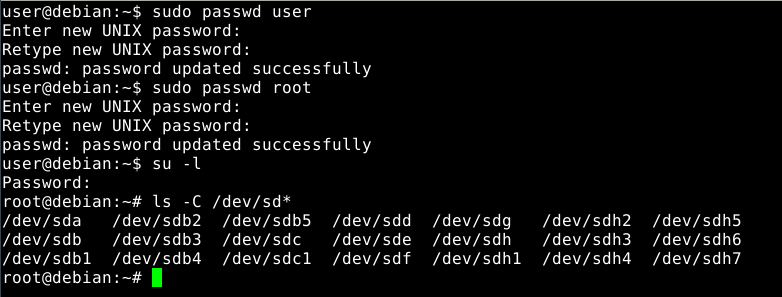
Notice Debian Live provides an account named user without any
authentication requirement, and root has no password so you cannot
log on as root.
Thus, an excellent habit to get into when booting a live system
is to immediately set those passwords.
To reset the user password without knowing it, use your
active sudoer status by typing "sudo passwd user", pressing
the Enter key, and responding to the two prompts with the
string of characters you want to use for the user password.
Then use a "sudo passwd root" command and set a password
for root in the same manner.
Now issue a "su -l" command to log on as root specifying the
password just set when prompted.
Step 2-2-4: Examine Drives Using cfdisk
Now we are ready to validate the project computer is as we expected
in conjunction with determining what Debian Live is naming its storage
drives/partitions/logical volumes or whatever.
The demonstration platform has three hard drives with differing
numbers of partitions and no logical volumes, so an "ls -aC /dev"
command is sufficient to see what's what.
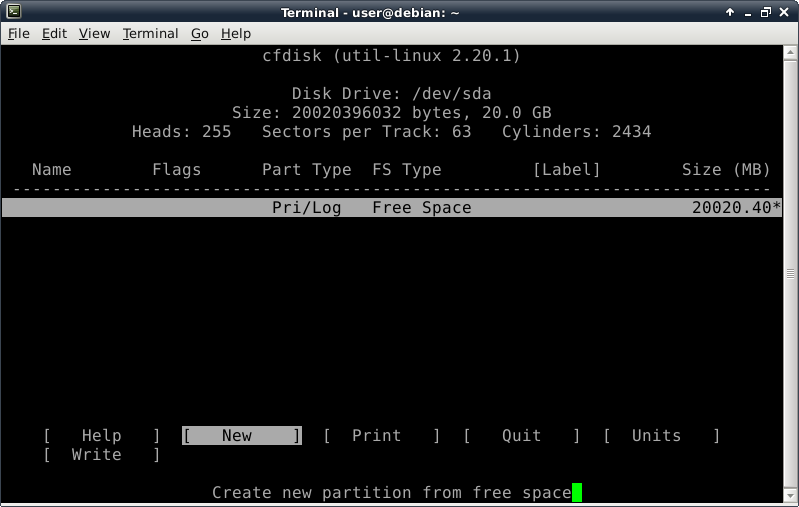
/dev/sda has no partitions so it should be the wiped IDE hard drive
I installed just to develop this cookbook.
Running a "cfdisk /dev/sda" command shows that was a good expectation:
Your inspection of your disks may not proceed nominally.
If you reach a point where Debian Live cannot install Stable on your
project computer, you cannot follow the recipe to the end of this
section—you will need to research alternatives to achieve the
section goal.
Getting back to the recipe, press two tabs to move from the New menu
item to the Quit item:

and press the Enter key to return to the root shell prompt to continue
validating the storage infrastructure.
Next up on my platform is the sdb device with its five partitions, so
I type "cfdisk /dev/sdb", click Enter, and get:

Oh, right—cfdisk doesn't support GPT disks.
Pressing Enter does show some unformation about the disk:
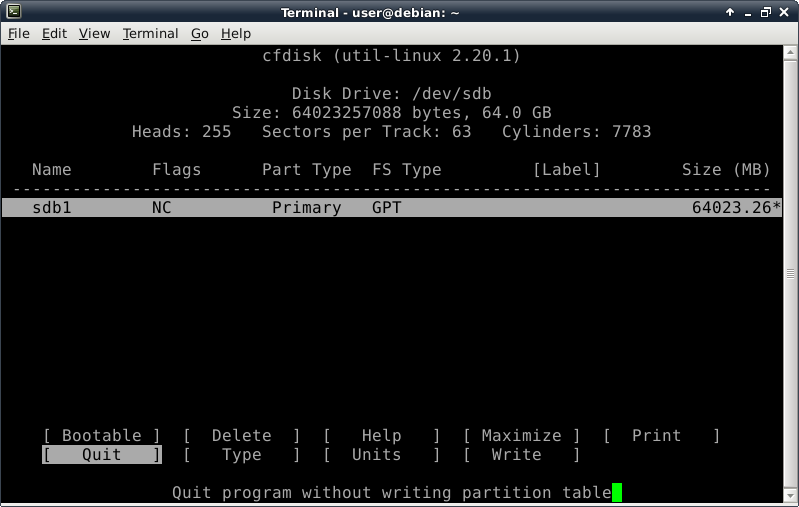
but I won't have to tab twice to quit because cfdisk knows that's all
I can do at this point.
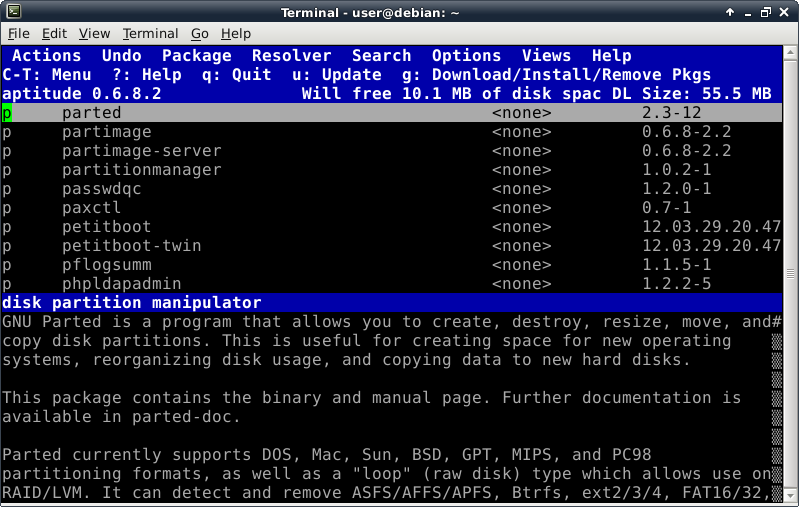
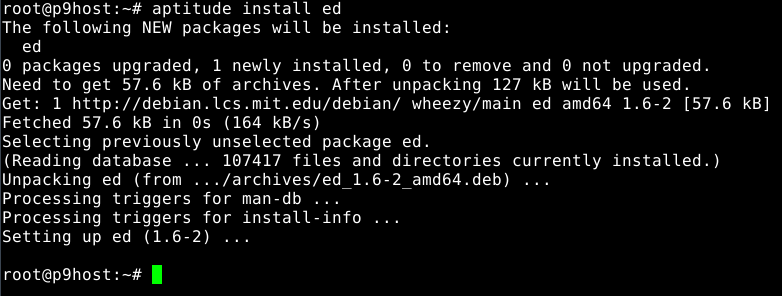
Step 2-2-5: Install the parted package

Oddly enough, even though the Debian Live installer does support GPT
disks, the parted command is not included at this time in the ISO.
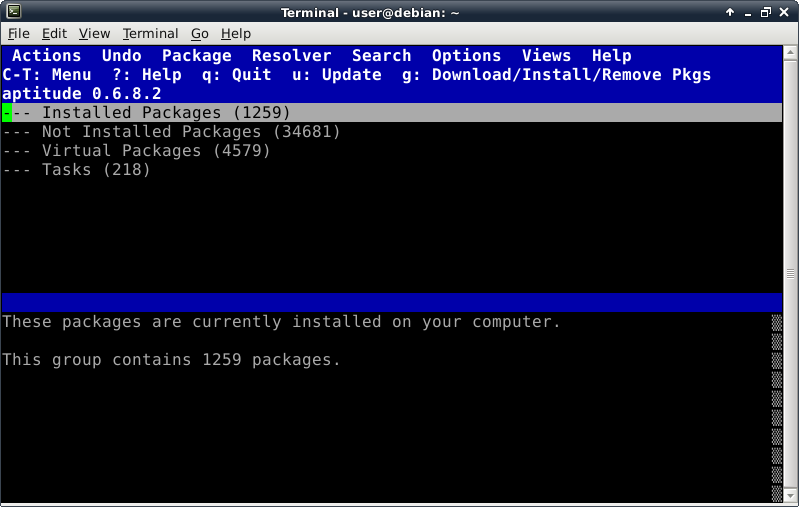
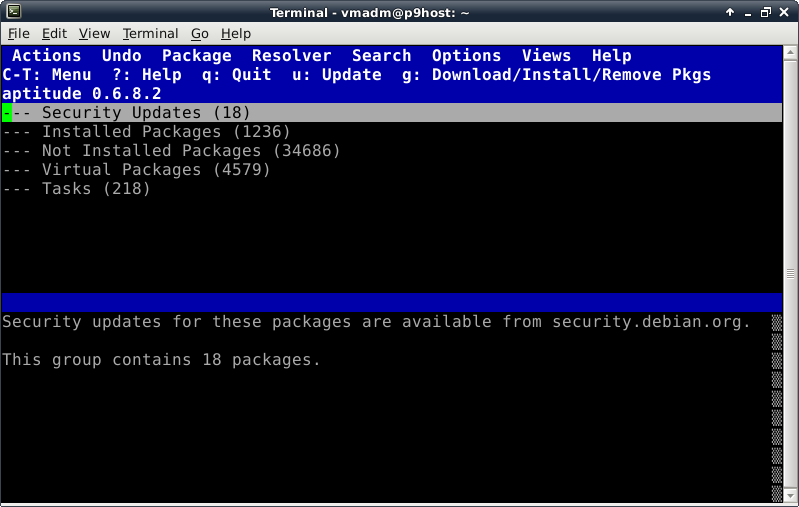
This introduces a lovely opportunity, in order to install the parted
package, to show off one of Debian's package management tools, which
looks like this after launching the "aptitude" command:
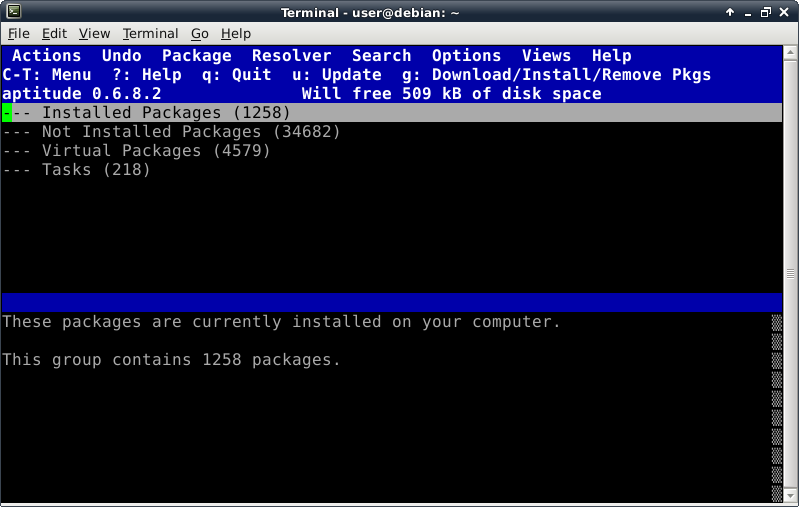
Before trying to install anything using aptitude, make the repository
information up-to-date by pressing the lowercase "u" key (for update).
Now we verify Internet connectivity is functioning properly.
A lot of activity will be displayed looking something like this:
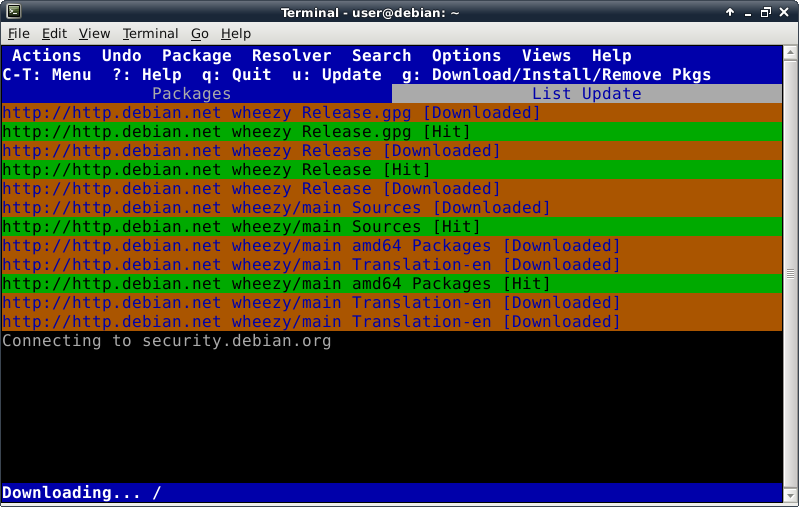
until it finishes by redisplaying the now current main screen:
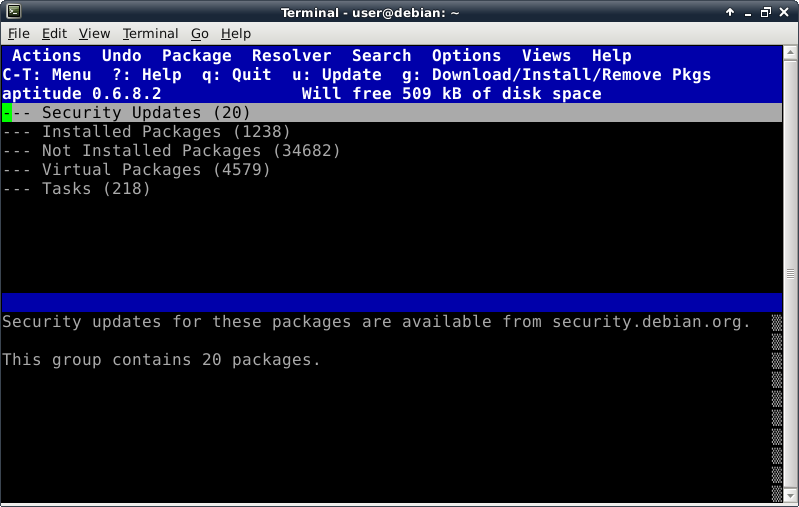
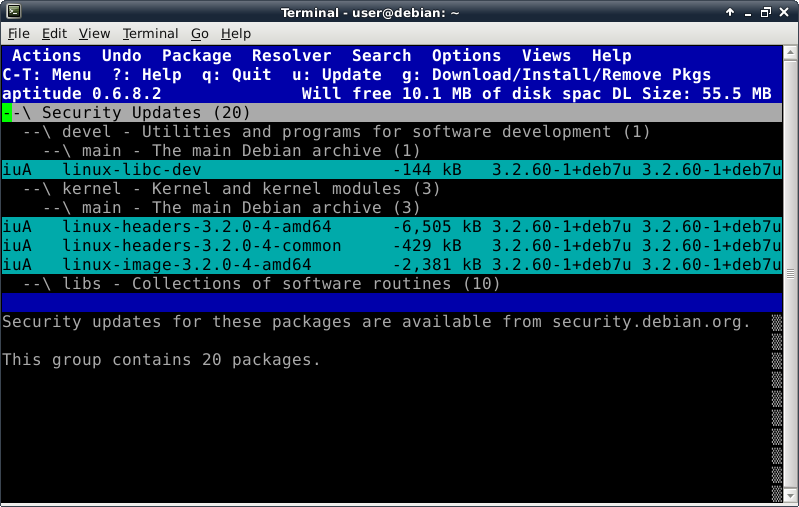
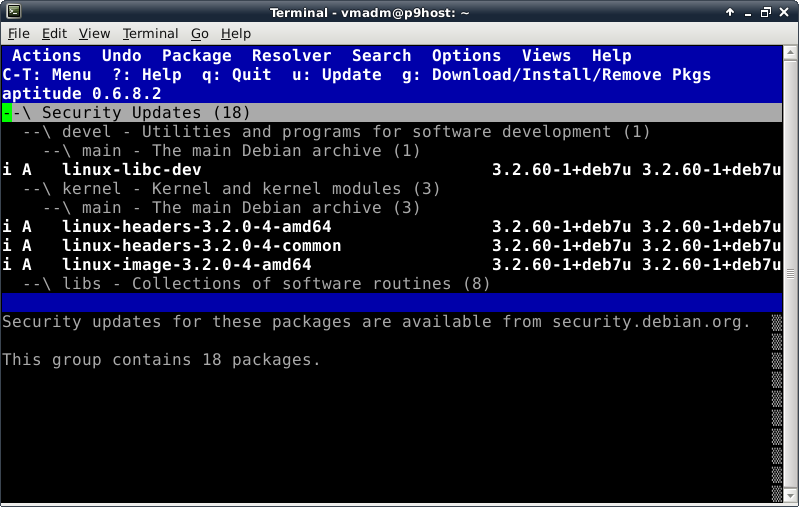
Although the ISO was refreshed a scant week ago, 14 new Security Updates
are available.
If you press "[" now all the Security Updates wil become displayable:
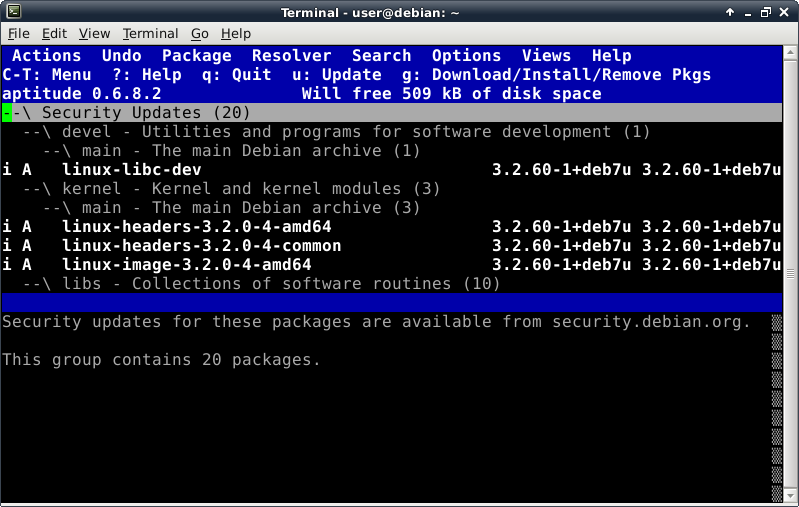
They are all at status "i " meaning package installed and update not
marked for installation (an "A" indicates the package will be
automatically removed if all installed packages dependent upon it are
removed.
If you move the cursor vertically—use the arrow keys (or lowercase
"j" and "k" for vi-centric users)—you will see different
information in the lower display area appropriate to the current line.
Pressing the Enter key on a group line expands/collapses the line's
next lower level and pressing the "[" key expands the line's entire
subtree (the "]" key also collapses a group line's subtree).
Even though we're running from a USB-stick booted into a RAM file
system that will evaporate when we shut down, we are still accessible
via the Internet, so it's worth the small amount of time needed to
install these security updates.
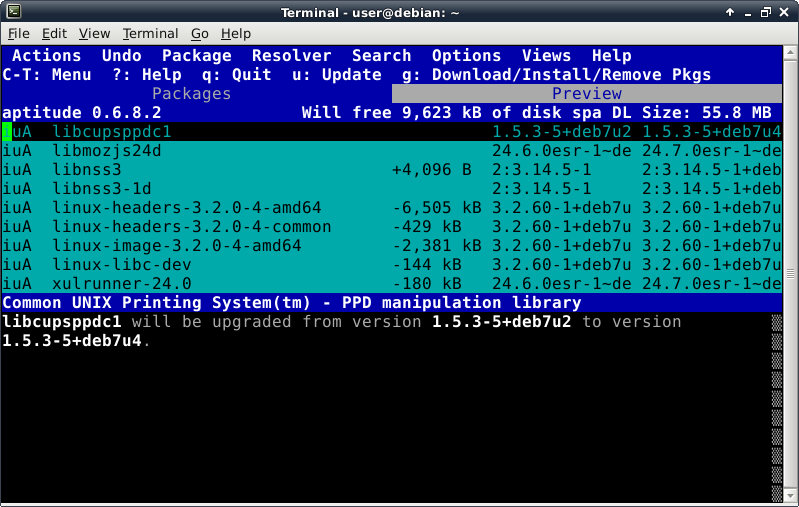
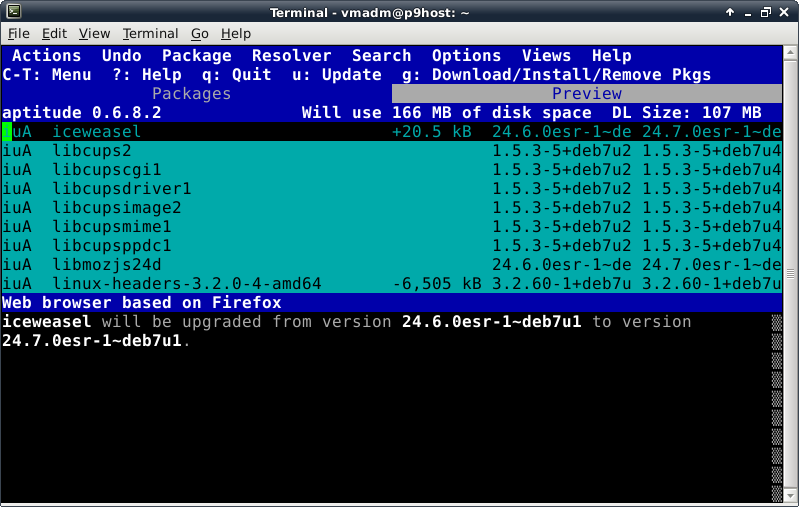
We simply type an uppercase "U" (for upgrade) to mark all available
updates for installation (it matters not where the cursor is on the
screen for this command), which will change the display:
Scroll (Page Up|Down and Ctl-F|B keys also work as you might expect)
through the display to see all the packages you have marked for upgrade.
Does aptitude's appearance and keyboard-centric interface strike you
as deplorably unsexy?
It does?
Oh, dear.
As the saying goes, "You ain't seen nothin' yet."
You are proceding toward interacting with Plan 9.
It does not support Chrome or even FireFox.
There are in fact some good reasons for that condition.
But Plan 9 is unashamably not UNIX and certainly not GNU; similar in
many ways, but significantly different.
Never forget Plan 9 exists primarily for researching operating system
design.
While it is highly usable in its way, and learning how it is different
and why are worthy goals, do not get it into your head that it needs to
be "improved" to be more like modern day UNIX.
Rather, it is you that needs to be improved to be able to appreciate
the positive qualities of the design and paradigms Plan 9 offers that
you can show respect to the guys who created and fix it (many of whom
also created UNIX before they created Plan 9—I daresay they know
more than you do).
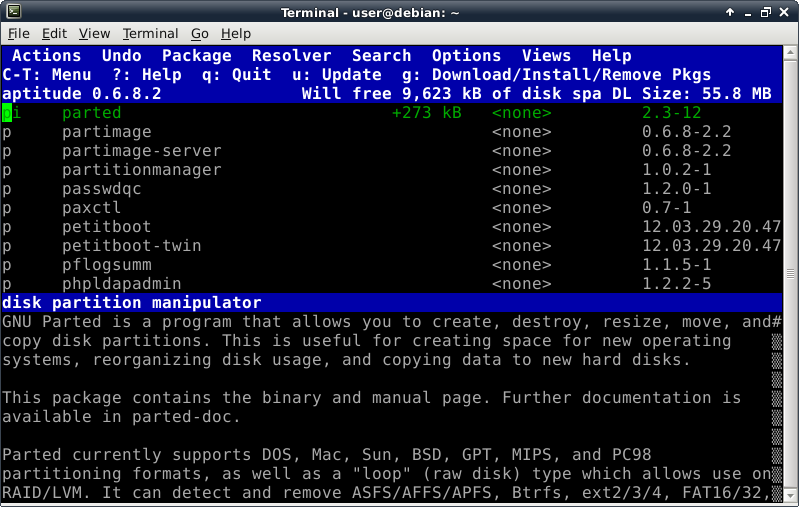
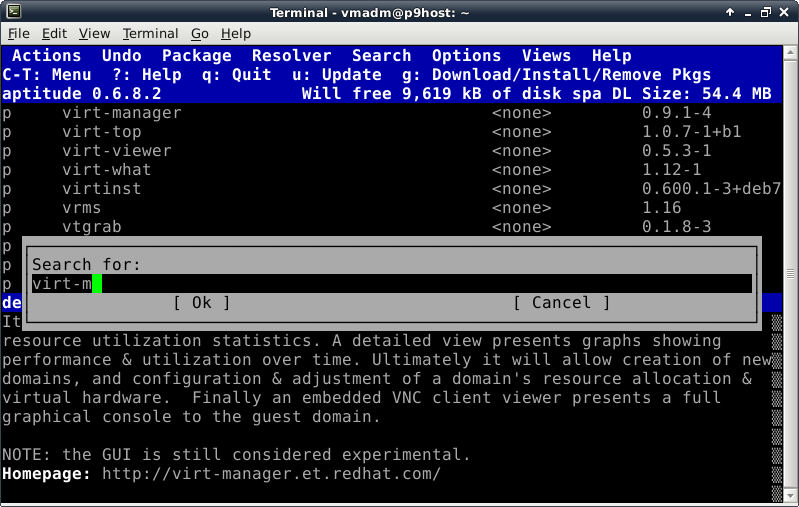
Now press the "/" key to initiate a search, which will be acknowledged
by displaying the pop-up we see here:
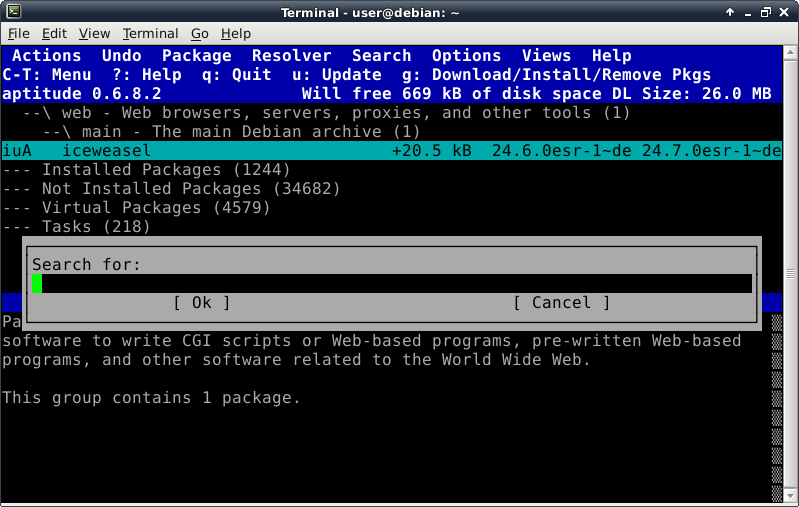
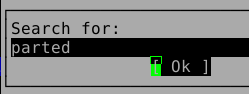
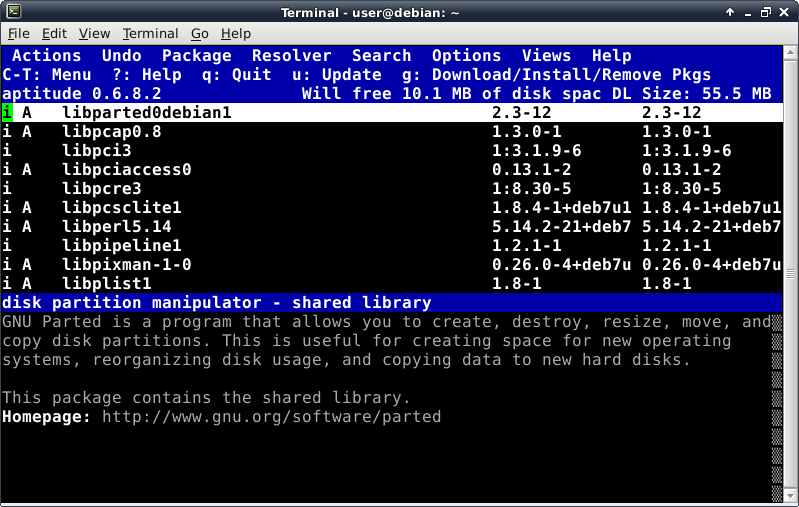
Key in "parted" and press the Tab key, then the Enter key, which will
present the following response (hmmm... this is not the package you
are looking for, being already installed, but it probably explains why
the installer can work with GPT drives):
Try again by pressing the lowercase "n" key:
Yes! The "p" status means uninstalled so this is what we want, thus we
enter a "+" on the parted line to request it be installed.
Now the status is "pi" (not installed, to be installed) and green:

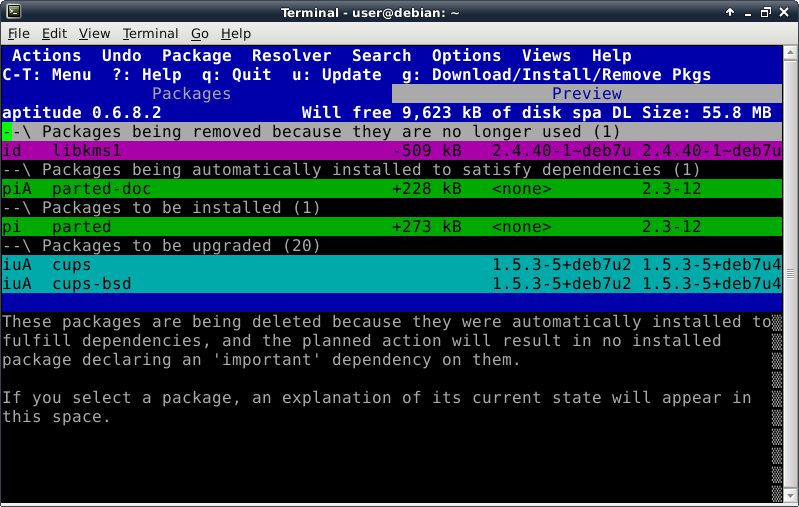
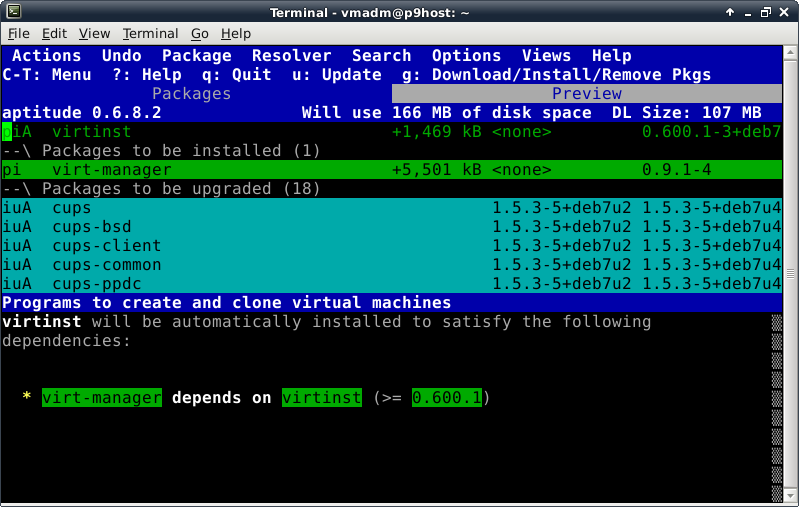
Now that we have requested what we want and don't want installed, we
press the lowercase "g" key to go, which brings up the Preview display:
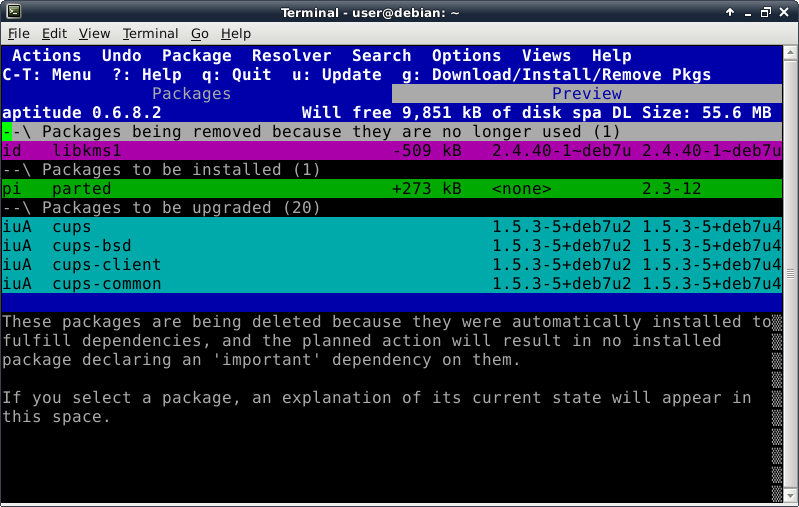
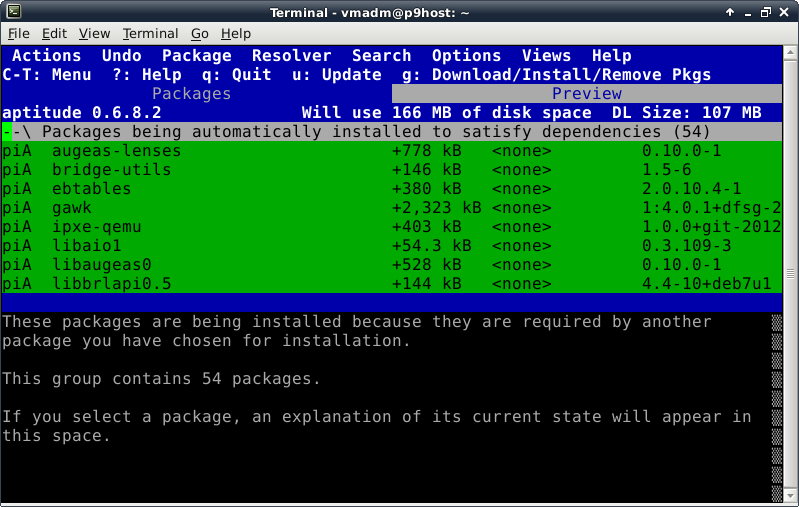
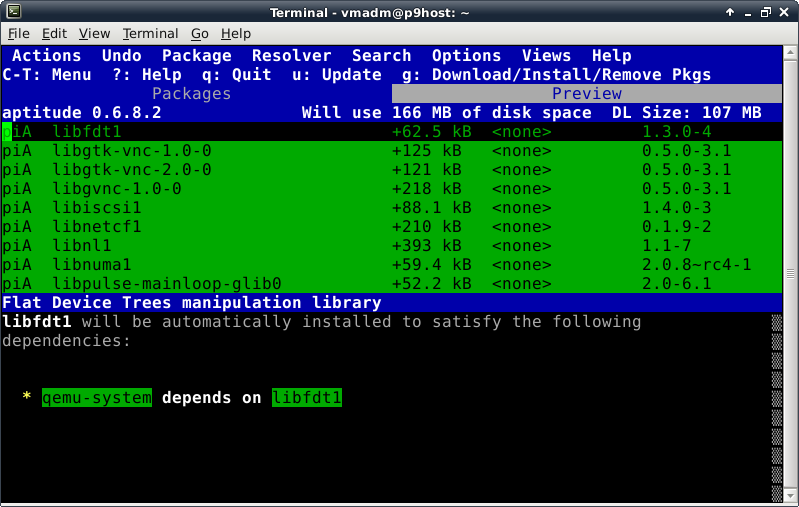
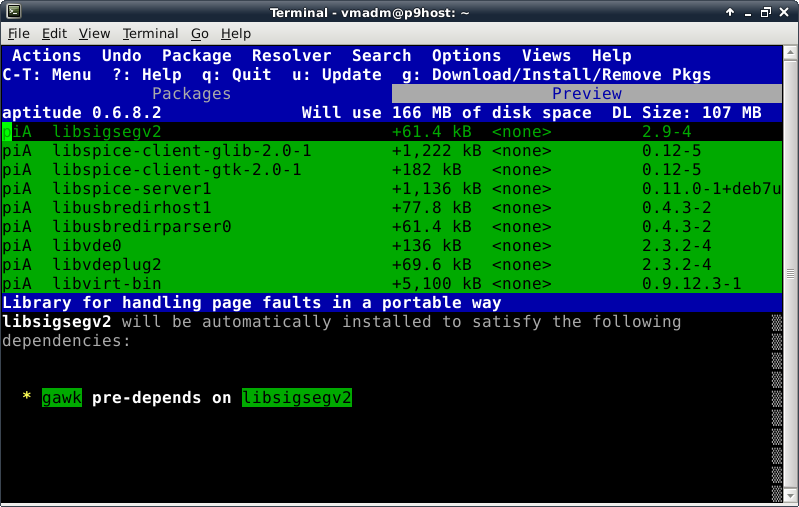
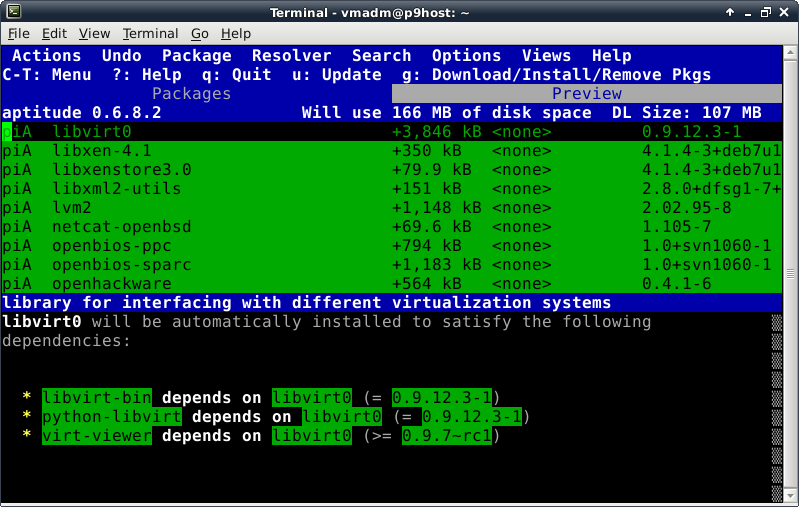
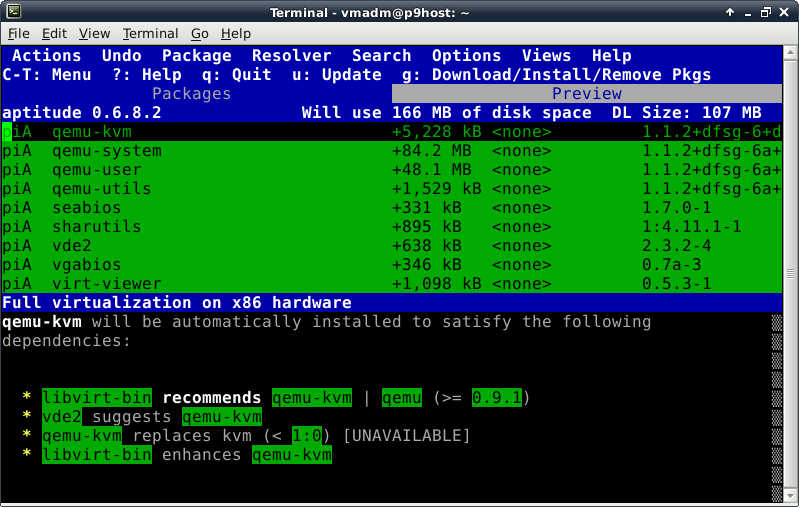
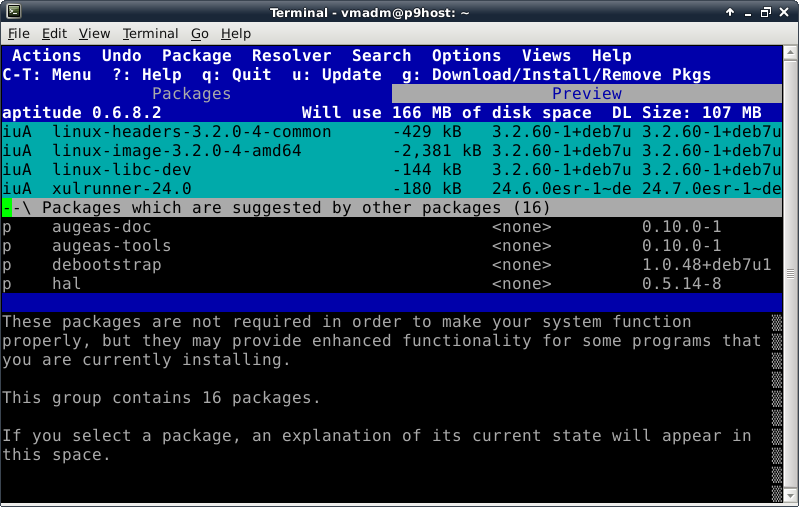
Now we see what will happen if we press the lowercase "g" key a second
time, with like-handled packages grouped together in collating sequence.
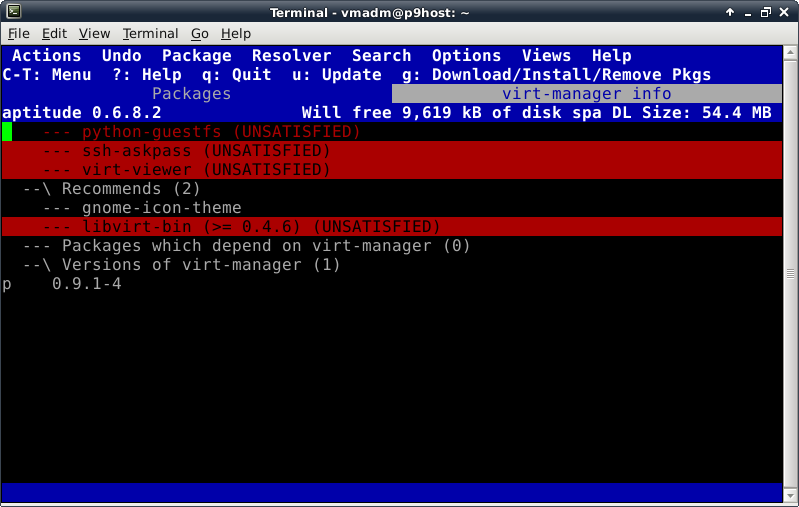
The final page should look something like this:
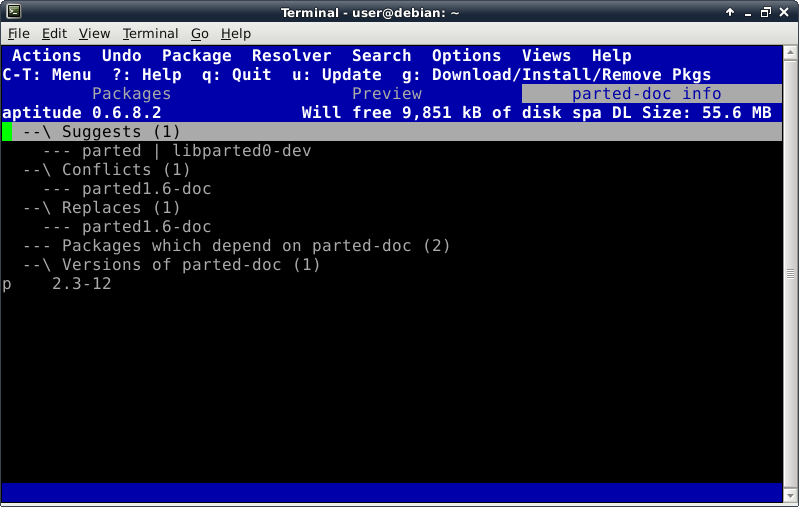
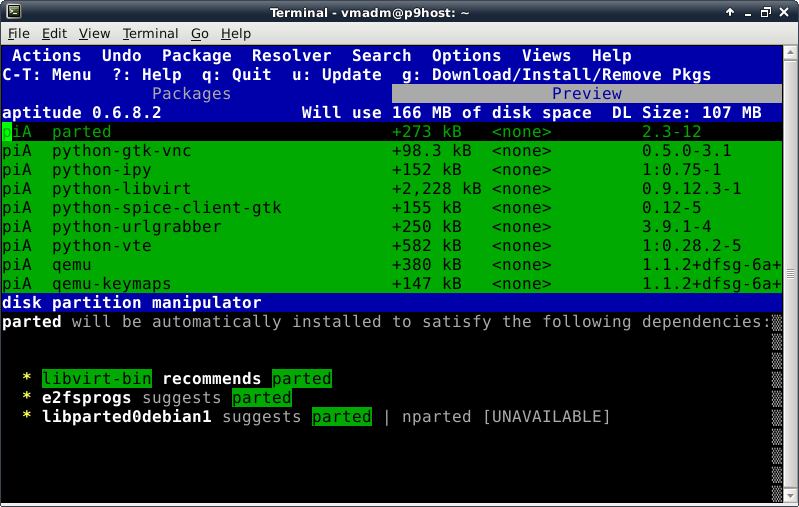
Notice the last line is a group line for uninstalled packages
that are not "recommended" (aptitude is configured by default
to automatically mark uninstalled recommended packages for
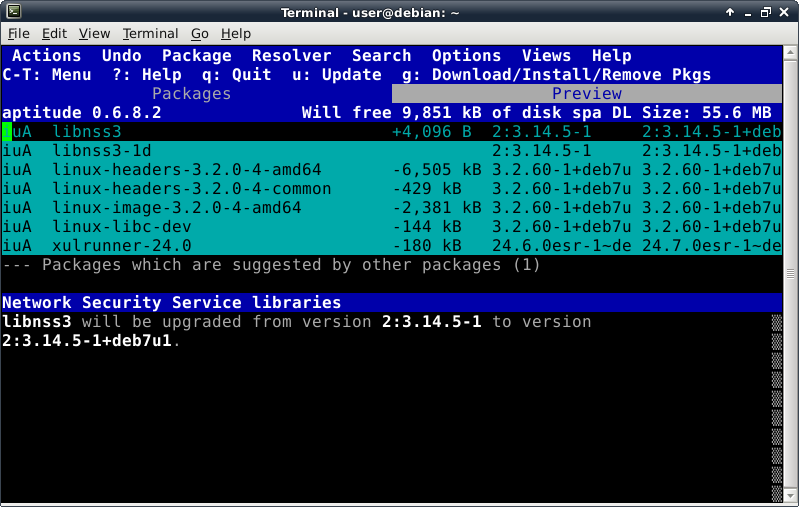
installation) but merely "suggested".
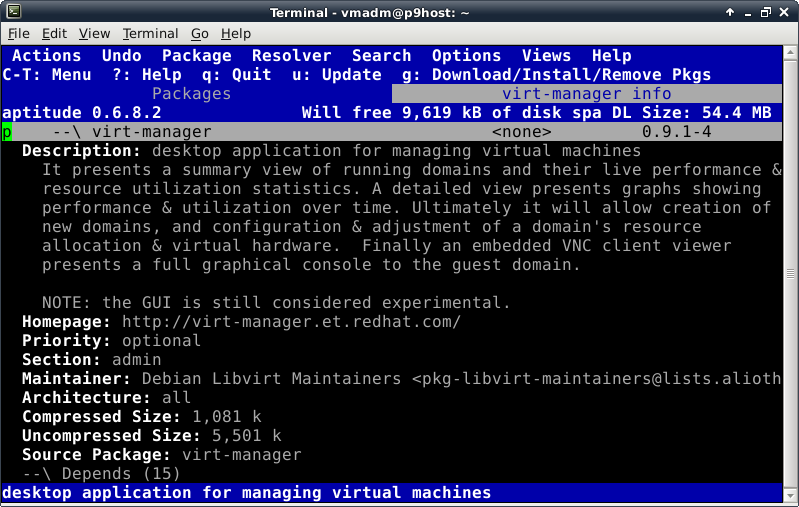
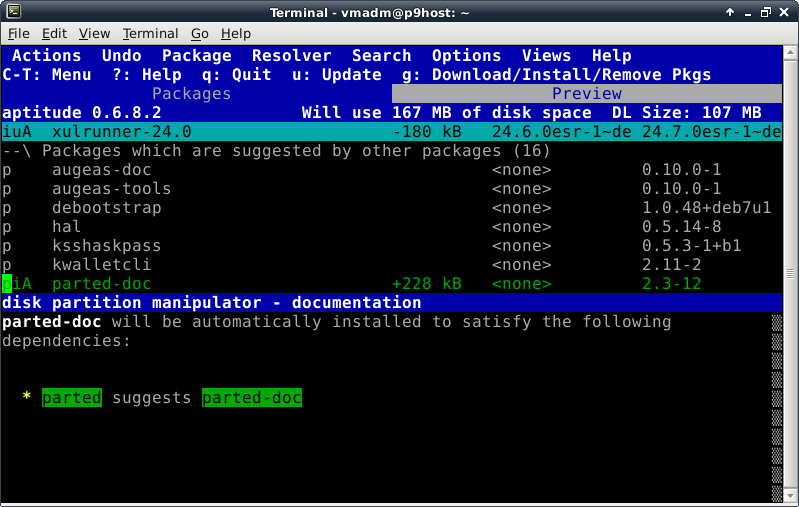
Let's take a look at that package by typing "[":

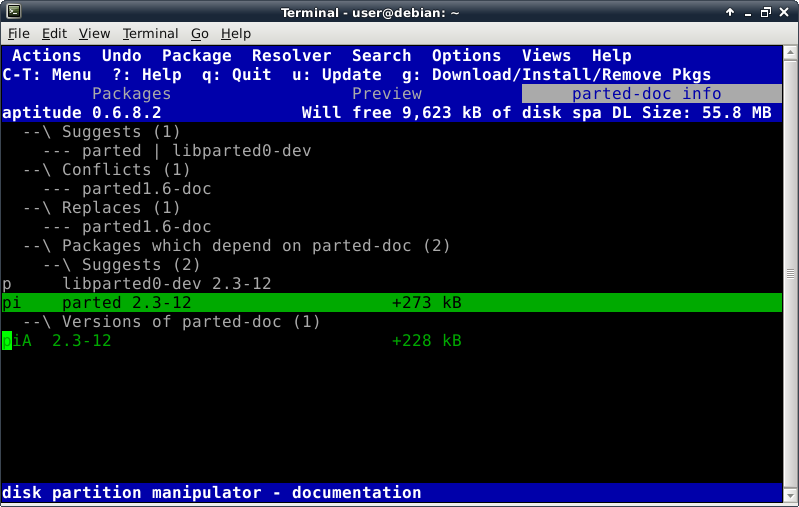
I'll assume you might find that useful so I can show you how
to add a suggested package to the list of work to be done.
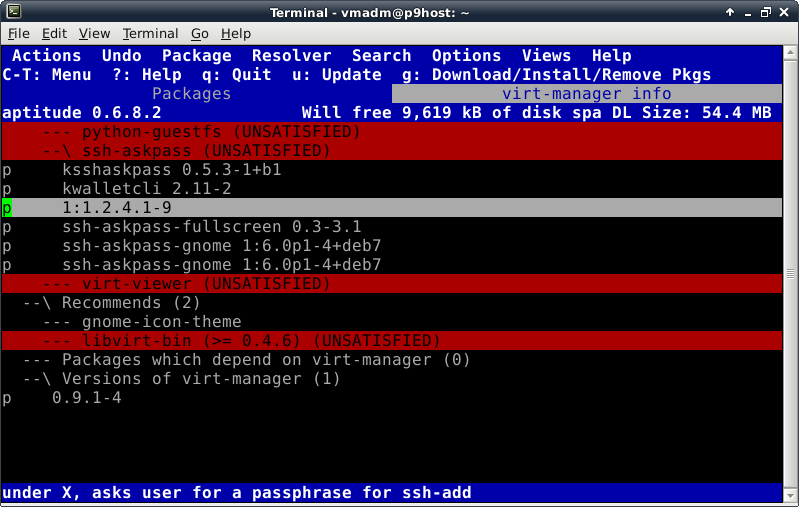
Press the Enter key to open the package line as a subscreen
of the main display:
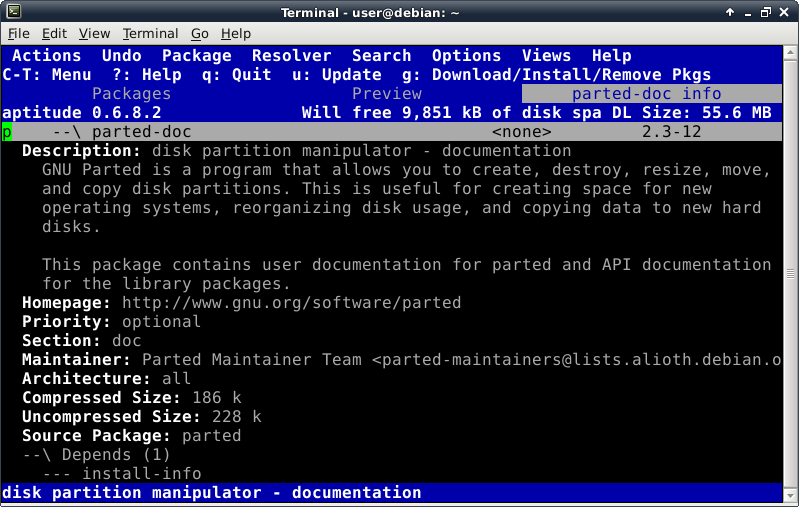
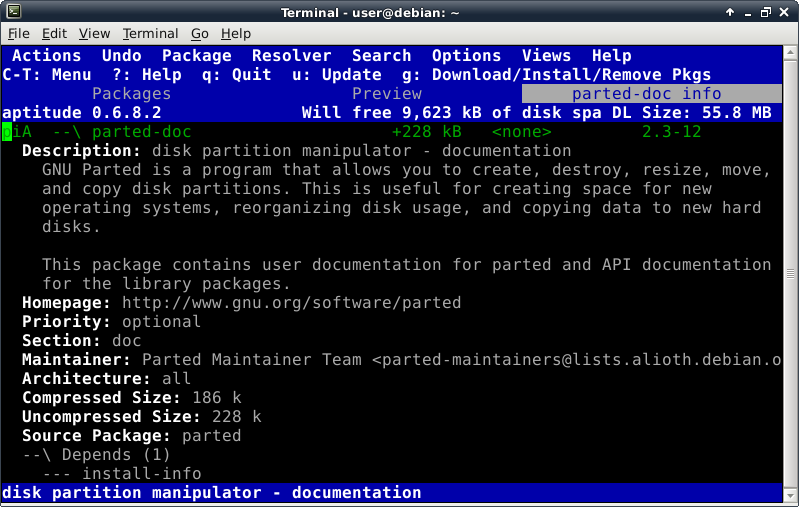
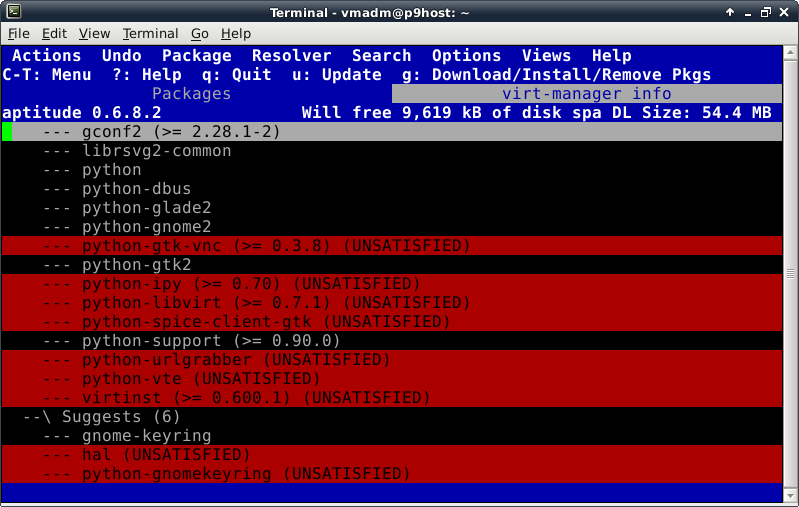
Having already decided to install it, we are interested in
what other packages may be essential (depends), recommended,
suggested, or conflicting.
Scrolling through we do not encounter any red lines which
indicate either something needed that isn't installed (or
possibly not installable) or that is installed that mayn't
be if this package is installed.
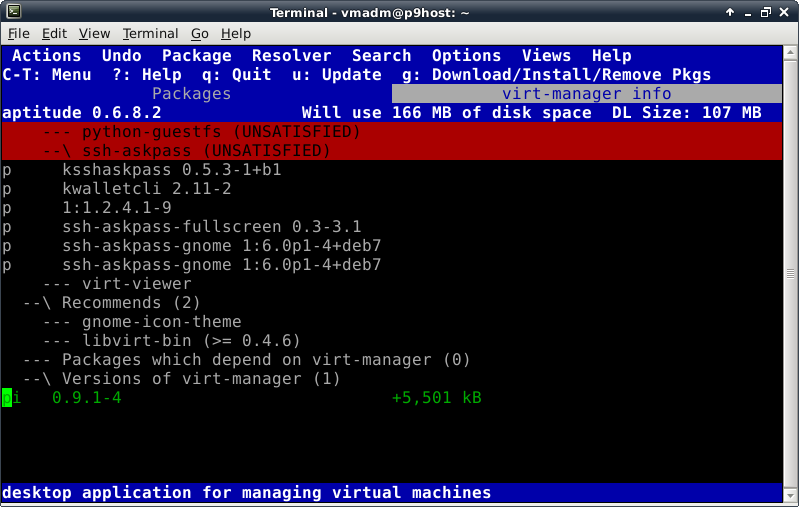
There being nothing to change our mind about installing
parted-doc, we position the cursor on the final line and
press "+" to mark that version as installable, then press
uppercase "M" to mark it for automatic removal (if we
remove parted in this case—expand the "Packages which
depend on..." line to see the details), resulting in this
screen:
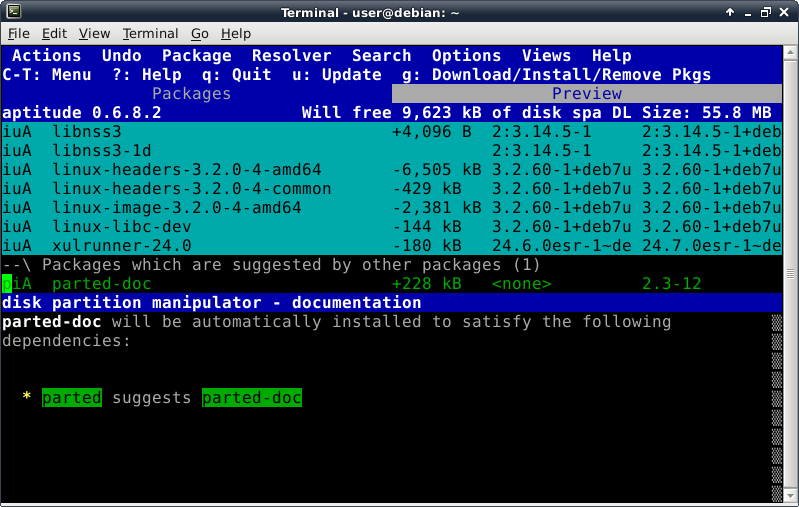
Scroll back to the top to observe the top line also reflects
the addition, and note you could have entered the "+" on that
line as well:
Pressing a lowercase "q" closes the package subscreen and
returns us to the Preview screen:
Pressing a lowercase "q" again closes the Preview subscreen and
returns us to the Packages screen without starting the pending
operations:
Pressing lowercase "g" now brings up the Preview screen again
(previewing is an aptitude option that can be disabled if you
wish) and verify the addition of parted-doc hasn't caused the
work to be done to have gone awry in any way:
(scrolling all the way through):
If the plan looks good, make it so by pressing lowercase "g"
again.
After another brief round of downloading (like before to get
the repository status updates):
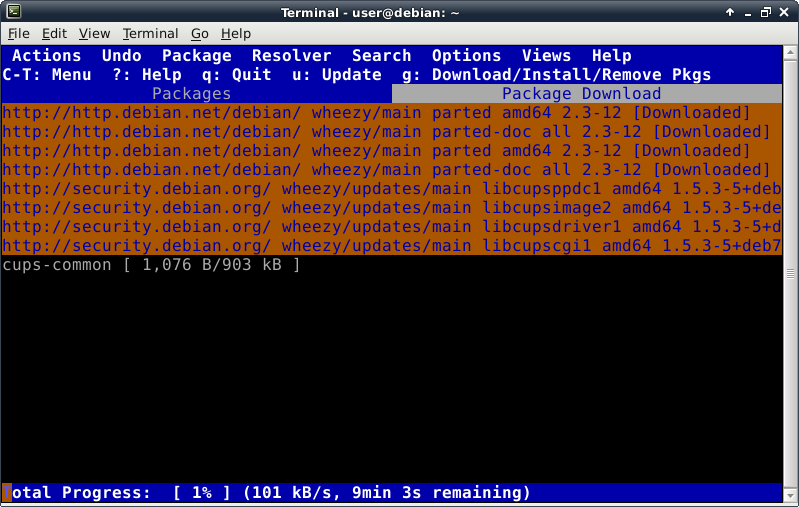
the display returns to the shell screen so you can follow the
progress of the actual package processing, something like this:

If you get the "Press Return to continue." message, package
processing is finished.
You can scroll this window with Shift-PageUp, Shift-PageDown,
Shift-UpArrow, Shift-DownArrow, or use the scrollbar on the
right.
Make sure processing was nominal or resolve the errors
(remember that Debian Support link?).
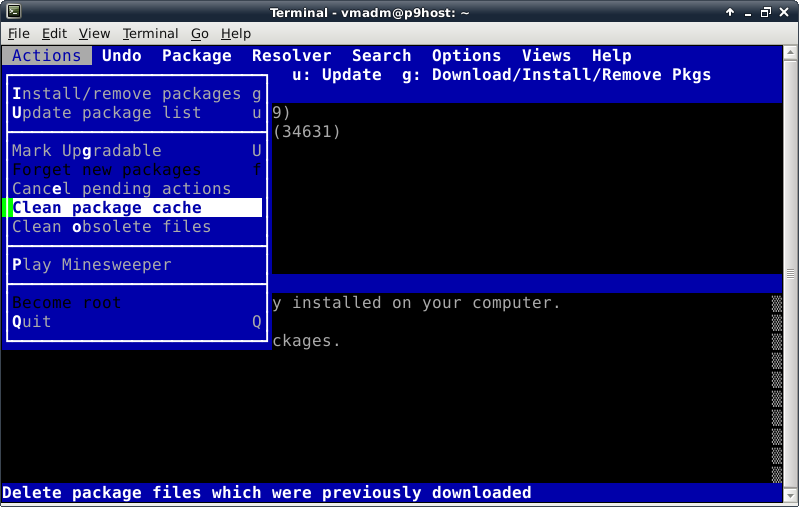
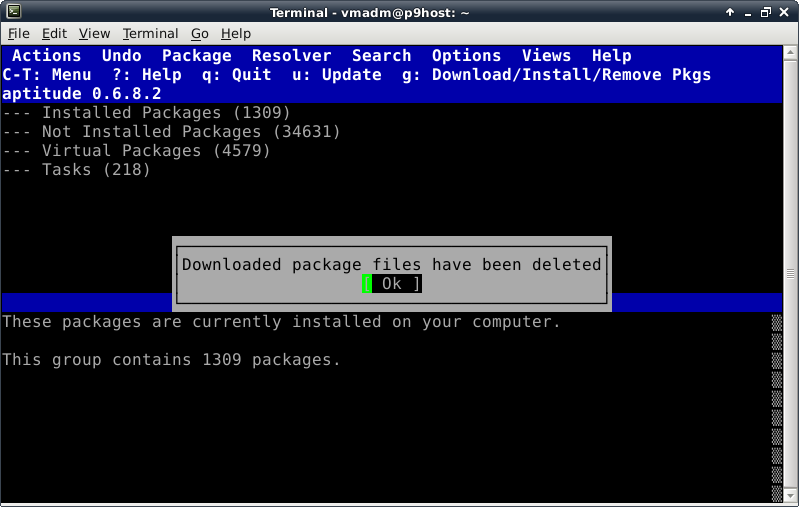
When you comply with the message by pressing the Enter key,
you return to the freshly updated Packages screen of aptitude.
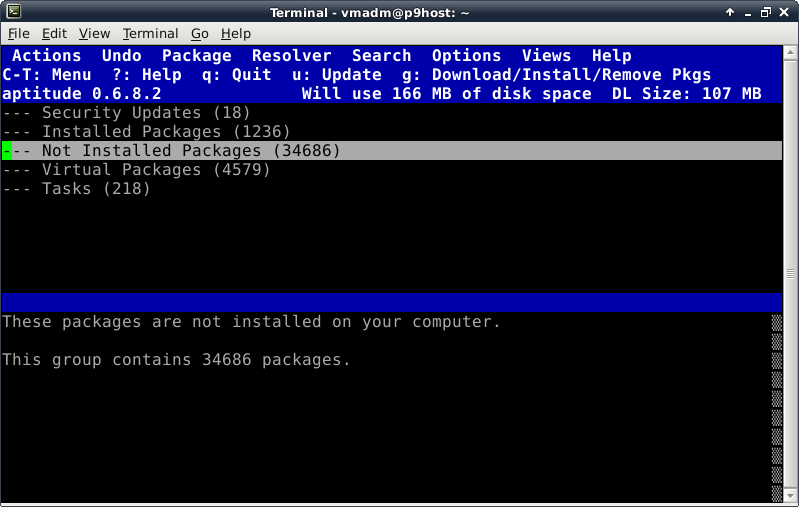
Press Ctrl-Home to move to the top line and collapse all the
top-level groups to clean up the display which should then
look something like this (nothing to install):
Press the lowercase "b" command to search for broken
packages.
The screen should not change.
If it does, fix things until "b" stops finding anything.
Press the lowercase "q" key to quit.
In response to the Really quit Aptitude? dialog, press the
Tab and Enter keys.
Step 2-2-6: Examine drives using parted
Now that parted is available, I take a look at that sdb
drive again by invoking a "parted /dev/sdb" command,
then issuing the "print free" subcommand which displays
more than cfdisk did:
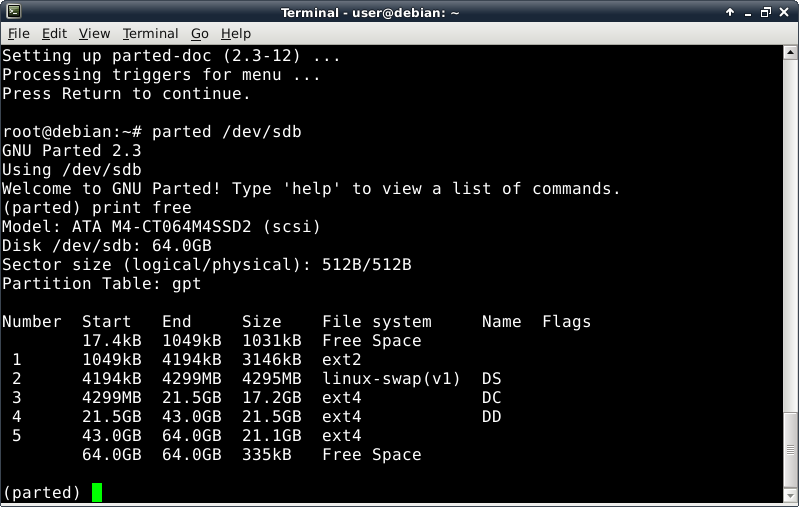
Partition 2 will automatically be allocated by our project
host installation, which is fine because I do not run any
Linux systems as a virtual guest of a Linux host system.
Right now, none of my Linux systems are running, so the
RAM-disk resident, USB-stick booted system effectively owns
the swap partitions exclusively.
Therefore I need not be concerned about them getting
(re)formatted during the install (the format is the same
for all systems that can ever access those partitions).
I just have to prevent more than one system from using any
swap partition at the same time.
I enter a lowercase "q" and press Enter to exit parted,
then look at the sdc drive:
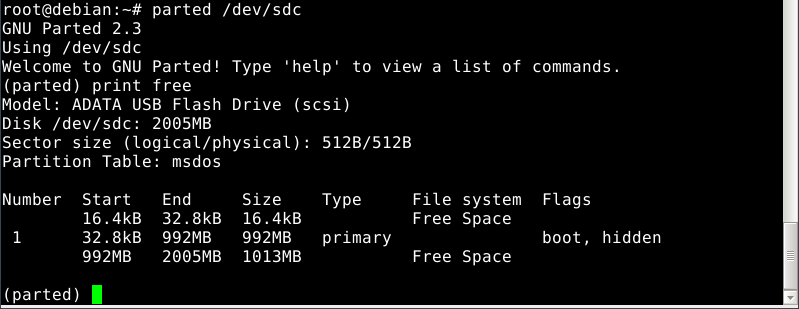
This is the USB-stick (parted works with non-GPT drives,
too).
Attempting to examine the sdd, sde, sdf, and sdg drives
fails with "No medium found" dialogs that are dealt with
by typing a lowercase "c" and pressing the Enter.
The final drive, sdh, displays as expected:
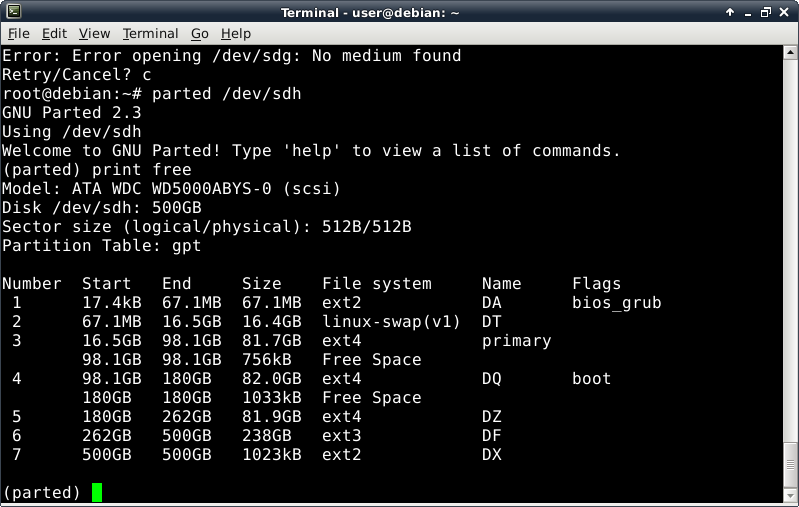
In addition to that large swap partition, the other area
of significance to this project is partition 5, which is
an obsolete filesystem of 81 GB that I shall use in
addition to the 20 GB drive, sda.
I will put a /boot partition of 128 MB at the beginning
of sda and allow the remainder to be allocated into a
partition the much later in this subsection for the
exclusive use of the Plan 9 guest system.
In addition, I will delete the sdh5 partition, then create
a new 32 GB root partition for the host system.
Grub will be installed into the MBR of sda and since the
host system installation of grub will find all my other
bootable systems automatically, letting the host system
own sda's MBR is satisfactory (especially since the BIOS
and boot loader of the Gigabyte allow any of the hard
drives to be treated as sda with out recabling anything).
Not having encountered any unresolvable problems with
either the Debian Live system or its interaction with the
hardware platform, you can proceed confidently to the next
subsection.
Subsection 2-3: Run the Installation Application
Step 2-3-1: Launch the installer
We are finished with the terminal emulator, so we enter a
lowercase "q" and press Enter to exit parted, then type two
Ctrl-D combos to dismiss it.
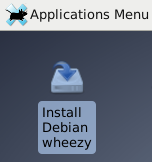
Next we double-left-click on the Install Debian Wheezy
icon to get the installer running, which, after a couple of
terminal windows flash by, it should settle into the GUI.
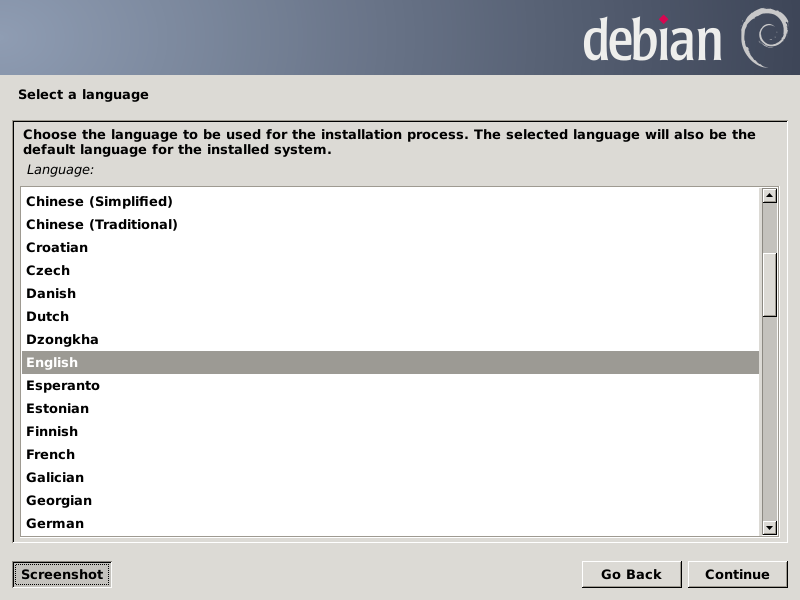
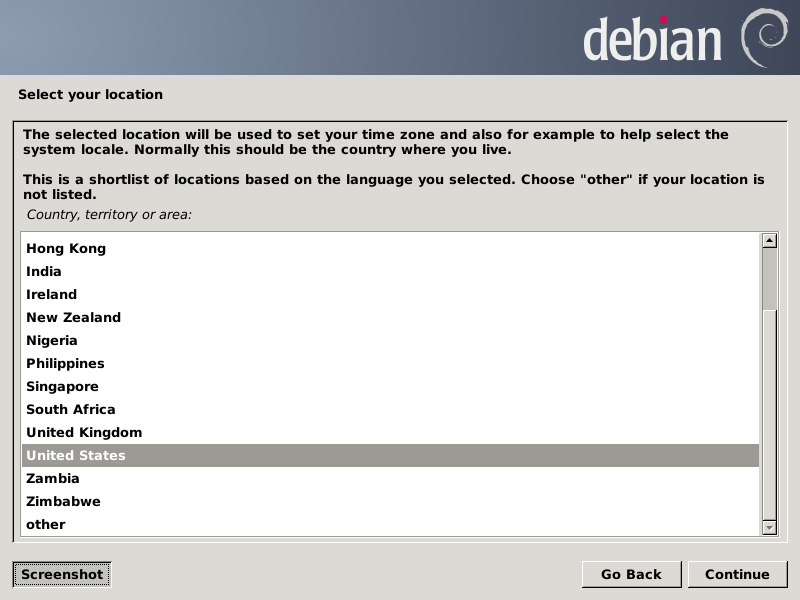
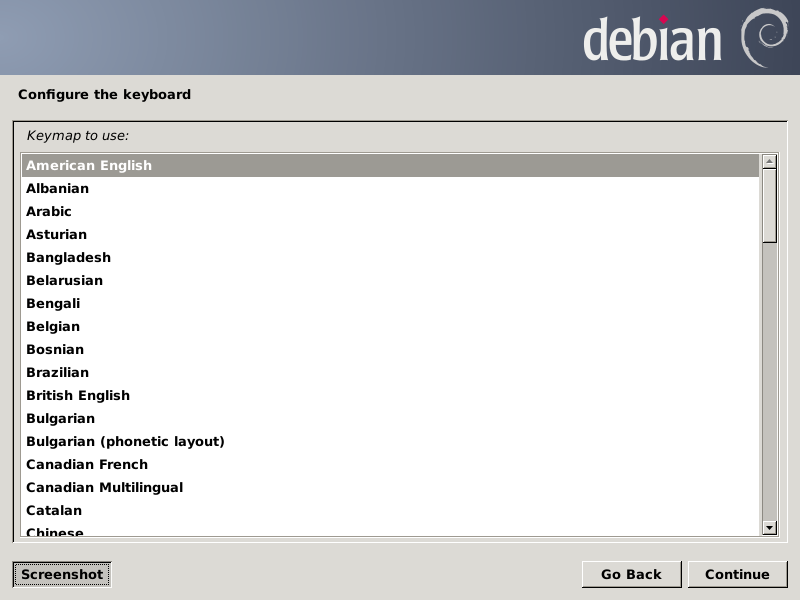
Choose the options you wish for the first three screens (all
screens are shown just before clicking the Continue button):
Then the installer will load files it needs from the
USB-stick, followed probing the local network and setting
that up for the install (so you can allow it to use DHCP for
this phase of the project.
Then it returns to asking you for more parameters:
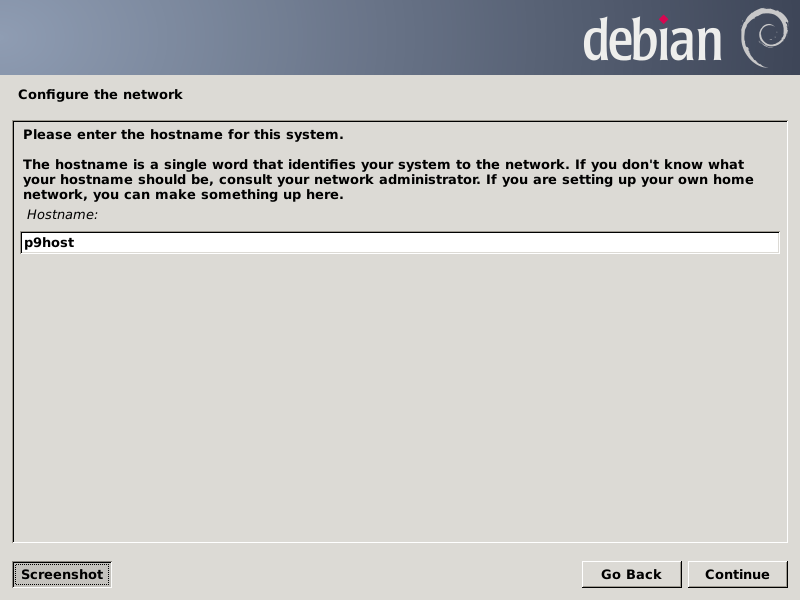
You may use what you prefer.
I'm using "p9host".
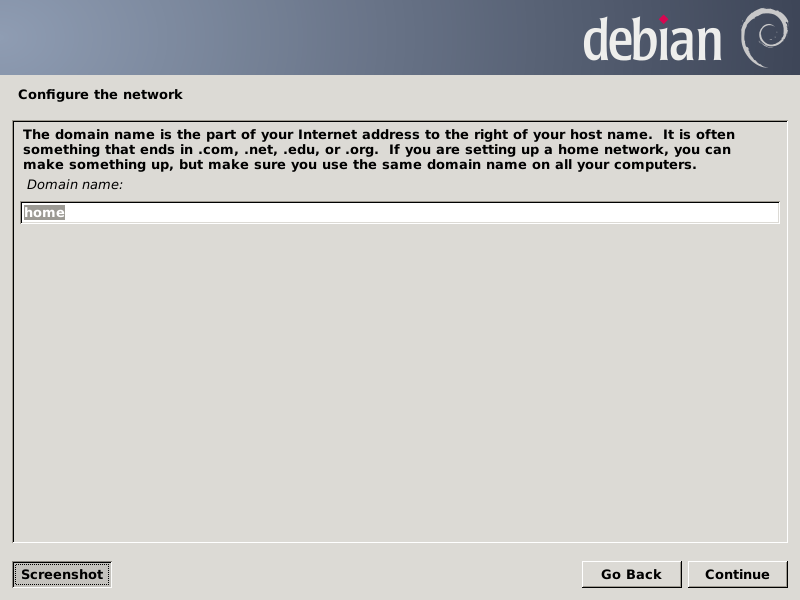
I don't show adding this host to your DNS zone, assuming
you understand the need and know how to do that.
There will also be a name for the Plan 9 virtual machine if
you are setting up networking as this cookbook does, with
virtual machines being visible on the same network as the
host machine.
There will be more on that after we get the host booted.

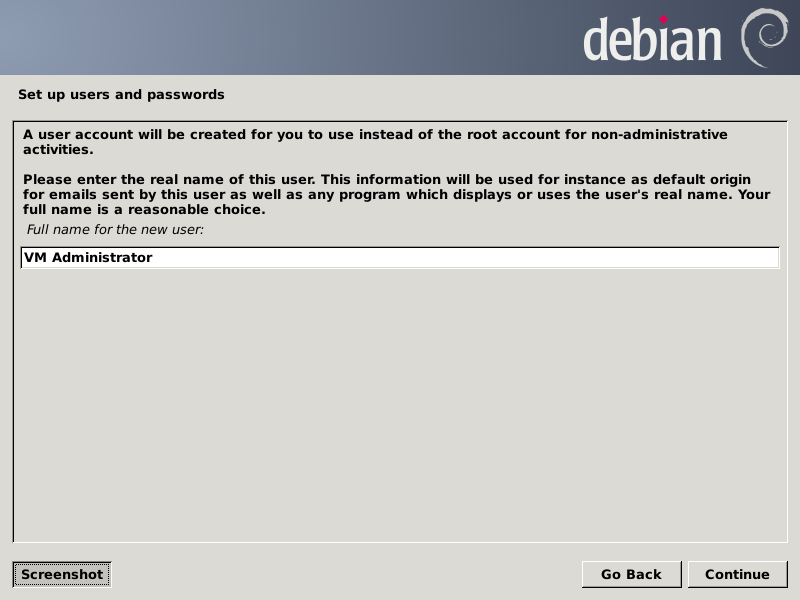
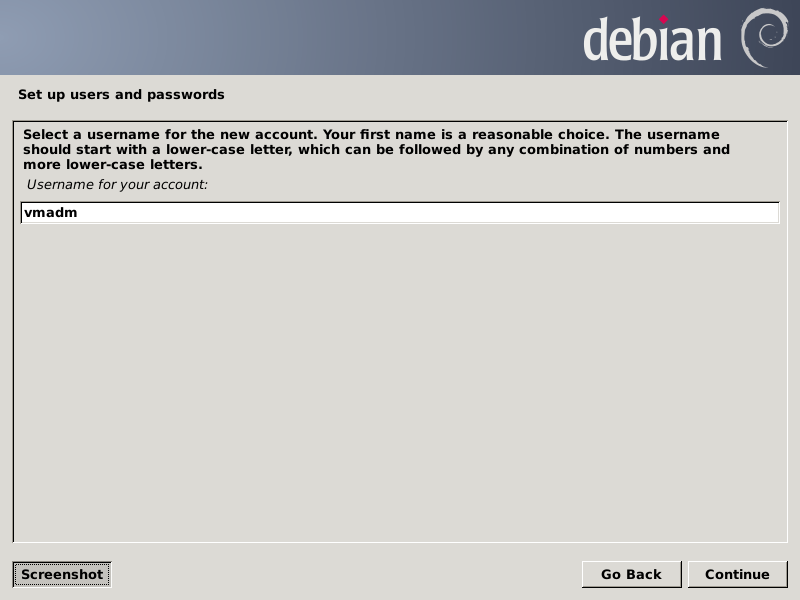
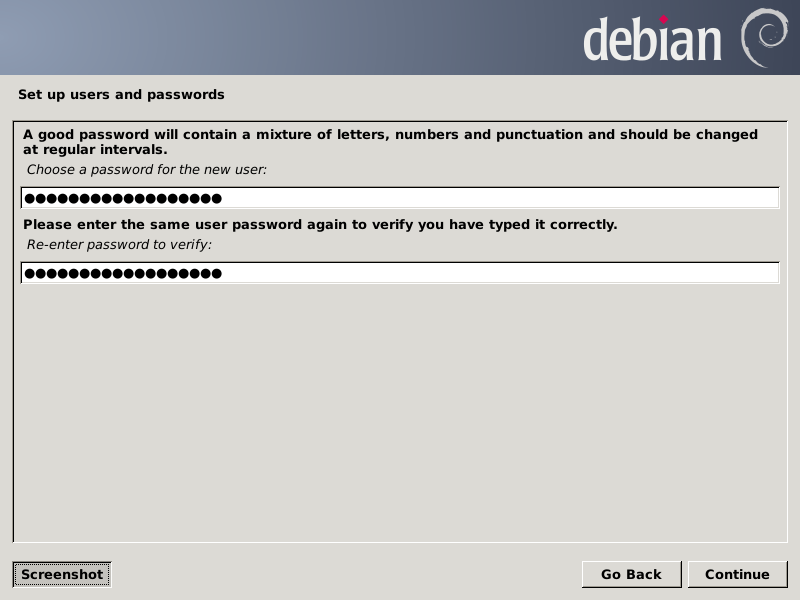
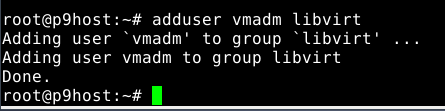
The next three screens define the initial non-root
user for the virtual machine host system who should be the
administrator of the virtual machines.
You may use what you prefer.
I'm using "VM Administrator" and "vmadm".
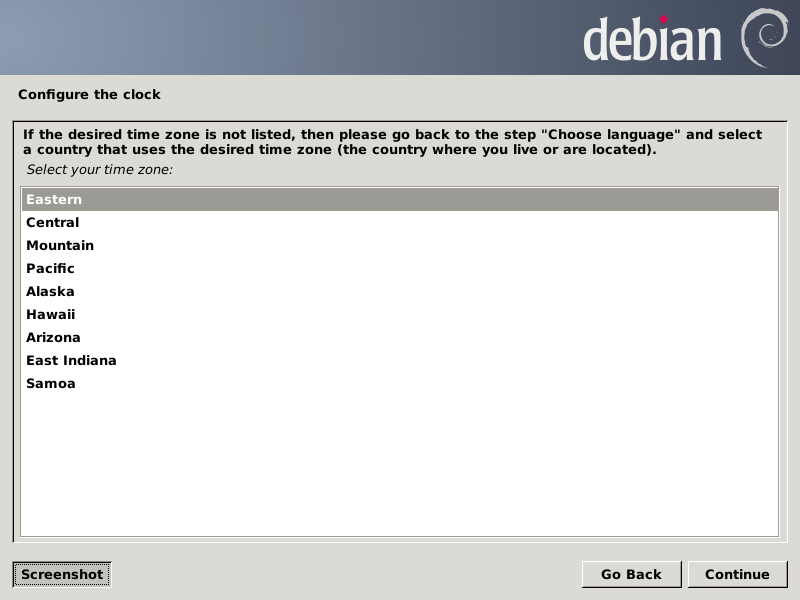
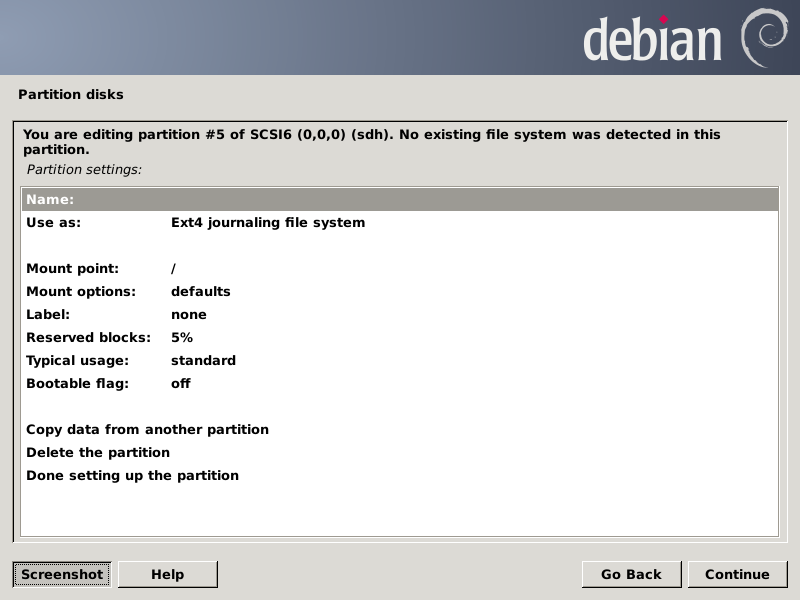
After getting the local time zone from you, it prepares for
disk management, and after a short time, presents the first
screen of that dialog:
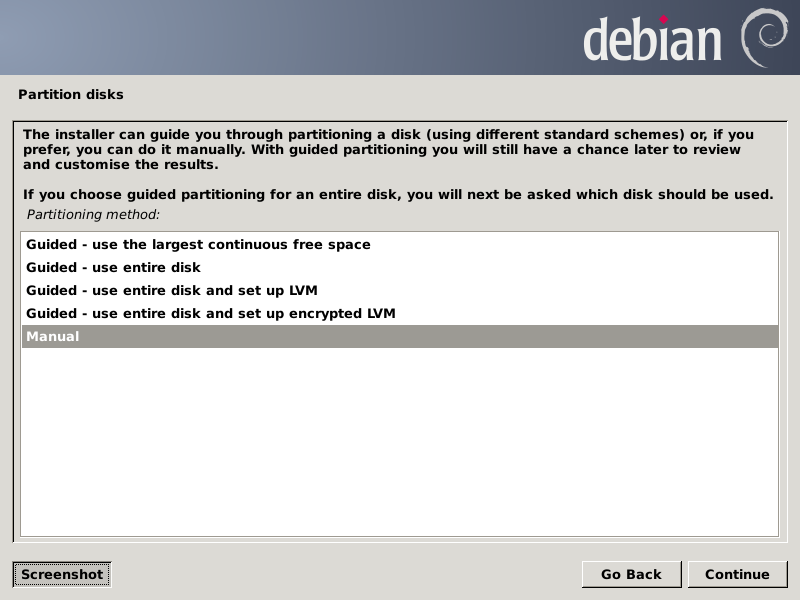
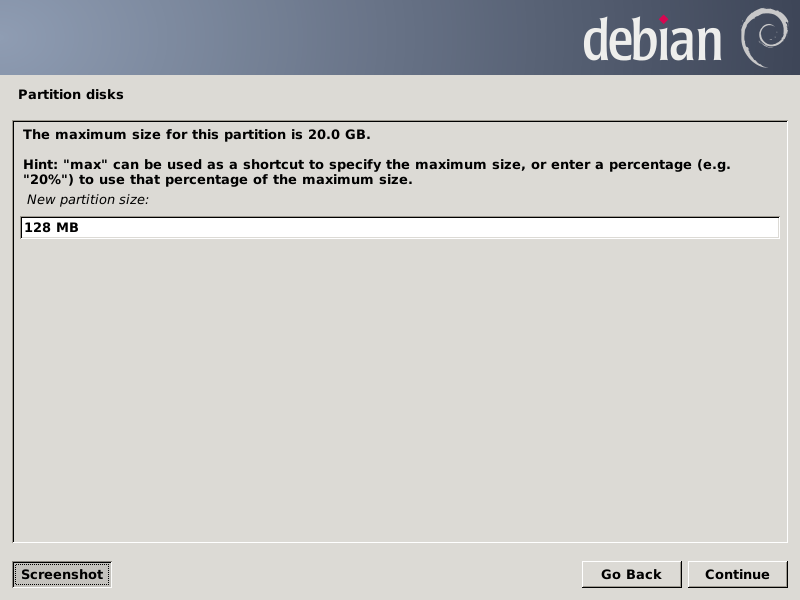
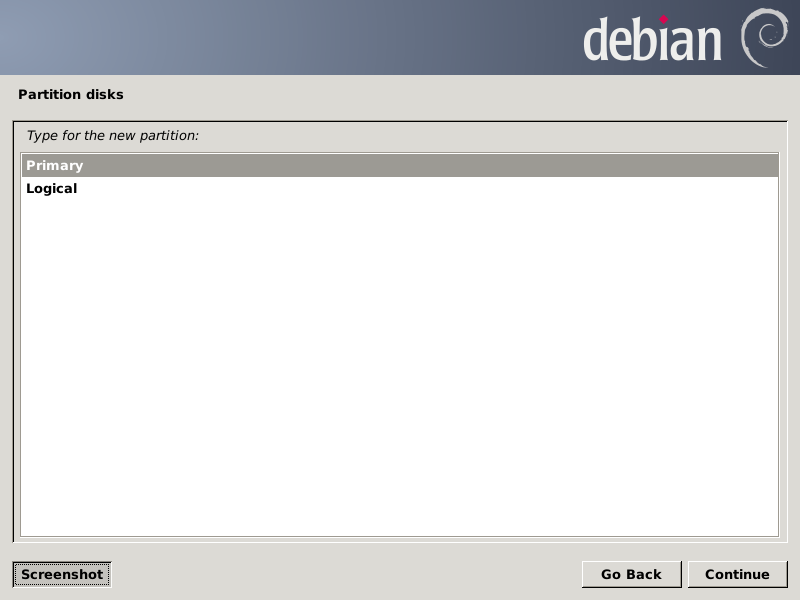
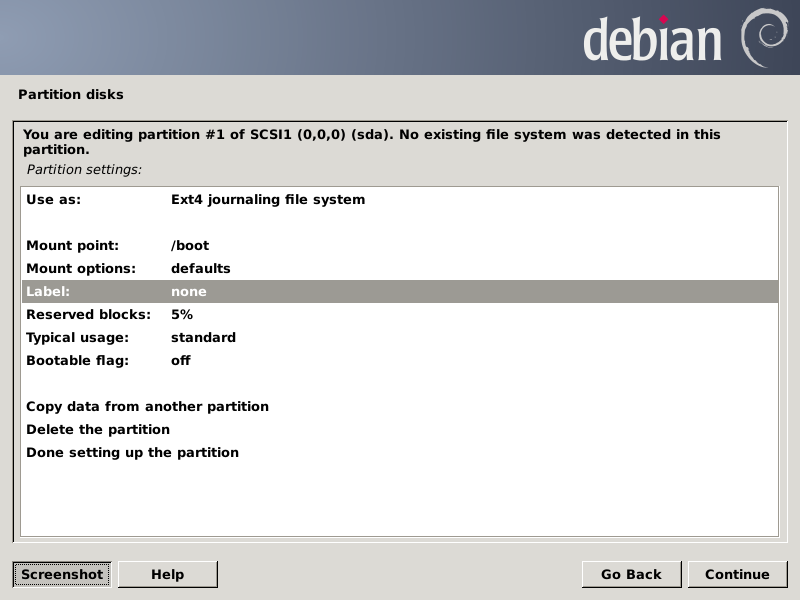
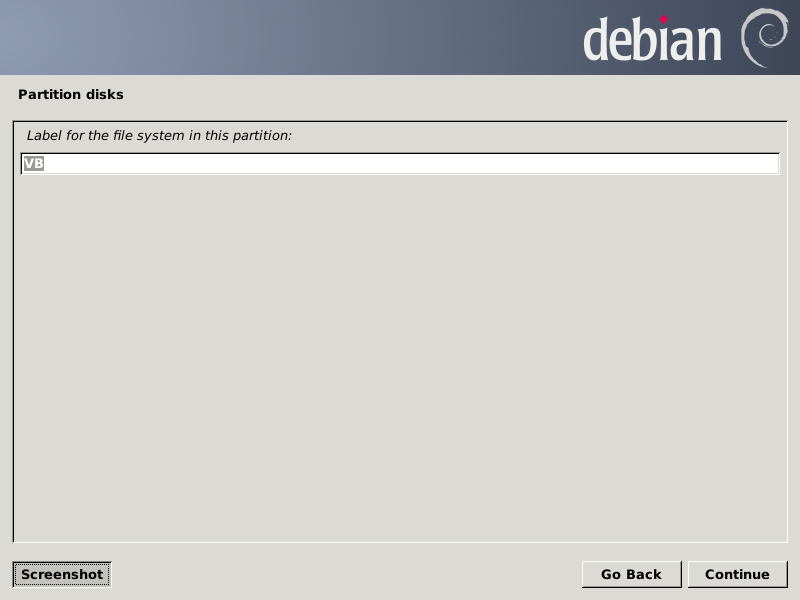
First up is the empty sda disk which gets a 128 MB /boot partition.
The remaining space (for the Bell Labs Plan 9 virtual machine) will
be allocated later in this section. Note that everything you change
is merely setting parameters for the actual operations that you will
shown to review and confirm before the trigger is pulled.


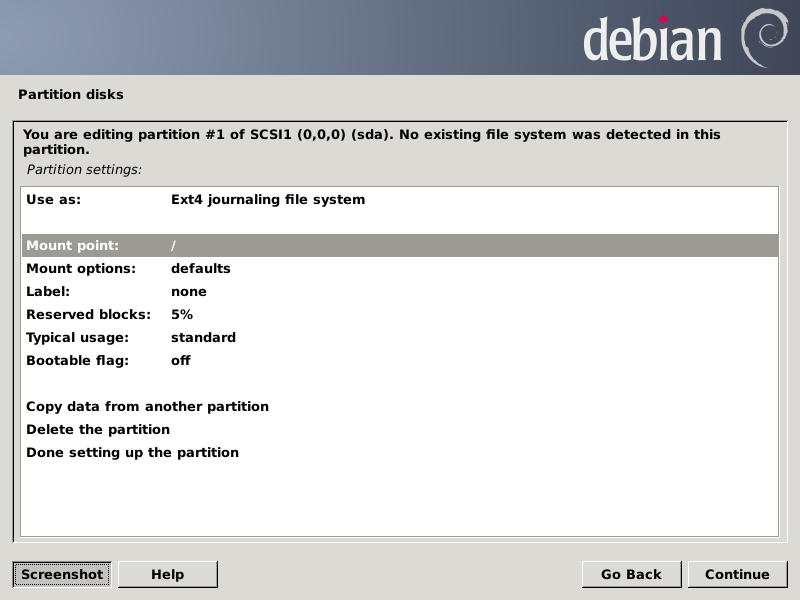
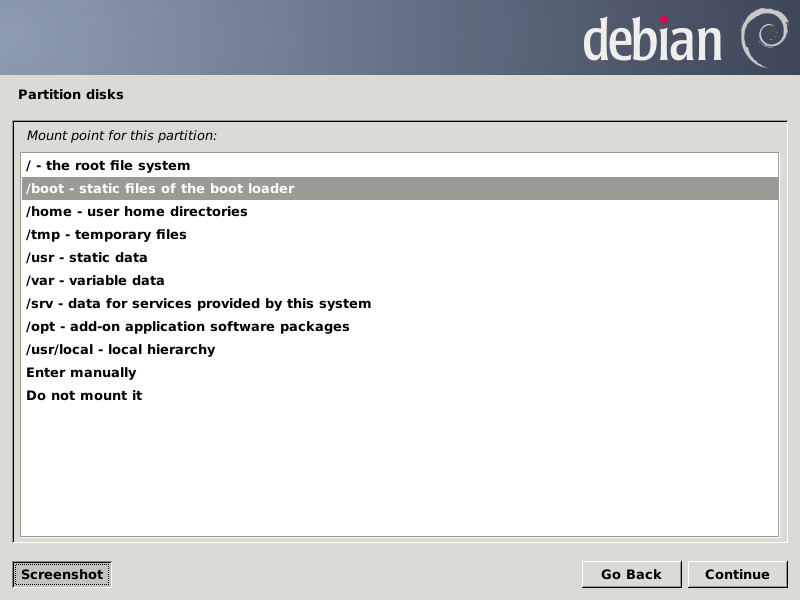
The default is everything, so be sure this next screen defines what
you want:

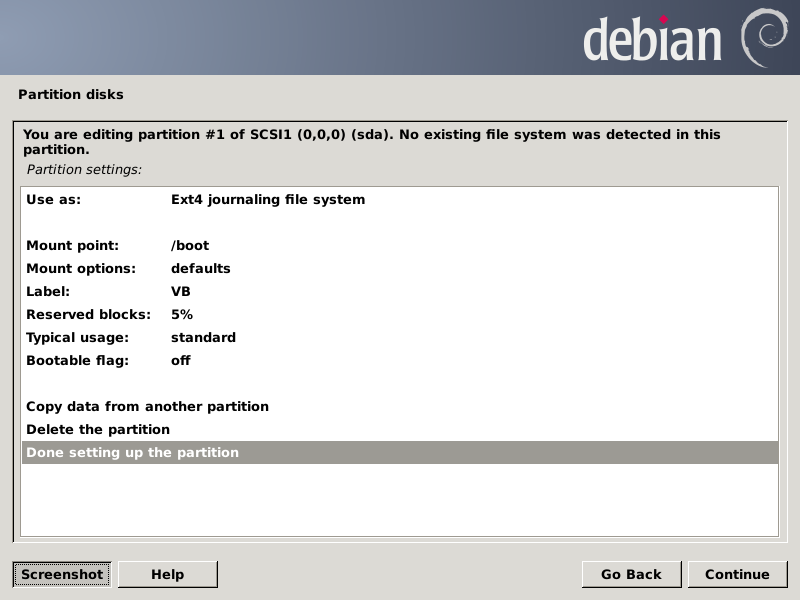
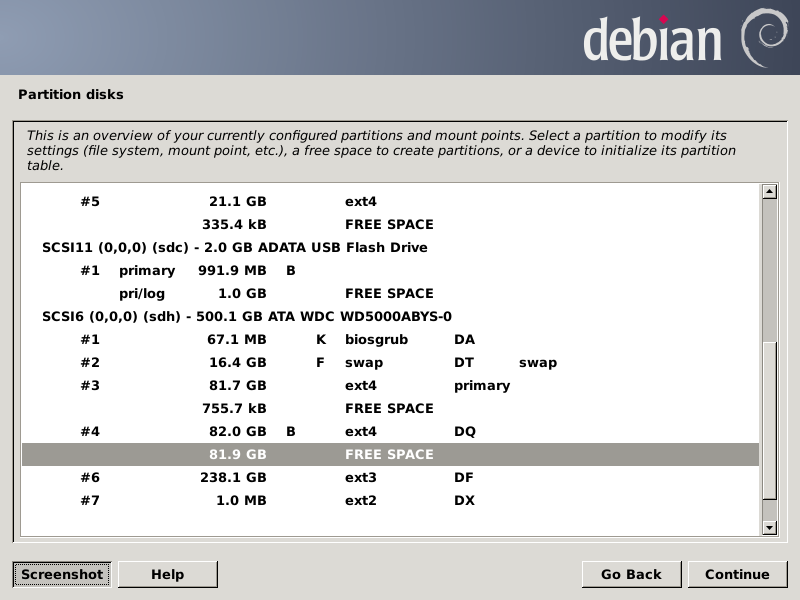
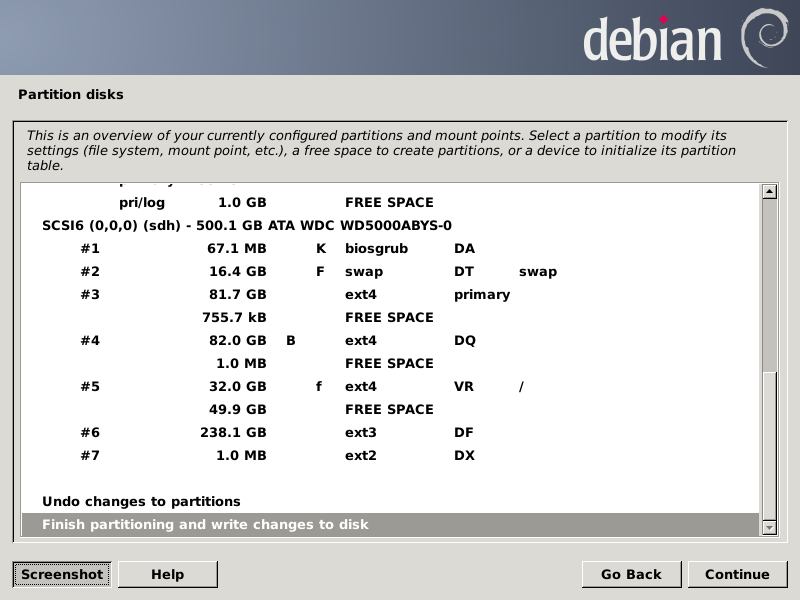
After pressing Continue, the partition chooser screen should look
like this:
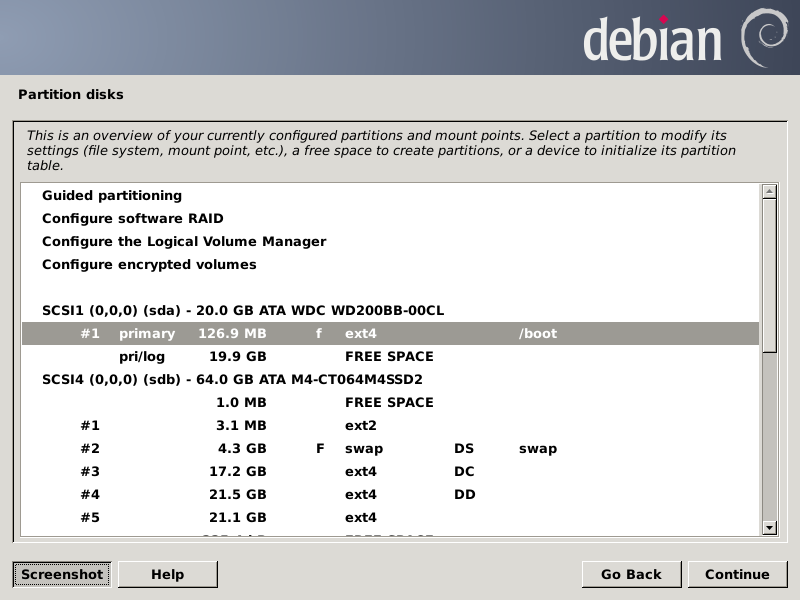
Note the "f" for the sda1 partition means it should be formatted.
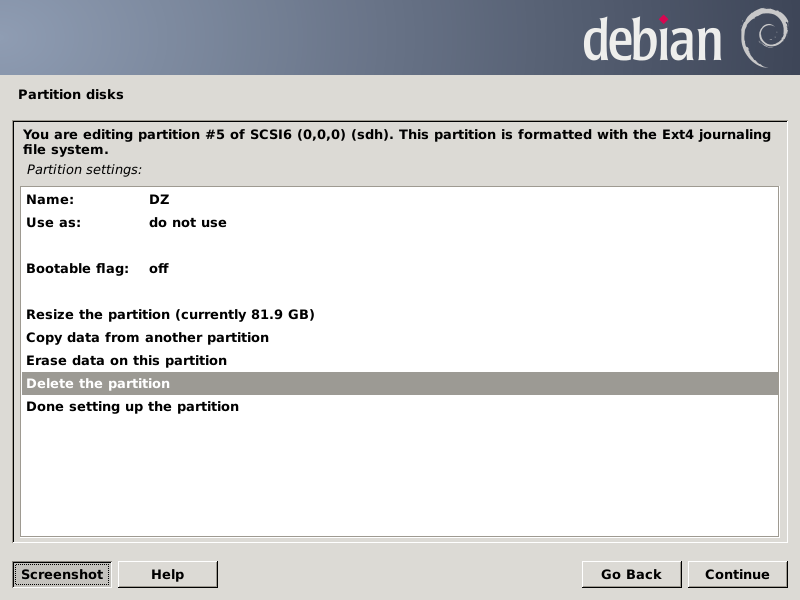
Now I have to scroll down to get to the sdh5 partition:
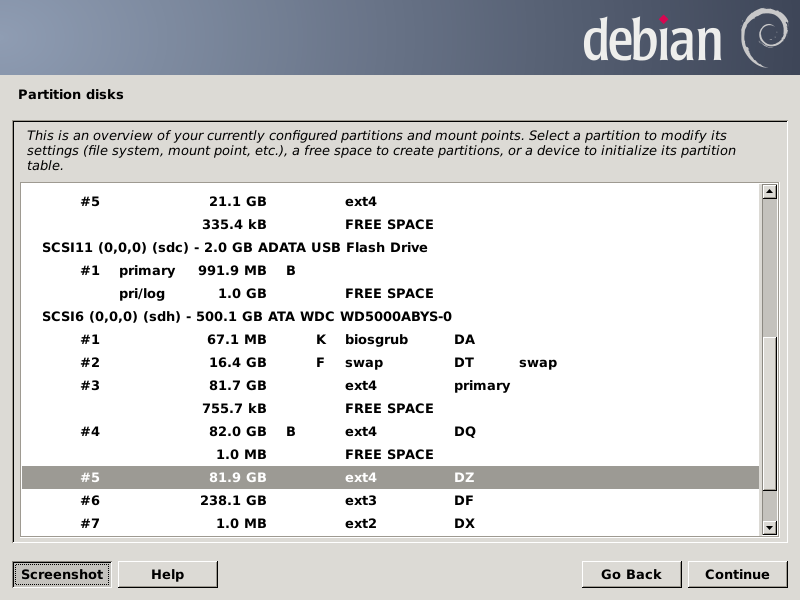
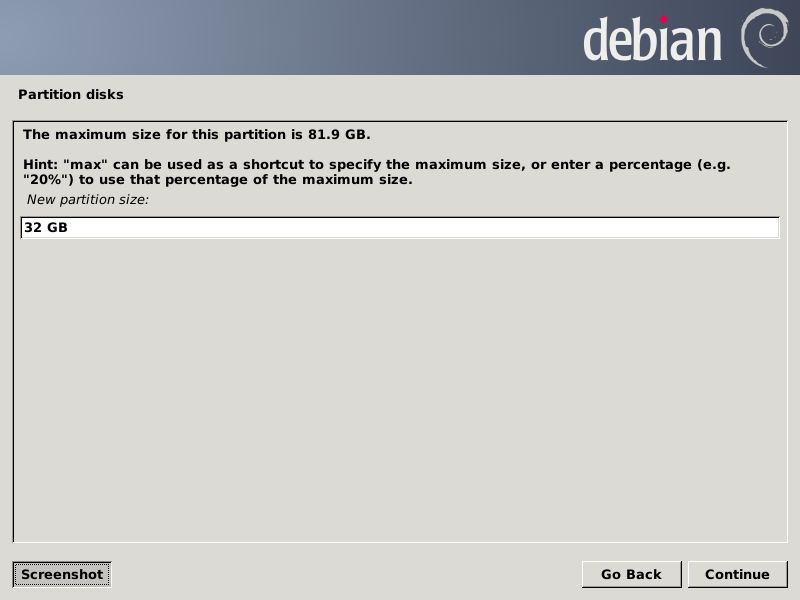
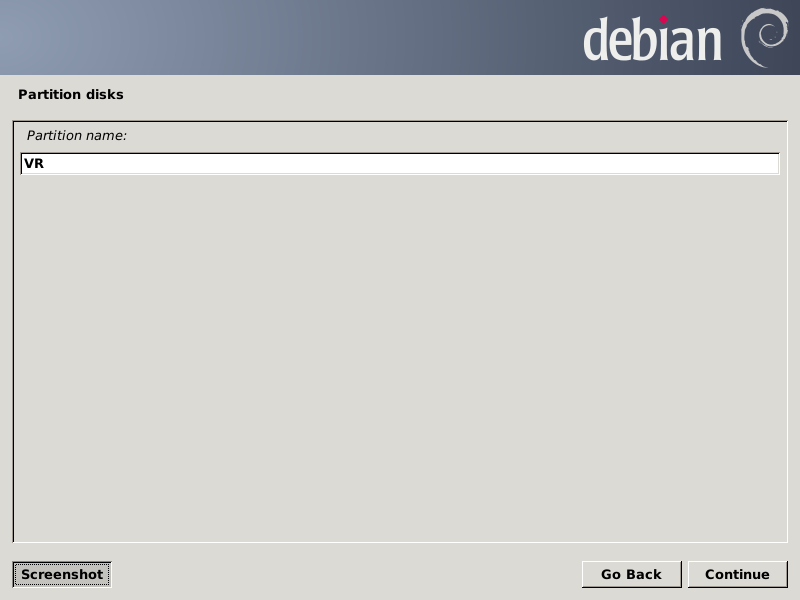
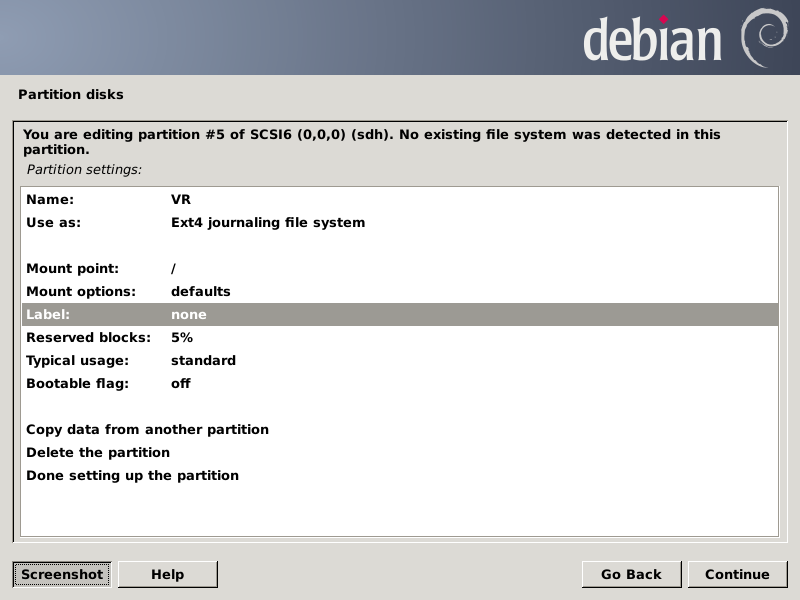
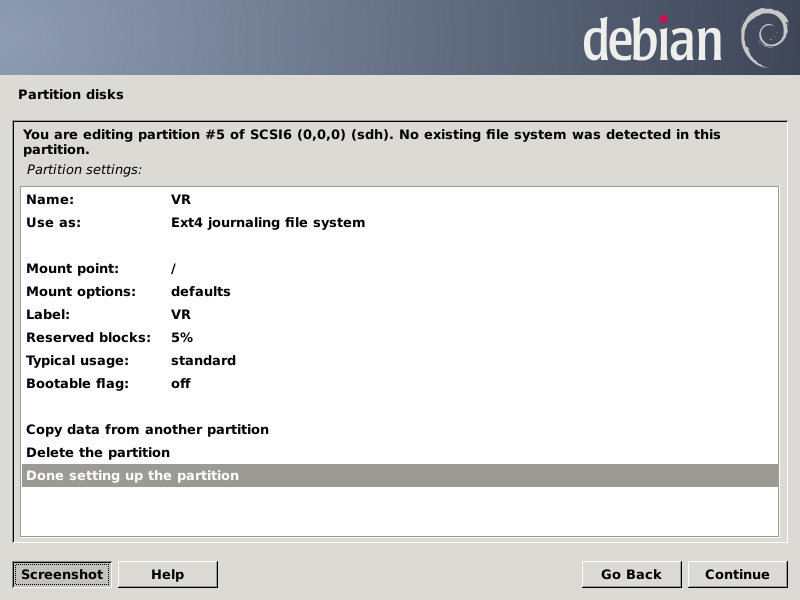
Now we delete the sdh5 partition and reallocate a much smaller
partition for the root (/) filesystem of the host, which will
contain everything beside /boot ans swap space:
Scroll down again to get to the free space just made available:
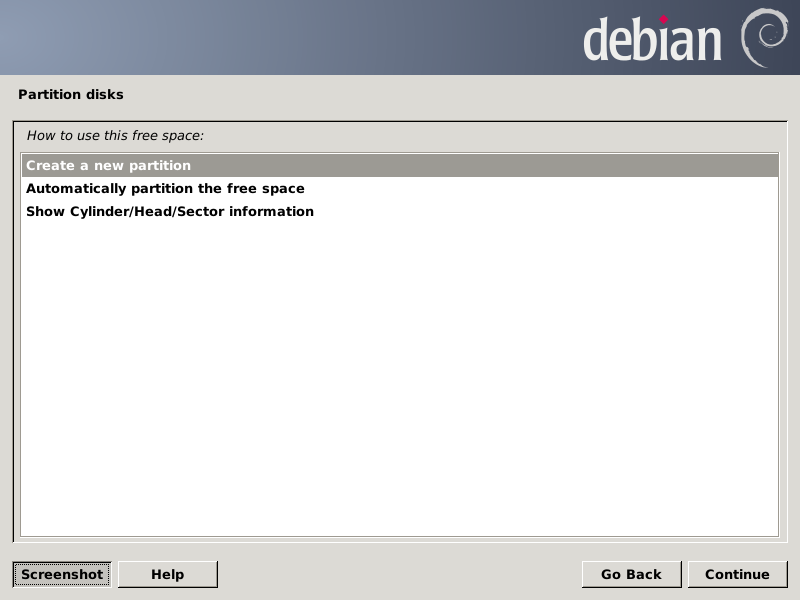


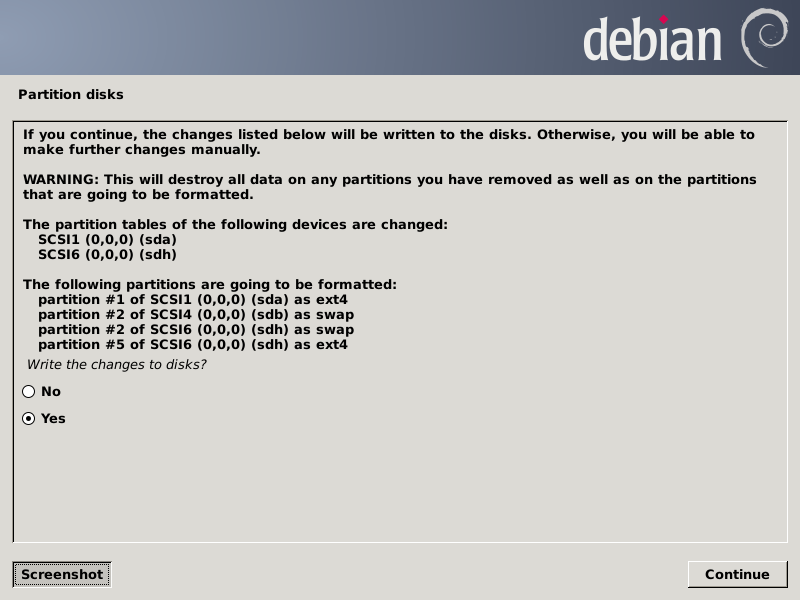
Here's the disk modifications plan.
You must either punch the Yes radio button and Continue or Go Back:
After all file systems and swap space have been prepared,
the lengthy installation proper begins, which takes about
five minutes on the Gigabyte.
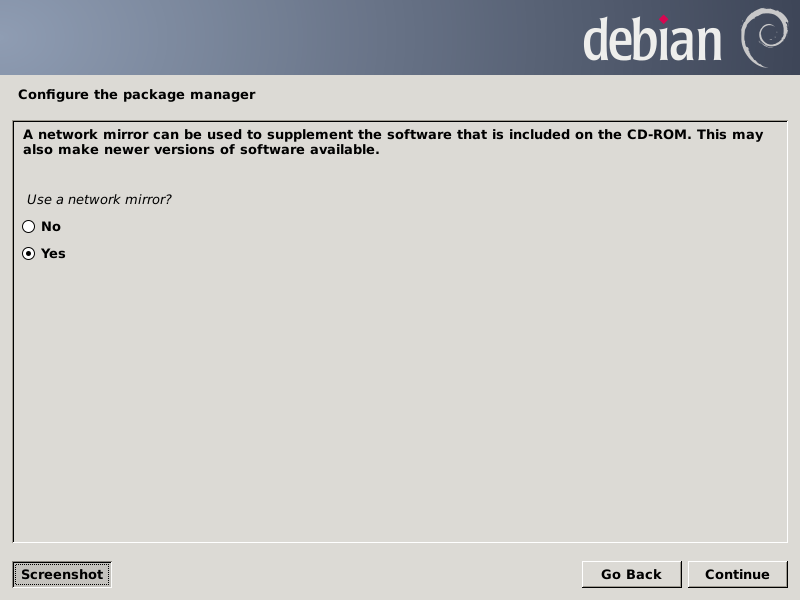
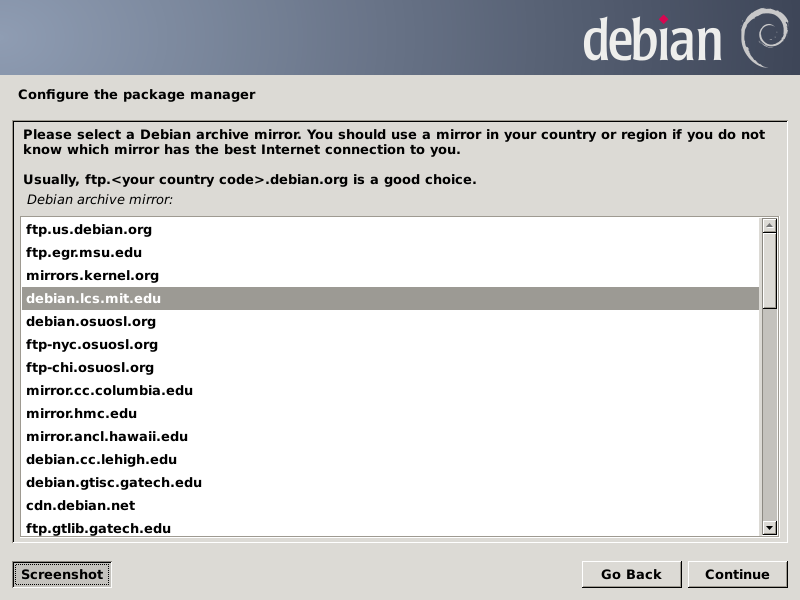
Next it prompts for information about using a mirror for
the Debian package repositories.

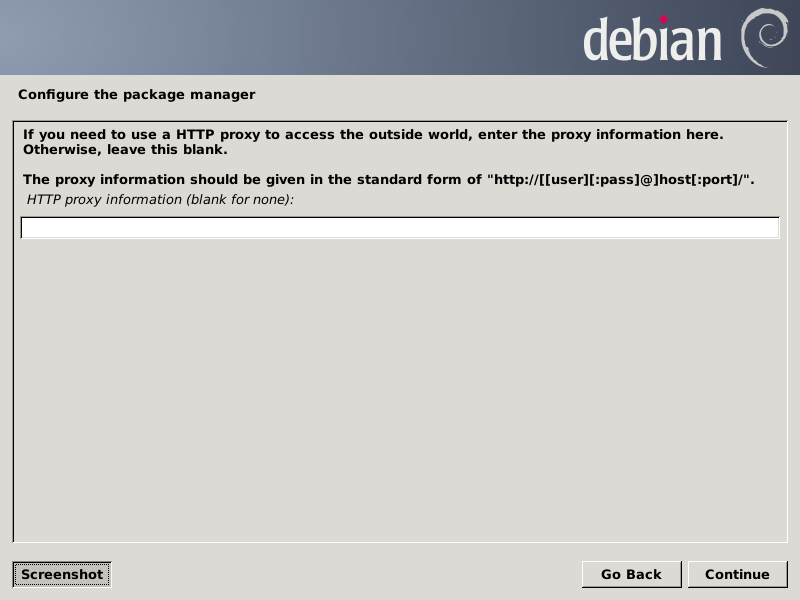
After asking about network proxies, it will configure the
package manager, then GRUB.
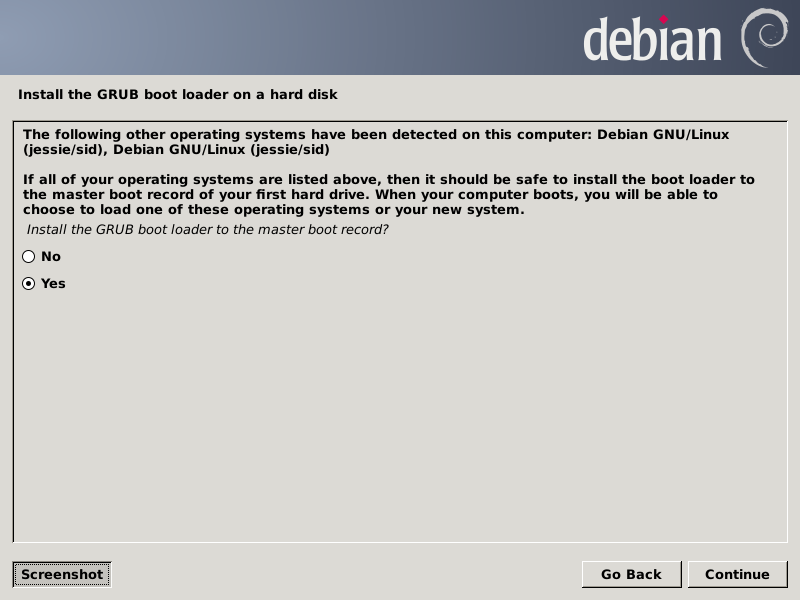
If it finds any bootable operating systems on all your
disk devices, it will identify them, then dialog with you
to determine where to install the boot loader.
On my system, I tell it to use the MBR (of the sda drive).
After installing GRUB and finishing the install proper, it
will ask about the orientation of the system clock, which
for my platform is UTC.
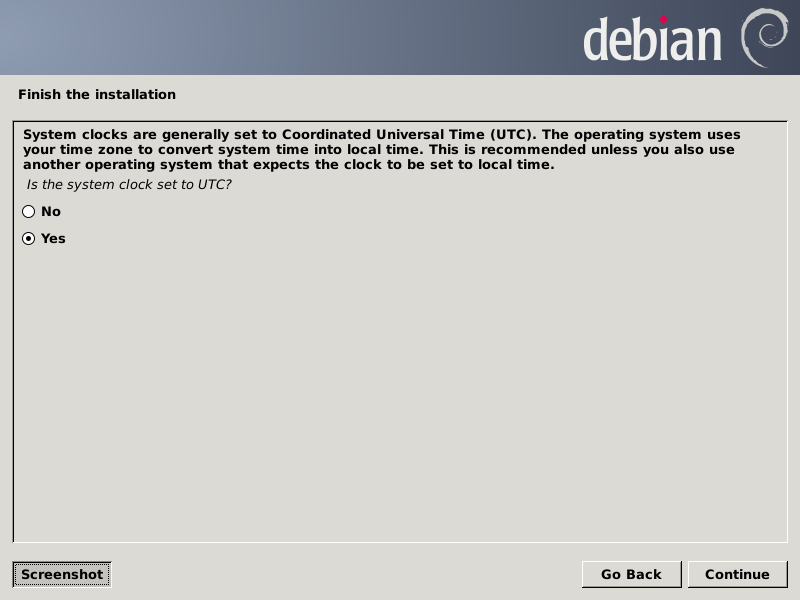
After attending to that, it is almost finished:
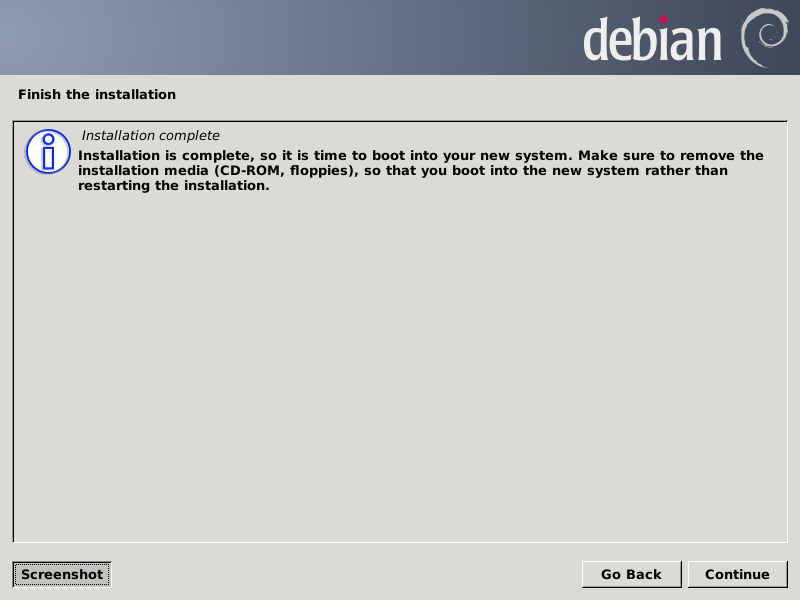
After removing the live packages, it really is finished.
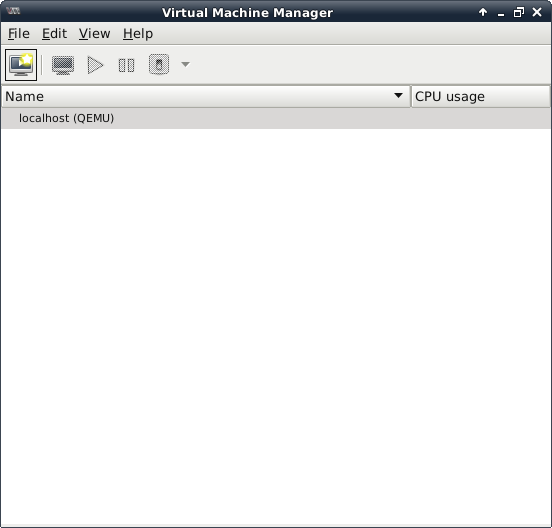
To reboot into the new host, left-click on the Action Buttons
icon as shown:
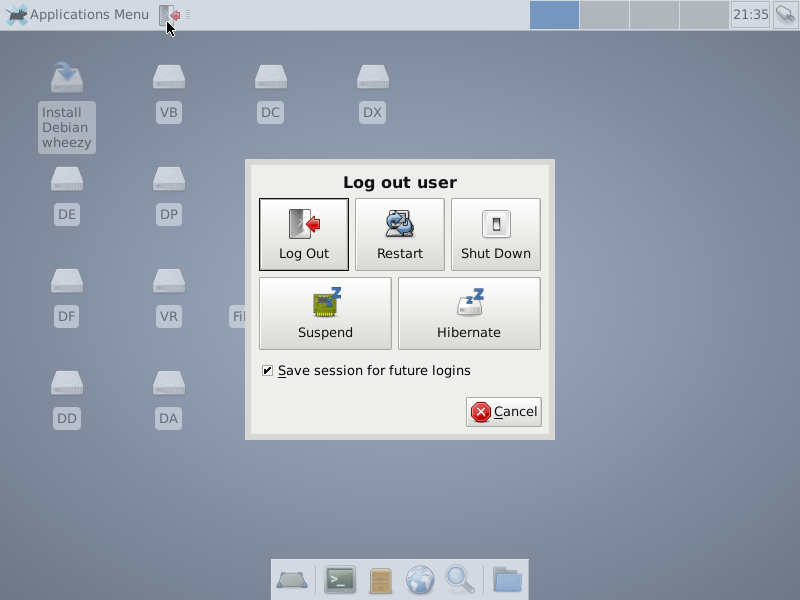
and then left-click on the Restart icon.
Remove the USB-stick when requested and press Enter.
Subsection 2-4: Reboot the New Host System and Check Install
After getting your project computer to begin booting up,
interact with your BIOS/boot loader as needed to get your system
to use sda as the boot device.
When the GRUB menu appears, make sure it advertises the system
you installed in the previous subsection.
If it does, you can let it default to a normal boot, or you can
you the Up|Down Arrow keys to explore and test the other boot
options.
After you get it doing a normal boot, it should display before
too long a GUI logon menu identifying the hostname you installed
and the vmadm user you specified.
That being so, login as that user specifying the password your
defined during the installation dialogs.
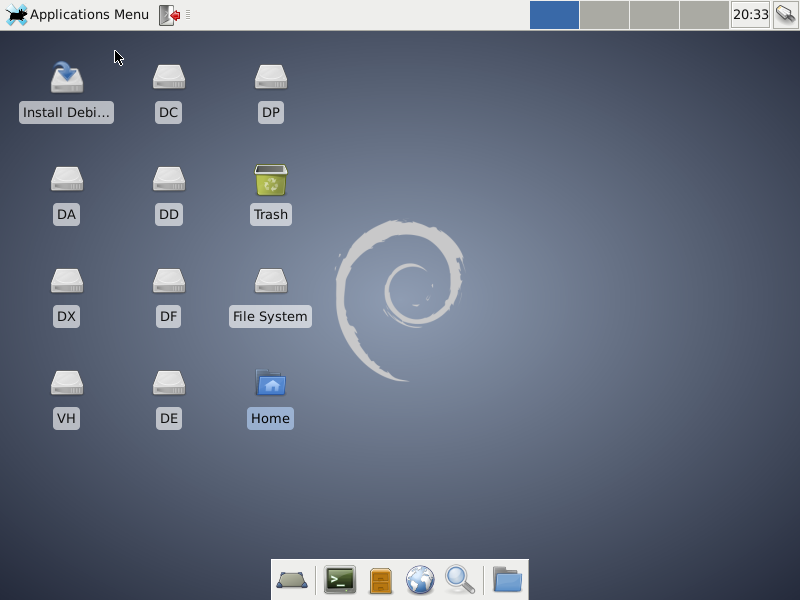
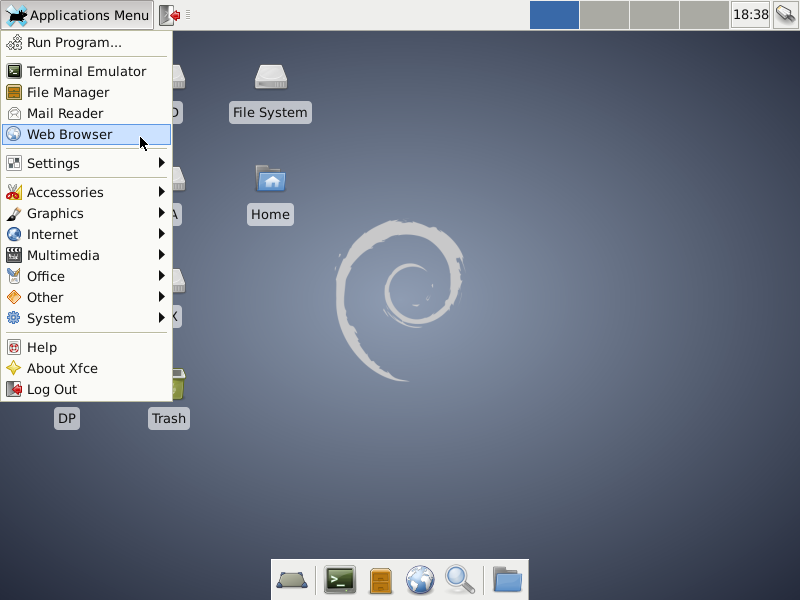
If that goes according to plan, you should shortly see a screen
very much like that of the Debian Live desktop and almost
identical to this:
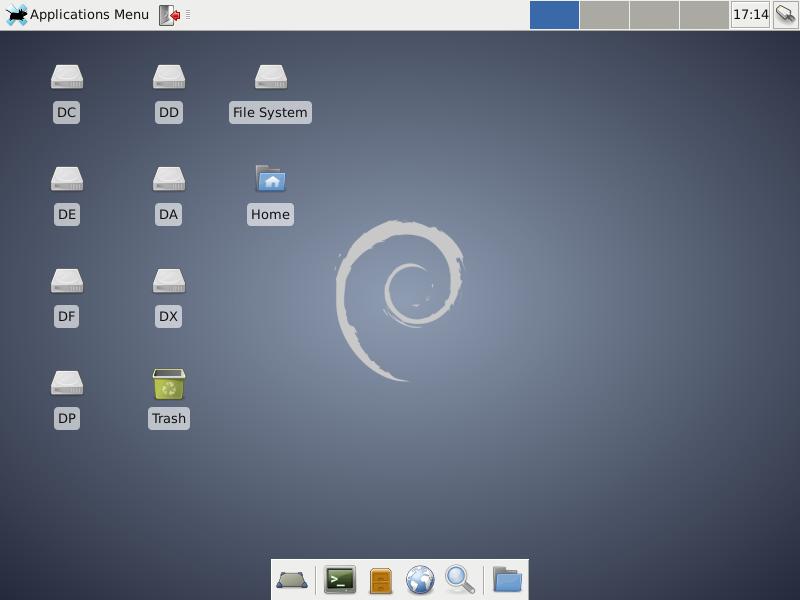
The difference is the Install Debian wheezy icon is gone.
If you got to this point, you're though most of the installation
validation process—a lot has do occur as planned for this
much to work.
Some questions remain, especially networking.


Subsection 2-5: Update Old and Install Needed Packages
sudo adduser libvirt
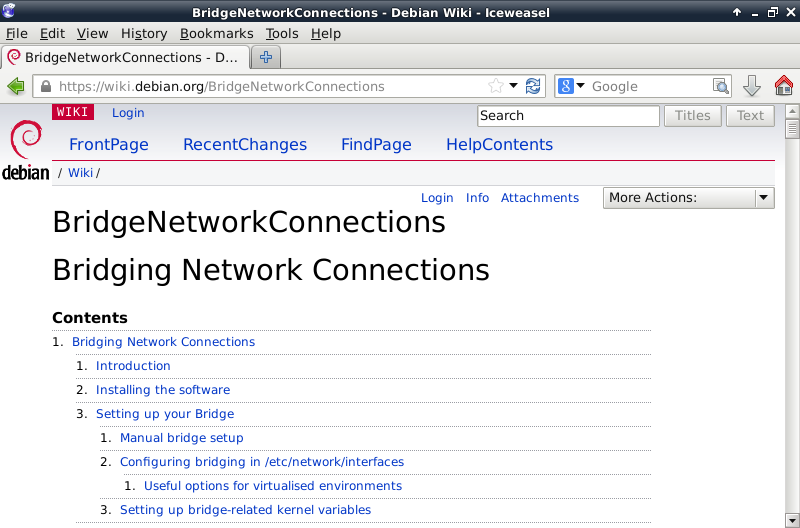
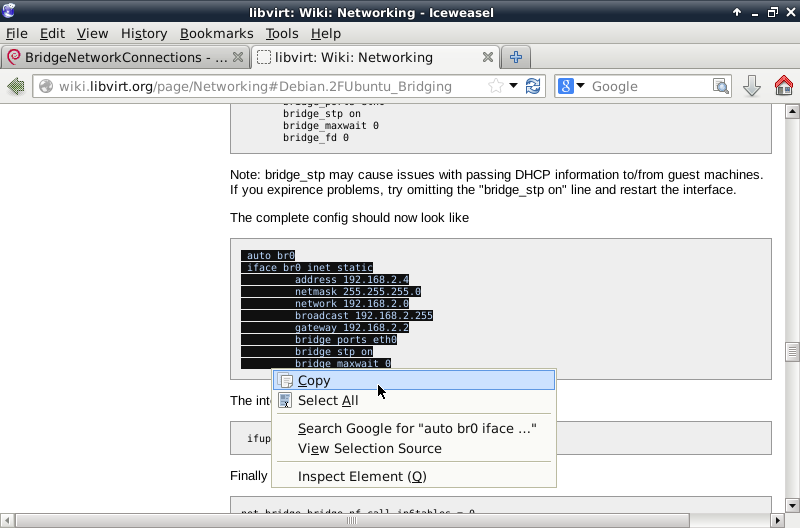
http://wiki.debian.org/BridgeNetworkConnections
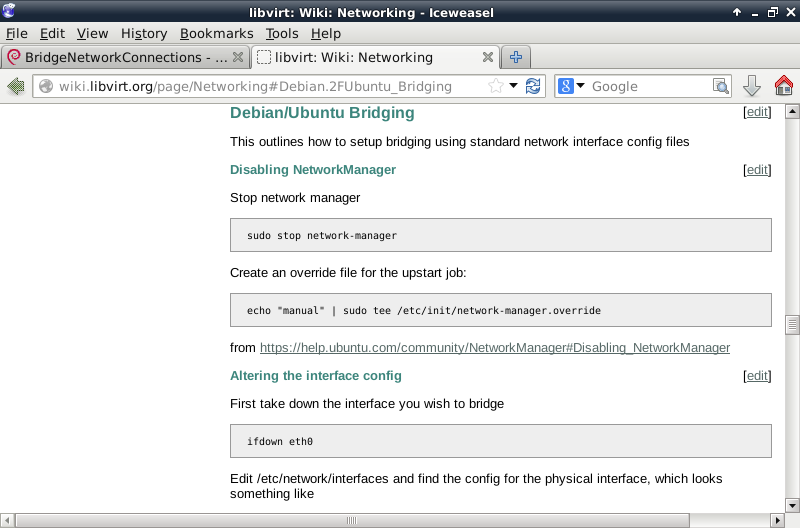
http://wiki.libvirt.org/page/Networking#Debian.2FUbuntu_Bridging
http://backreference.org/2010/03/26/tuntap-interface-tutorial/
Disconnect the wired cnnection using Network Manager
service network-manager stop
echo 'manual' >/etc/init/network-manager.override
brctl addbr br0
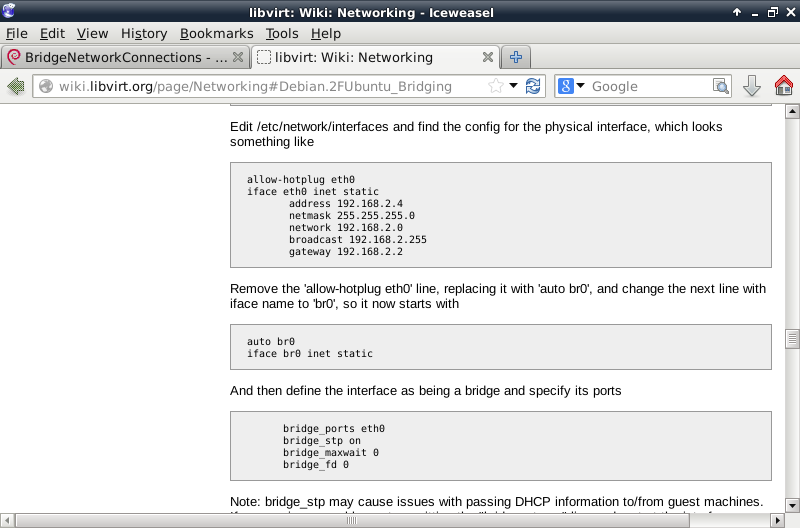
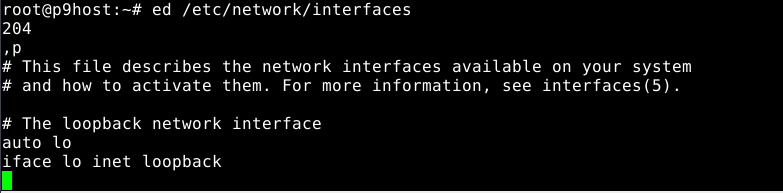
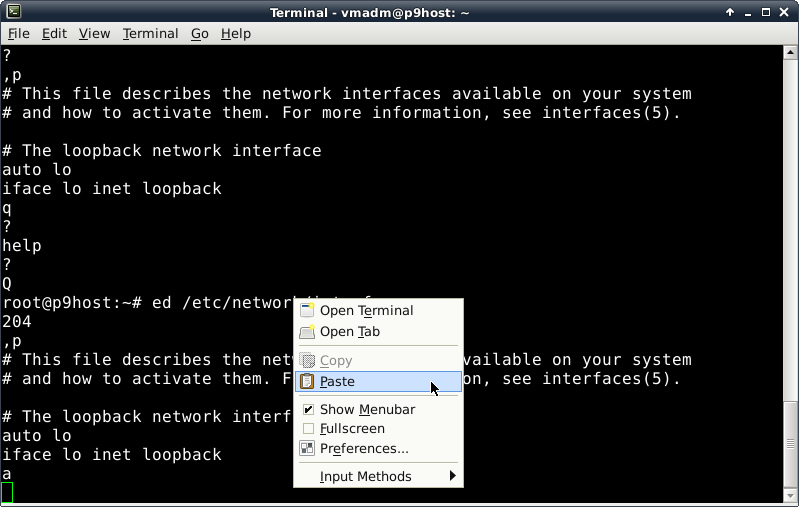
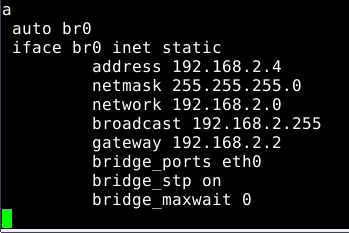
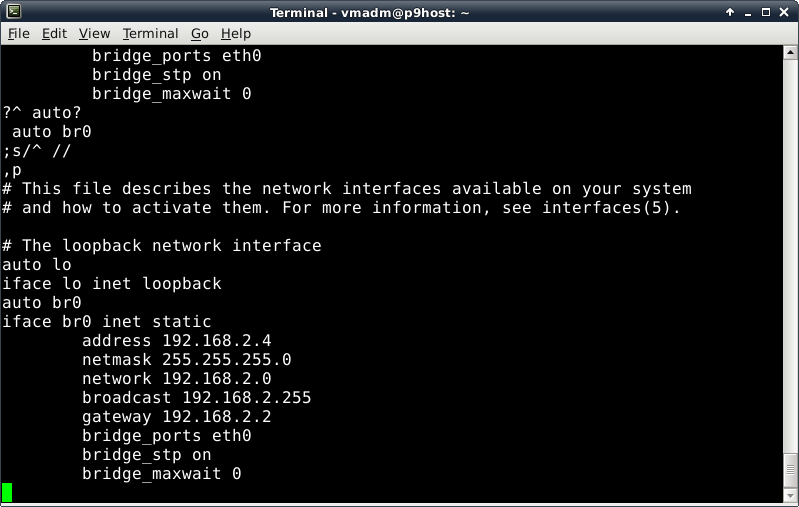
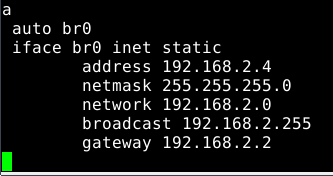
edit /etc/network/interfaces:
auto lo br0
iface lo inet loopback
iface br0 inet static
address 10.220.186.202
netmask 255.255.255.128
network 10.220.186.128
broadcast 10.220.186.255
gateway 10.220.186.129
pre-up ip tuntap add dev tap0 mode tap user vmadm
pre-up ip link set tap0 up
pre-up sysctl net.bridge.bridge-nf-call-ip6tables=0
pre-up sysctl net.bridge.bridge-nf-call-iptables=0
pre-up sysctl net.bridge.bridge-nf-call-arptables=0
bridge_ports eth0 tap0
bridge_stp on
bridge_maxwait 0
bridge_fd 0
post-down ip link set tap0 down
post-down ip tuntap del dev tap0 mode tap
# dns-* options implemented by the resolvconf package, if installed
dns-nameservers 192.168.1.1
dns-search home
ifup br0
brctl show
ifconfig -a
ping from an outside host
ssh to an outside host